Prerequisites
Before you begin, confirm you have:- The Speckle connector for your authoring tool (Revit, Rhino, or Civil3D) installed, signed in, and updated to v3.24.0 or later.
- A model that has been published to a Speckle project at least once.
Where to find Parameter Updater
In any dashboard, open the widget sidebar and scroll to the Data Conditioning category at the bottom. Drag the Parameter Updater widget onto the canvas.End-to-end workflow
1
Publish a model
Open your model and use the Speckle connector to publish it to your target
project and model. Wait for the publish to complete so you have at least one
model version available as a dashboard data source.
2
Create a dashboard with that model
In the Speckle web app, go to your workspace Dashboards, create or open
a dashboard, and add a Model Viewer widget that points at the published
model and version. You should see the model rendered so the dashboard can
read elements and parameters.
3
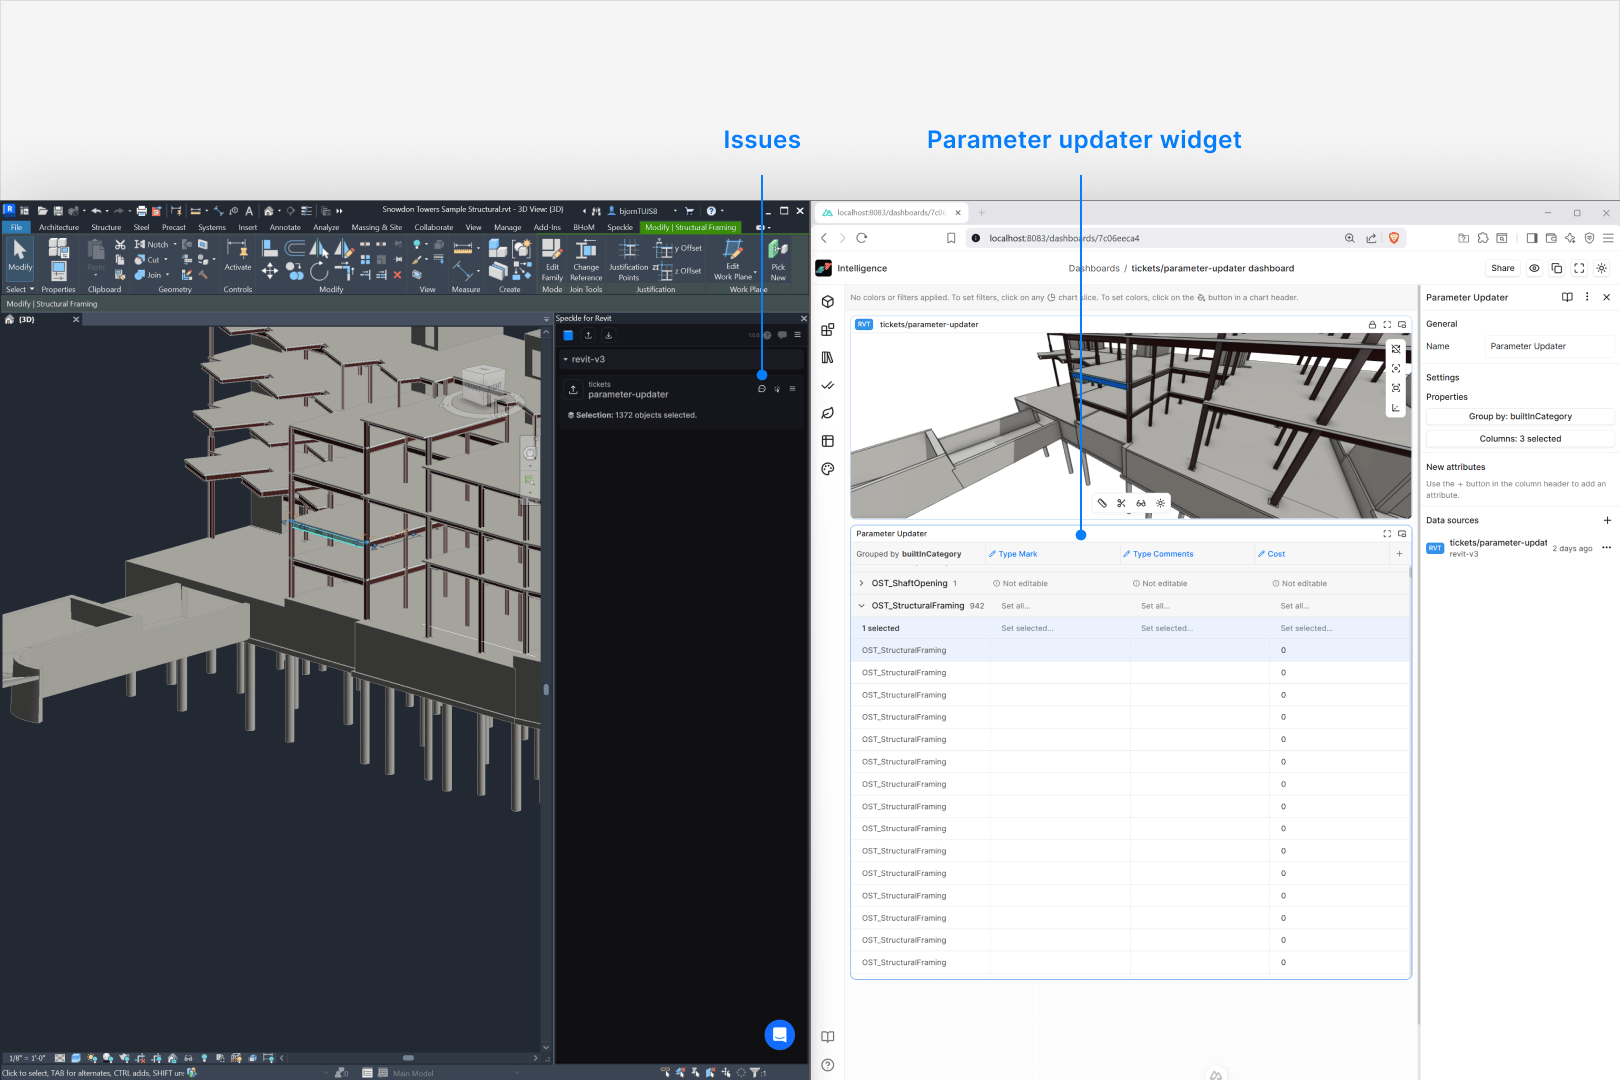
Configure the Parameter Updater widget
Add the Parameter Updater widget from the Data Conditioning category
and configure its settings. Pick one or more model versions as data sources,
choose editable and read-only columns (fields under 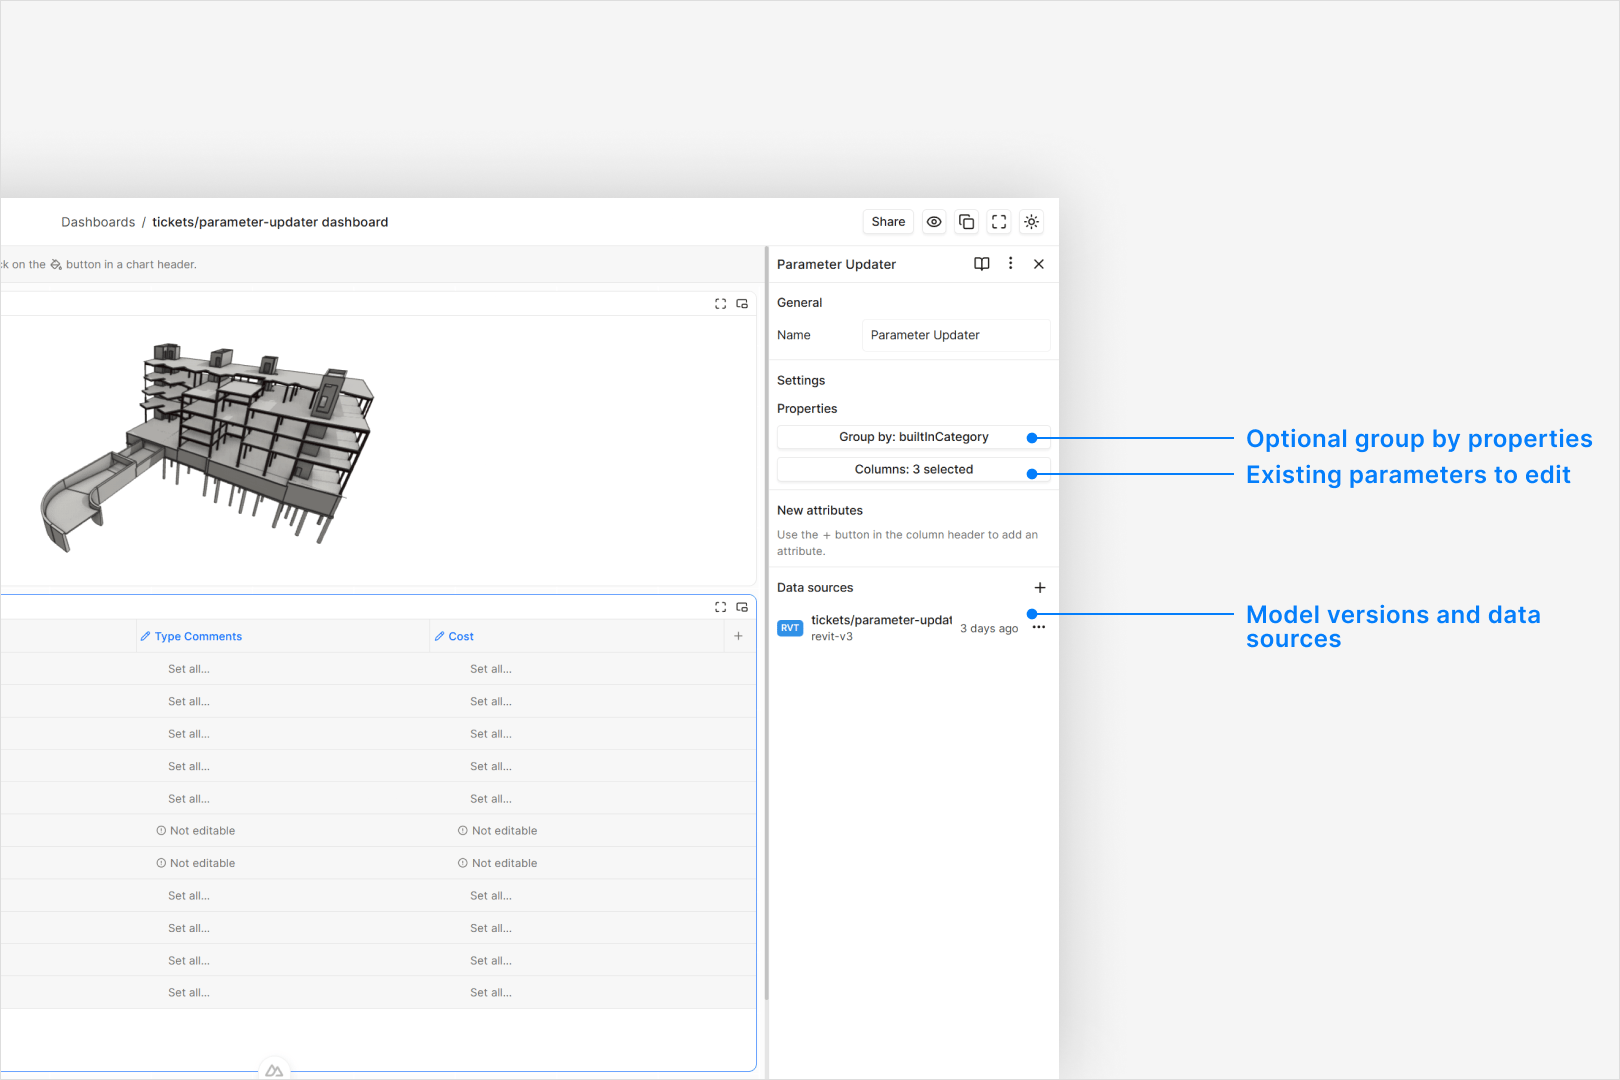
properties are
editable), and optionally group rows by a property such as level or type so
you see a grouped table of elements.4
Review and edit parameters
In the table, edit parameters directly in cells, set values for an entire
group from the group header, or update only selected elements using the
selection row; cells may be editable, read-only, or marked as “Missing
parameter” when the element does not have that field. When you have unsaved
edits, a footer bar appears at the bottom of the widget showing the number
of pending changes with Discard and Submit change requests actions.To add a parameter that does not yet exist in the model, click the +
button at the end of the column headers, type a name in the dialog, and
click Add. The new column appears with a green indicator and behaves
like any other editable column — you can set values per group, per
selection, or per element. Removing a column from the sidebar discards any
staged values for it.
5
Submit a change request as an Issue
Click Submit change requests in the footer bar and fill in the dialog
with a title, status, optional tracking fields, and a description that
summarises the changes. When you submit, Speckle creates an Issue with a
screenshot, viewer state, and the parameter changes stored as
objectDeltas
so you can track what changed and why.6
Apply the approved changes
Open the same project in your authoring tool, find the published model card
in the Speckle connector, and open the related Issue via the Issues
icon. Use the Apply changes action so the connector sends the batch of
parameter updates, validates each one, and applies them in a single
transaction, showing a toast that reports whether all, some, or none of the
parameters were updated.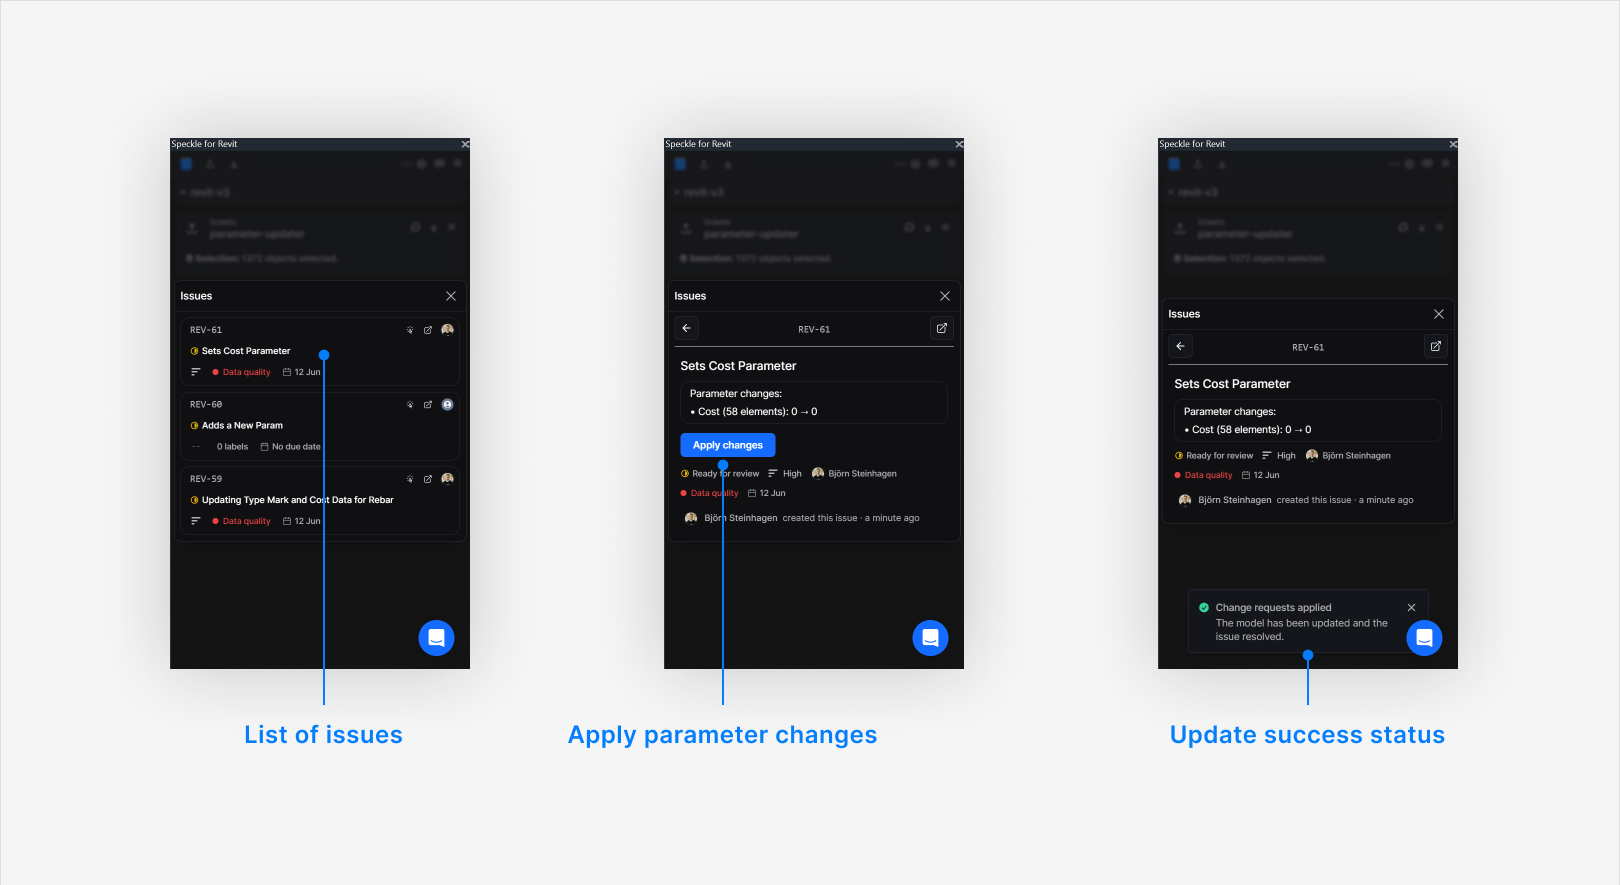
What you can and cannot edit
Editable
- Parameters exposed under
propertiesin the object tree — including instance, type, and system type parameters (Revit). - Text, numeric, boolean (Yes/No), and some ElementId-backed parameters (for example materials and levels that can be resolved by name).
- New attributes added via the + column button. Rhino writes them as
user strings. Revit creates a shared parameter under the Data group in
the Properties panel. Civil3D creates a property in a
SpecklePropertySetDefinition. All new attributes are Text type.
Not editable
- Read-only parameters – system-controlled values that the native API does not allow you to change.
- Missing parameters – elements that do not have the selected parameter. The widget shows “Missing parameter” and skips these during bulk edits.
- Linked model elements – elements from linked models are blocked. The connector reports “Cannot modify elements from a linked model”.
- Parameters not published – parameters that were not included when the model was published will not appear in the widget.
Known limitations
What to test
For beta testing, focus on:- Happy path – update a small set of parameters and confirm they apply correctly in your authoring tool.
- Mixed results – include parameters that should fail (read-only, missing, linked elements) alongside valid edits. Confirm the widget flags uneditable cells and the connector reports partial success with grouped errors.
- Scale – try batches of tens to low hundreds of elements and check that the experience remains usable and messaging is clear.
- Issue traceability – confirm each submission creates a single Issue with a useful screenshot, viewer state, and description so you can audit what was changed later.
Troubleshooting
“Your token does not have the required scope for this action”: This means the connector token is missing theissues:write scope needed to
resolve the issue after applying changes. The parameter updates themselves will
still have been applied. To fix it, go to Manage Accounts in the connector,
sign out of the affected account, and sign back in. This refreshes the token and
picks up any new scopes automatically.
Feedback and next steps
- If something behaves unexpectedly, note:
- The parameter path and element type.
- The exact error text from the connector toast.
- The Issue link from the Speckle web app.
- Share those details when reporting bugs so we can reproduce them quickly.
- If you want a walkthrough:
- Book a short session for a live demo and onboarding.
Book a Parameter Updater session
Provide feedback on Parameter Updater currently in public beta.