Notice: This user guide is based on the legacy connector.
We recommend using our new connectors instead, as they are easier to use and actively maintained. This legacy documentation may not be up to date.
We recommend using our new connectors instead, as they are easier to use and actively maintained. This legacy documentation may not be up to date.
Legacy Speckle supports versions:
We have renamed some core concepts in Speckle to be more widely understandable.
- Streams have been renamed to projects
- Branches have been renamed to models
- Commits have been renamed to versions
Getting started
Speckle currently supports Grasshopper for McNeel Rhino 6 and 7. To install this Connector and connect your Speckle account, make sure to follow the instructions in Speckle Manager.
Speckle 2 tab, or if you use tab icons you’ll see our new Speckle logo instead.
The following component categories are intended for all users:
- Send/Receive nodes
- Account category, holding all account related nodes.
- Stream category, holding all stream related nodes.
- Dev/Conversion: Conversion + serialization nodes.
- Dev/Transports: Transports are used to send data to and receive data from Speckle.
Ribbon tabs
In addition to the nodes in theSpeckle 2 tab, the Speckle Grasshopper Connector also comes with a variety of specific nodes create objects for specific industry standards (such as BIM and Structural) or specific applications (such as ETABS, Revit or GSA). These nodes are organized in independent tabs:
- Speckle 2 BIM
- Speckle 2 Revit
- Speckle 2 Structural
- Speckle 2 ETABS
- Speckle 2 GSA
Too many tabs?We know your ribbon tab space is precious (as Grasshopper doesn’t allow for horizontal scrolling of tabs…) and that in all likelihood, you will only need a couple of these nodes available at any given time.You can choose which of these tabs you want to display in your Grasshopper instance using the 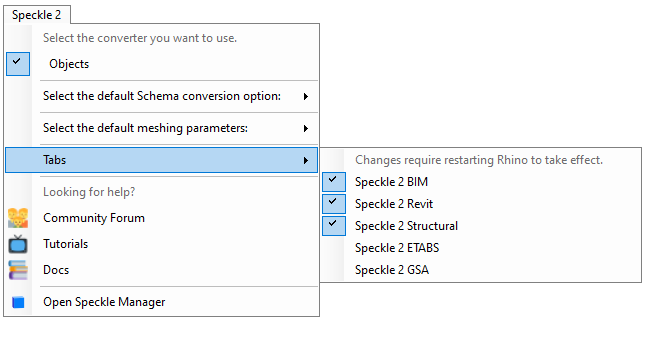
Speckle 2 top-menu.Just go to Speckle 2 -> Tabs and enable the ones you do need. By default, all these extra tabs will be deactivated.Streams and URLs
In visual programming environments, Speckle Streams are identified by their URLs. Across our Dynamo and Grasshopper connectors you’ll see URLs in 4 different formats:https://app.speckle.systems/streams/3073b96e86points to themainbranch on Stream3073b96e86https://app.speckle.systems/streams/3073b96e86/branches/devpoints to a branch nameddevon Stream3073b96e86https://app.speckle.systems/streams/3073b96e86/commits/604bea8cc6points to a specific commit604bea8cc6on Stream3073b96e86
Sending Data
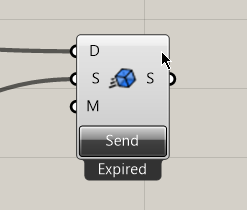
Let’s look at how we would send some data in grasshopper. First, start by creating a newSend node.
While you can send data to streams and branches, you cannot send data to a specific commit. This is because commits represent your stream in a specific point in time. Therefore, everything that gets sent to Speckle is already a commit.Want to edit an old commit? Just re-send the data and use the new commit instead.
Adding objects
In order to select which objects to send in grasshopper, we just need to connect the desired nodes to theData input in the Send node. The sender supports any type of data, in any structure (item, list, datatree), and will convert any supported Rhino objects into a Speckle-compatible format where necessary.
Adding a commit message
While not required, it’s good practice to add a “commit message” whenever you send you data, especially if working with others. This message should briefly describe the changes being pushed. You can add a commit message by passing some text to themessage port.
The commit message will be visible in Speckle Web (where you will also be able to edit it).
Sending
Once you’ve lined up your objects (and optionally written a commit message) the only thing left to do is to press the Send button.
To view the data you just sent in Grasshopper, right-click the 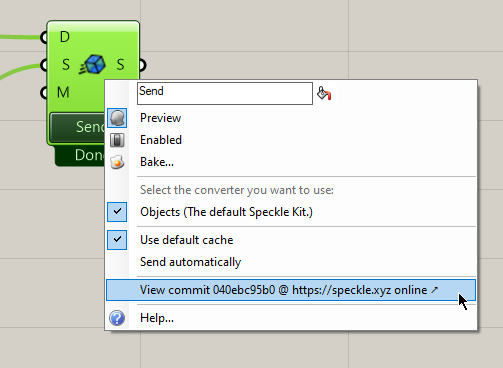
Send node and select the View commit ... option. This should open a new browser window loading the stream url. You can share that url with any collaborators so they can receive the data.Auto sending
By right-clicking on the node, you can enable/disable auto sending. If enabled, data will be send automatically every time it changes.
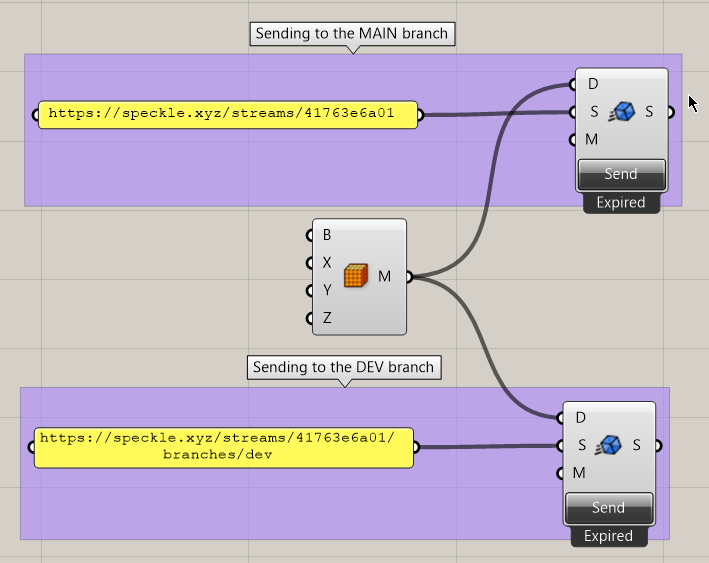
Sending to a specific branch
When referring to a stream by its URL, themain branch is used to send and receive data by default.
To target a specific branch, simply use the branch URL, such as: https://app.speckle.systems/streams/3073b96e86/branches/dev.
Receiving Data
Receiving data is very simple. You just need aReceive node, and a stream URL.
Auto receiving
By right-clicking on the node, you can enable/disable auto receiving. If enabled, new data pushed to this stream will be pulled automatically as it becomes available.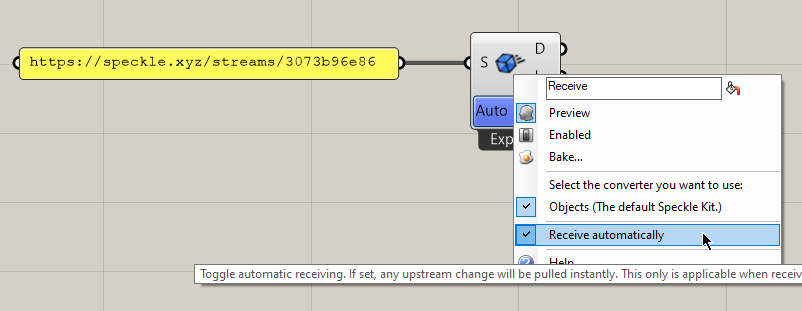
Receiving a specific branch
When referring to a stream by its URL, themain branch is used to send and receive data by default.
To receive from a specific branch, simply use the branch URL, such as: https://app.speckle.systems/streams/3073b96e86/branches/dev.
Receiving a specific commit
As we’ve seen, you can retrieve data from both the ‘stream’ and ‘branch’ level. It goes deeper - it’s possible to retrieve data from specific commits. To do so, simply use the commit URL, such as:https://app.speckle.systems/streams/3073b96e86/commits/604bea8cc6
When receiving from a commit, the node will stop showing notifications about new activity on such stream and the auto receive toggle will be disabled.
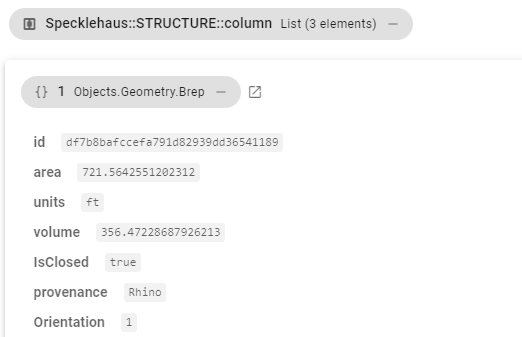
Receiving a specific object
Finally, you can also receive just a specific object in a commit, to do so simply use the commit URL, ie:https://app.speckle.systems/streams/3073b96e86/objects/df7b8bafccefa791d82939dd36541189. Objects can’t be edited, so the data received using such a URL will always be consistent.
You can find the ID of an object from the Speckle Web interface:
Creating custom objects
A custom object is a Base Object with custom properties assigned to it. It’s basically a custom data structure you can create to send data in a specific format that you define. There’s several different ways to create custom speckle objects using the Grasshopper. One of them is using theCreate Speckle Object node.
+/- sign that will allow you to add/remove properties from the object. Each input you define will represent a new property on the object. You can also modify the name of these properties, as well as their access type.
Modifying the access type
Access type operates in the same way as thePython and C# script components. In this case, you can specify if you want a specific property in the object to be a list or a single item.
Detach/Do not detach
Every property can also be specified as detached/non-detached. When a property is detached, it means that the objects it contains will be saved as independent entities in the Speckle database. All properties are detached by default for performance reasons, but you can choose not to by specifyingDo not detach on the right-click menu. Primitive types (int/double/bool/etc…) are never detached even if flagged as such.
Want to dig deeper into Detach/Do Not Detatch? Take a look at the Decomposition API.
Optional
Every property can also be flagged as optional. This will allow you to create new objects with incomplete data. Please Note: There is a limitation on this behavior. At least one of the node’s inputs must be non-optional.
When you activate any of the previous options, the corresponding icon will be shown in the parameter, very much like the 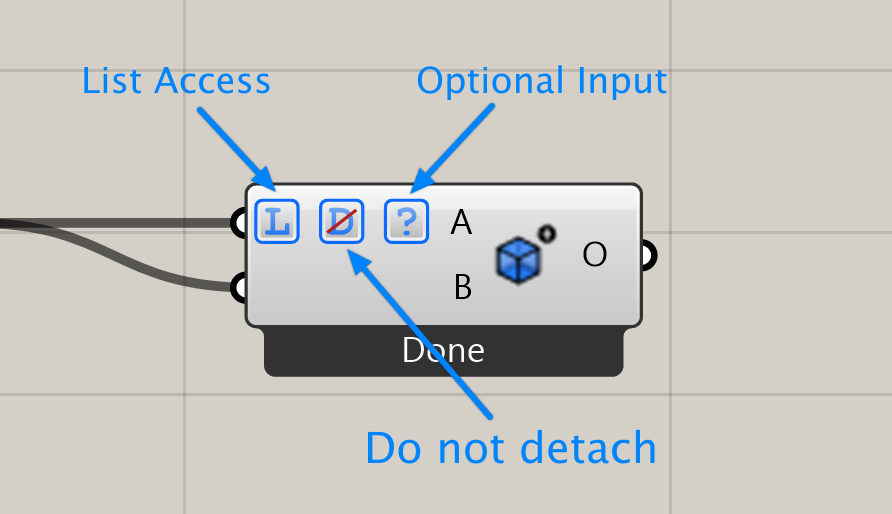
Graft/Flatten/Simplify options.Renaming inputs
All inputs can be renamed following the normal Grasshopper way. Just right-click the input you wish to rename, and write a new name for it in the first field of the pop-up menu.
- Use the
Inherit namesoption in each input right-click menu.
- Double-click the input while pressing
shift.
- Drag a new connection into the parameter while pressing
tab.
Grasshopper BIM
Speckle 2.0 lets you create Speckle BIM Elements from Rhino Geometry, so you can send objects like lines and surfaces as beams and floors! This means you can bring in your Rhino geometry directly as native Revit family elements using Grasshopper 💥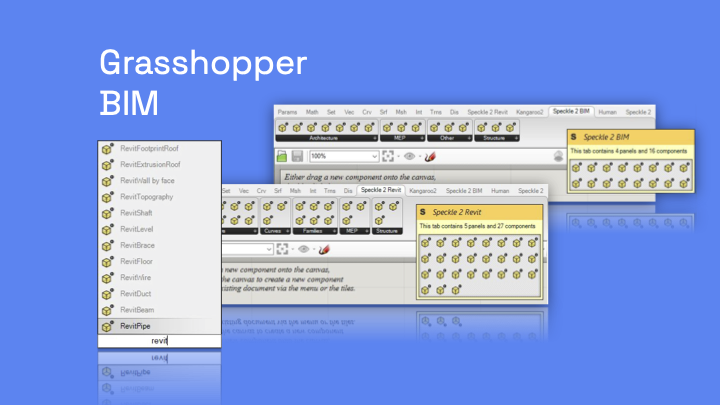
Features
Access Grasshopper BIM element creation through the Grasshopper toolbars, which include a button for every supported BIM element. The functionality is currently split into 2 distinct categories:Speckle 2 BIM and Speckle 2 Revit. You’ll find a tab for each of them in Grasshopper when you install the GH Connector.
The “Speckle 2 BIM” tab
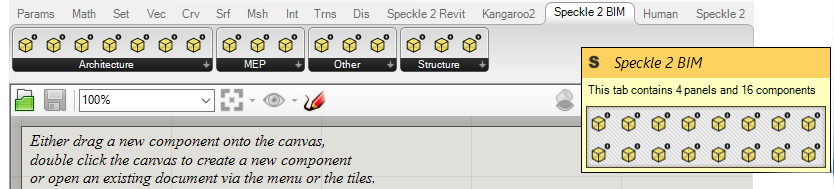
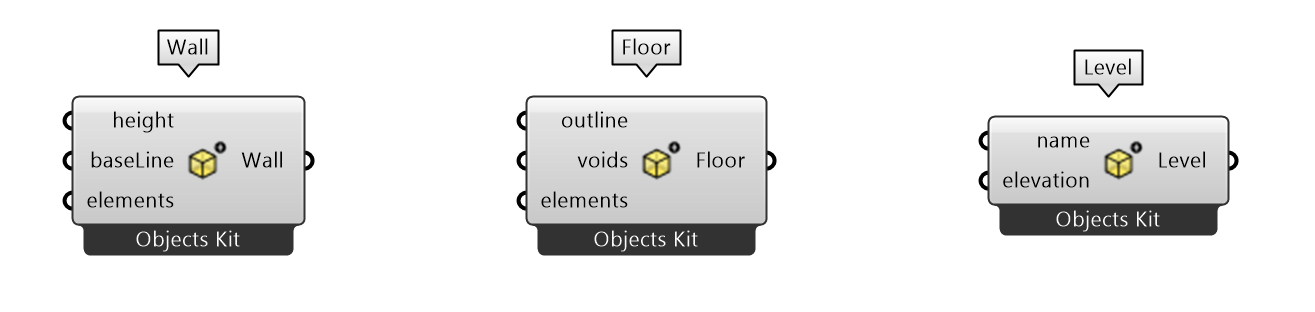
Speckle 2 BIM tab holds all components that can create generic BIM elements. These are the most basic BIM elements supported by Speckle, and consist on the minimum amount of information required to make them work.
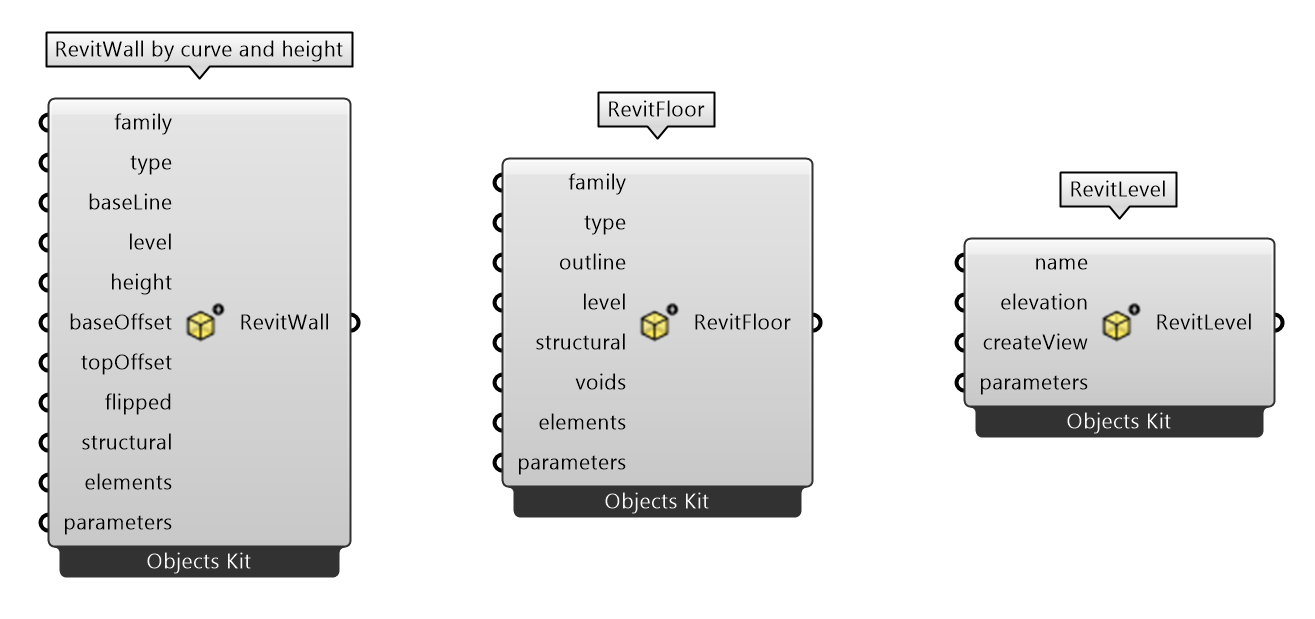
The “Speckle 2 Revit” tab
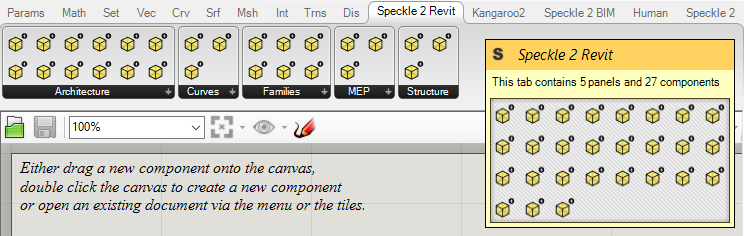
Speckle 2 Revittab holds all the components that can create Revit specific BIM elements. These elements require a higher amount of data from that is specific to your Revit Project, such as family name, type, parameters, etc… but they also provide a higher level of control when targeting Revit.
Updating Revit parameters
Sometimes you might just want to update Revit parameters from Grasshopper rather than creating new elements. For this we have created a “ParameterUpdater” component. It takes as inputs:
- a Revit element ID (ElementId or UniqueId)
- one or more Parameters
 Each Parameter will have:
- a name, either a the Revit display name, BuiltInParameter name or GUID (for shared parameters)
- a value
- (optional) Speckle units (mm, cm, m, km, in, ft, yd, mi, none)
- if updating a length based parameter (eg Base Offset) you don’t need to set the units. Speckle will automatically pick the ones in the current Rhino document and convert them to Revit (unless you want to override them)
- if updating a non-length based parameter (eg Air FLow) you should set the units to
none. Speckle will then simply assume the value used matches the display units being used in Revit (eg L/s) and will not convert them. - Speckle currently does not support converting non-length base units

Using Grasshopper BIM
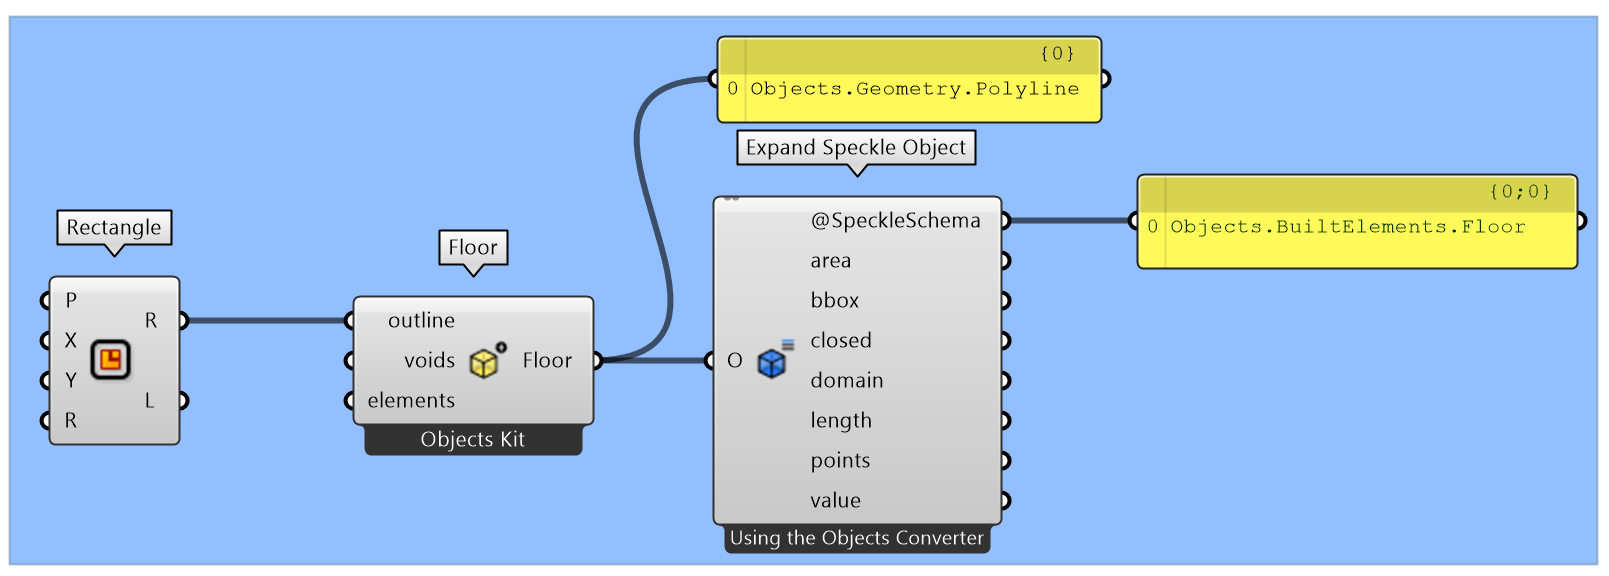
In simple scenarios, Grasshopper BIM works by assigning a new@speckleSchema property to a given geometry, such as a line. Once these objects are received in a BIM capable software (like Revit), our Revit Connector will detect this special property and generate the corresponding Revit element instead of a model curve.
The example bellow creates a Floor using a rectangle. If you expand the resulting Polyline’s properties, you can see the @speckleSchema property is present and it’s type is Objects.BuiltElements.Floor
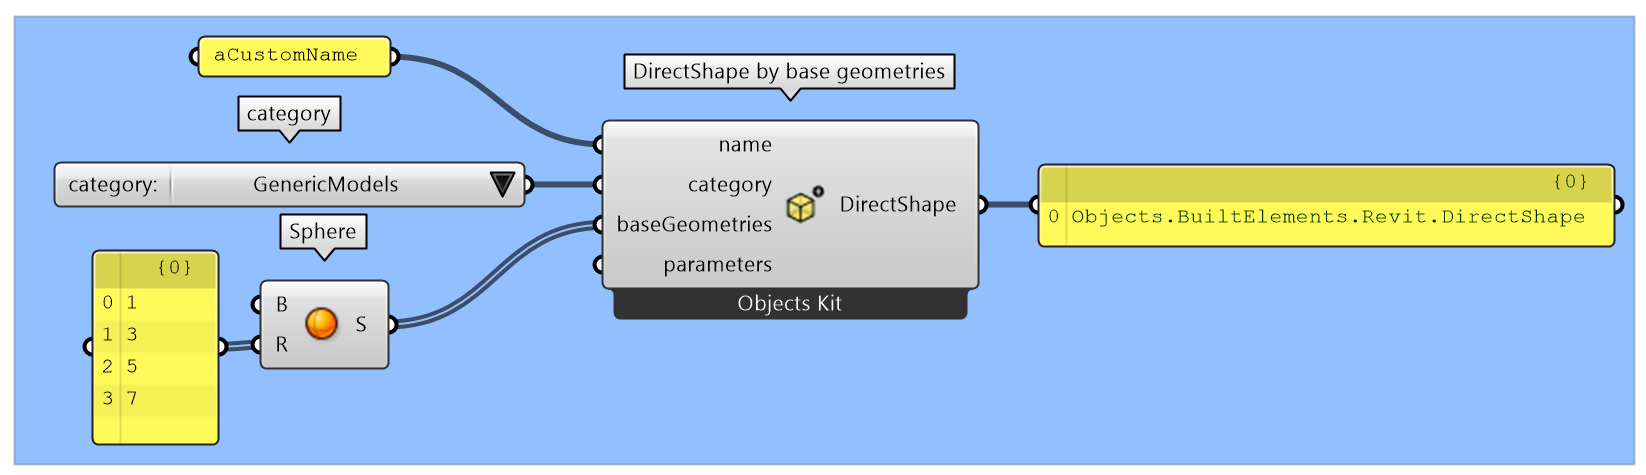
DirectShape from a list of spheres. Since Revit’s DirectShape allows you to add more than one geometry to each DS, the output of the node will be a Objects.BuiltElements.Revit.DirectShape with the list of geometries attached to it’s @baseGeometries property.
Understanding the schema conversion option
EachGrasshopper BIM node has an option that allows the user to select between two different types of conversion:
- Convert as
Schema Object - Convert as
Geometry(Line,Curve,Mesh...)withSchema(Beam, Floor...)attached.
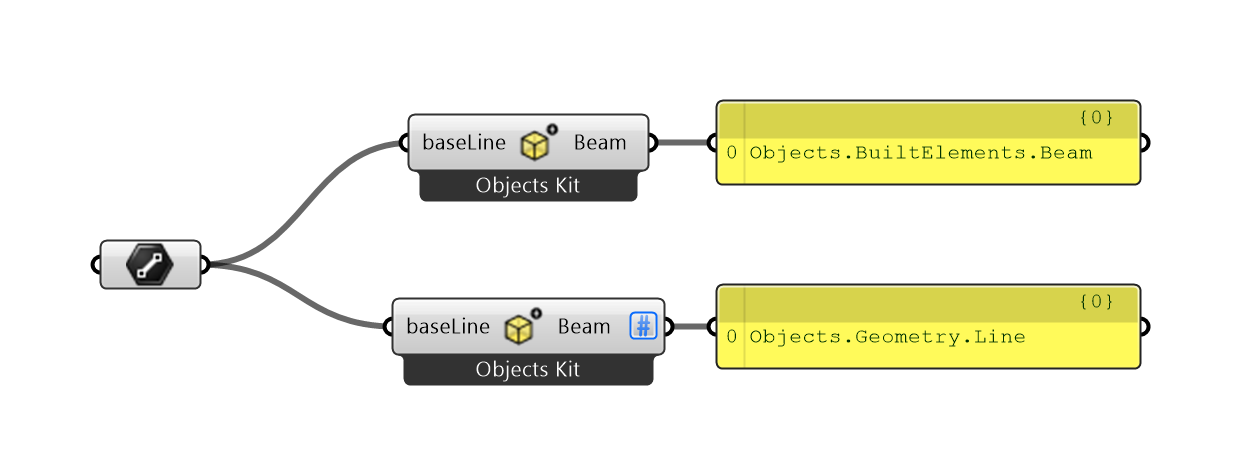
Beam node:
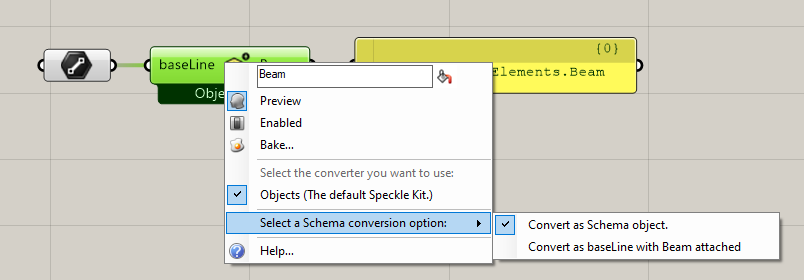
Speckle BIM elements directly, or treat them as geometry with a special property attached (@speckleSchema). The advantage of selecting one over the other depends on your preference:
- When targeting exclusively BIM applications, it makes sense to use the default setting (
Convert as Schema Object), as the data will be organised in a way that is relatable to BIM users (such as beams, columns, slabs, etc…) - When your data is going to be consumed primarily as geometry in other applications, but needs to play nice in some BIM application as well, then it may make more sense to treat this objects as geometry first, and attach the BIM information to that geometry.
Geometry with Schema attached option is enabled, the output will display a visual hint to indicate to the user this behavior is occurring, and allow to distinguish between nodes with different state options active:
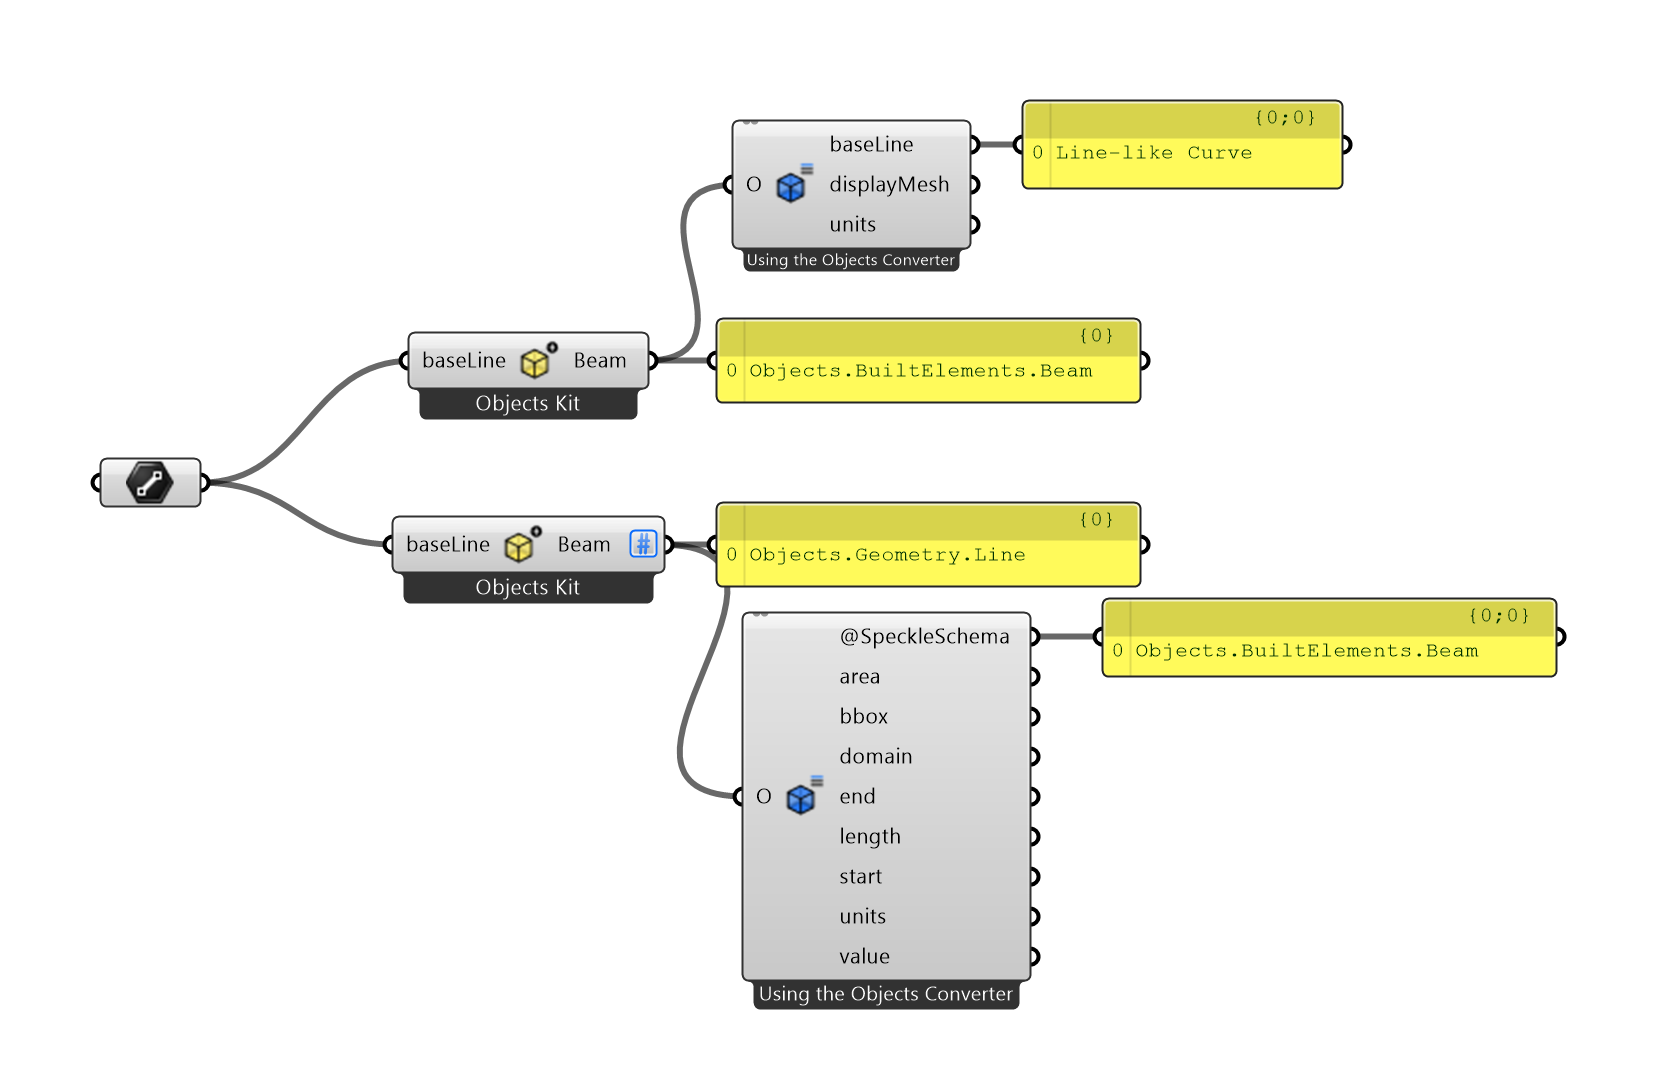
Geometry -> BIM Element and the other as BIM Element -> Geometry).
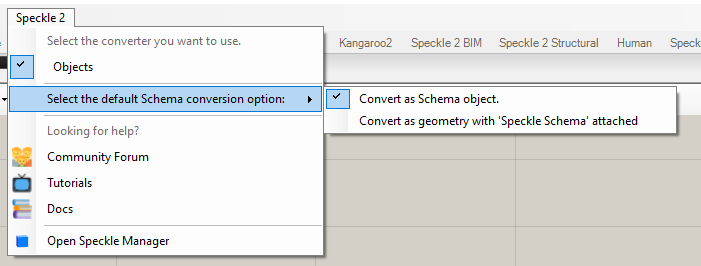
Setting the default behavior
By default, anyBIM Element node uses the Convert to Schema Object option. You can modify this behavior in your Grasshopper installation using the Speckle 2 menu in the top menu bar.
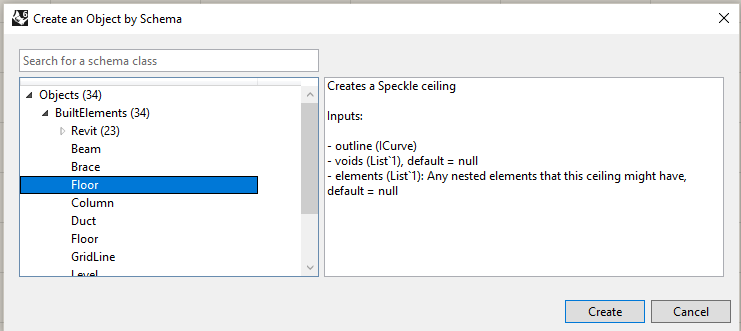
Schema Builder
The Schema Builder exists to allow the Grasshopper Connector to read and create schema objects from any available kit.If you’re just using the Objects kit, our recommended approach is to use the individual nodes in the
Speckle 2 BIM and Speckle 2 Revit tabs.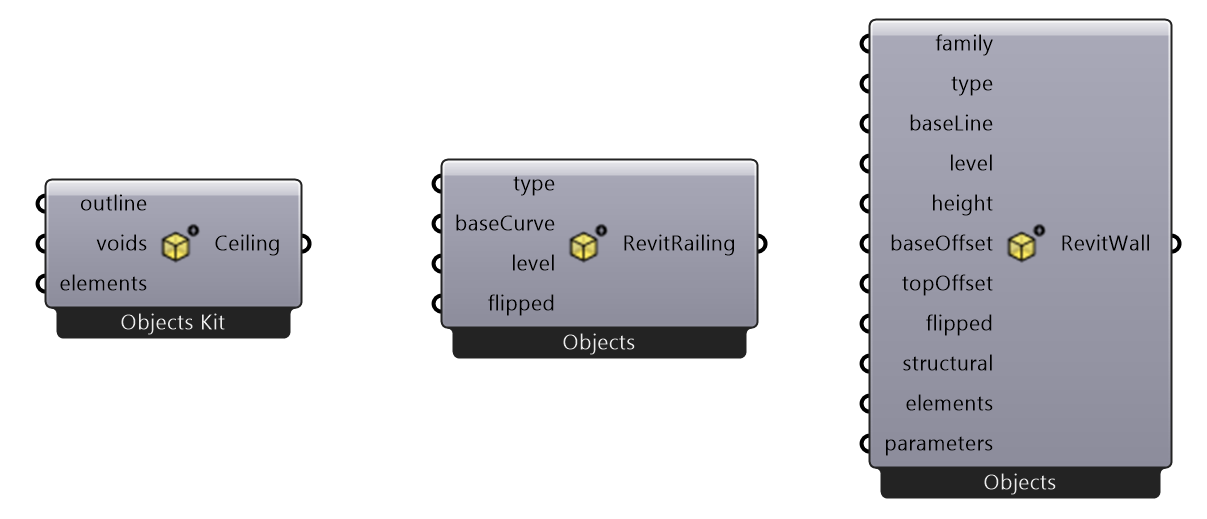
Check out our tutorial on sending data from Grasshopper to Revit!
Object conversion
By default, the Speckle nodes will try to convert any compatible objects (such as meshes, solids, lines and points):- On Input: to Speckle compatible format.
- On Output: to the native Rhino format that Grasshopper will understand.
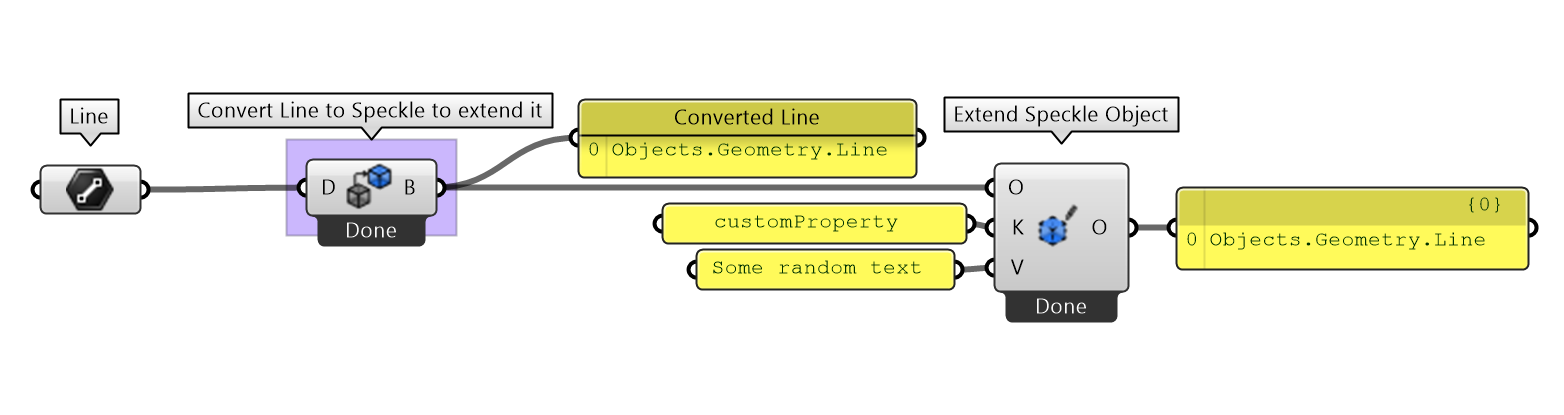
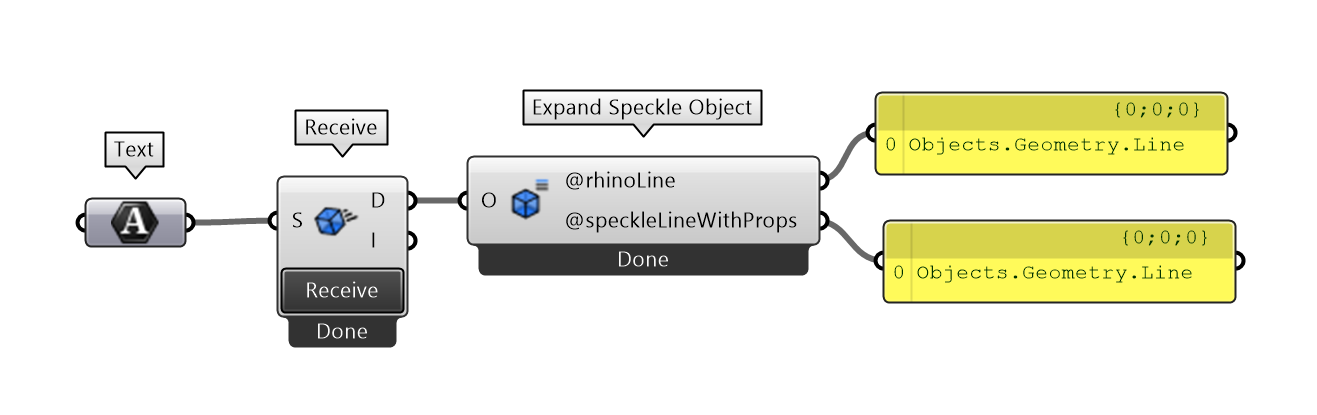
Handling geometry objects with nested data
Handling geometry objects with nested data
Following the example above, we package and send the custom Speckle Line.
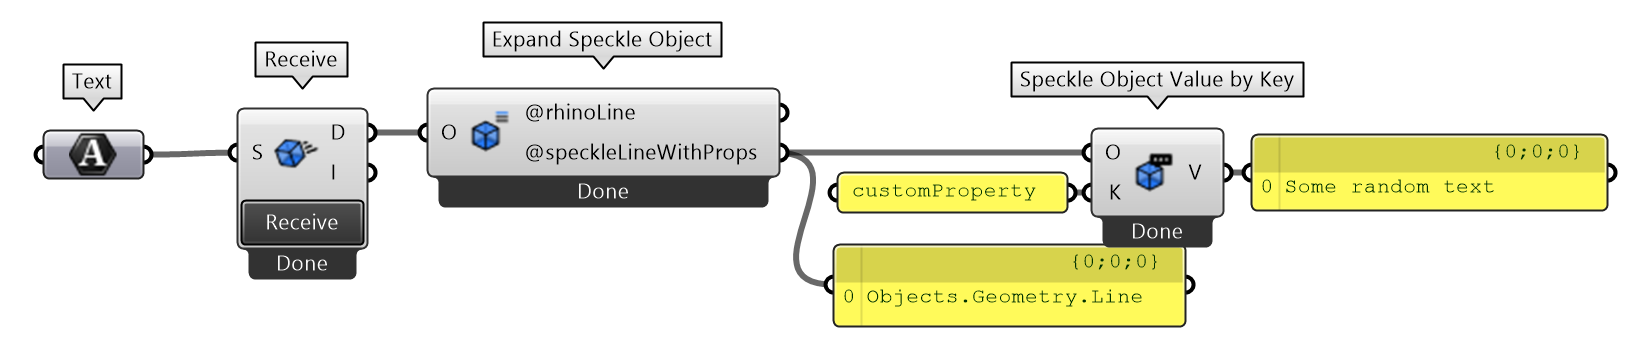
- Default behavior when receiving data: Automatic conversion to Rhino objects
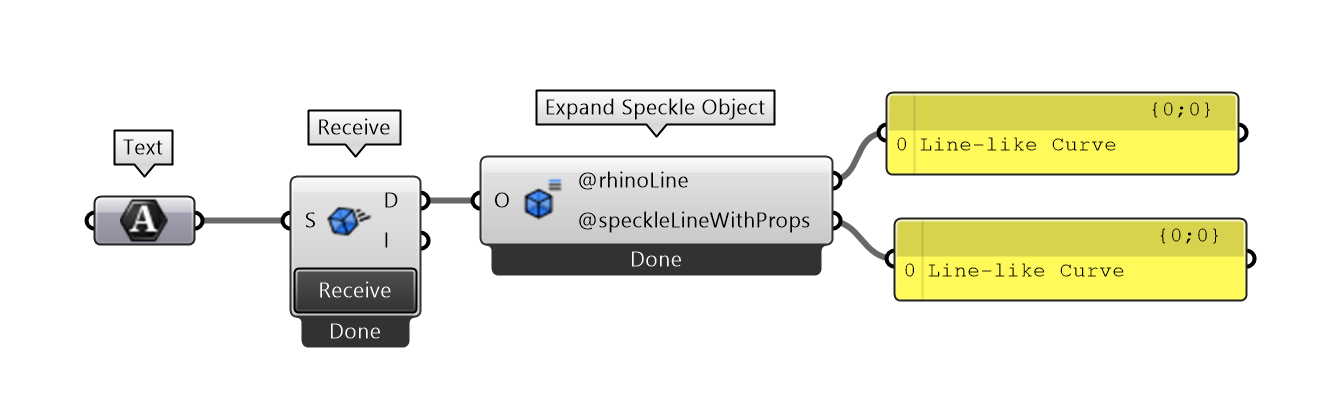
- Behavior when “Do not convert” options is enabled: Output is a Speckle Line
Don’t worry, we always ensure all objects are converted to Speckle format before preforming a
Send operation.Using the C#/Python script nodes
For more advanced scenarios, you can also use the Speckle libraries inside your custom C# or Python scripts in any Grasshopper definition. There is, though, a bit of a set up involved for this to properly work.Fair warningAbout creating your own objects in scripting nodes: Creating objects with
circular references is not supported, and although there is nothing stopping you from creating this types of object relationships in your code, they will fail to be sent to the server (or any other transport for that matter).That said, they will work inside your Grasshopper definition, but we heavily suggest you don’t. If you end up doing so (for whatever reason we don’t want to know… 😉), just make sure you remove all those nasty circular references before sending.C# Script
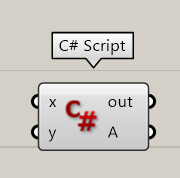
-
Create a new C# node on your canvas.
-
Right-click the node and select
Manage assemblies...from the dropdown menu.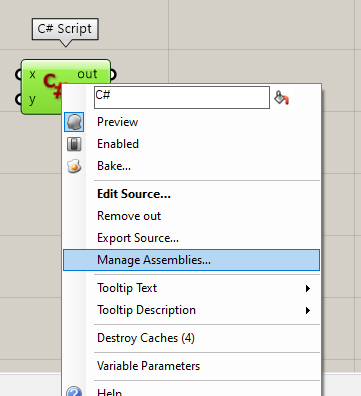
-
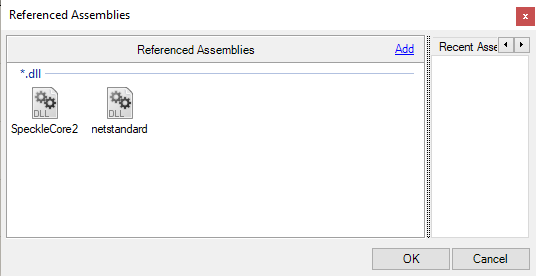
A new window will appear. Press the
Addlink to select a new library. You’ll need to add two libraries:- Find the location of the Speckle Rhino+Grasshopper Connector. It should be in
%appdata%\McNeel\Rhinoceros\7.0\Plug-ins\SpeckleRhino2 (8dd5f30b-a13d-4a24-abdc-3e05c8c87143)and selectSpeckleCore2.dll(make sure to use the right Rhino folder based on your installed version). - Now head to
C:\Windows\Microsoft.NET\assembly\GAC_MSIL\netstandard\v4.0_2.0.0.0__cc7b13ffcd2ddd51and selectnetstandard.dll
- Find the location of the Speckle Rhino+Grasshopper Connector. It should be in
-
Once done, it should look like this:
-
Now open up your script and add the following lines of code:
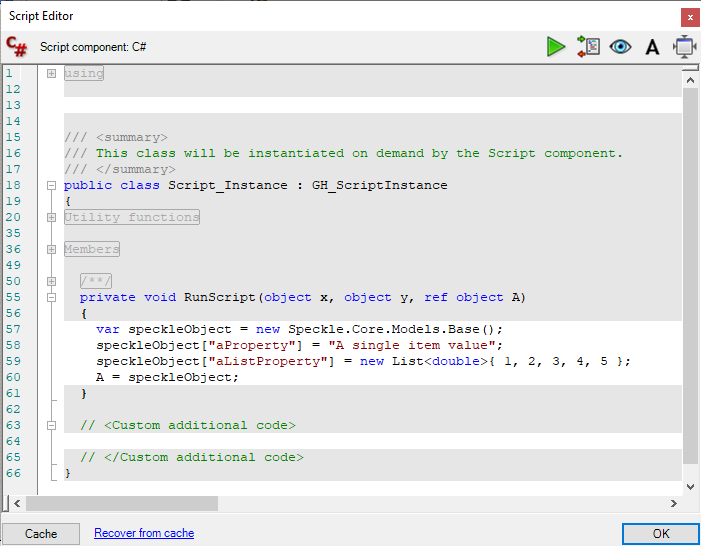
-
This will output a
Baseobject, to see the properties inside it you can always useExpand Speckle Node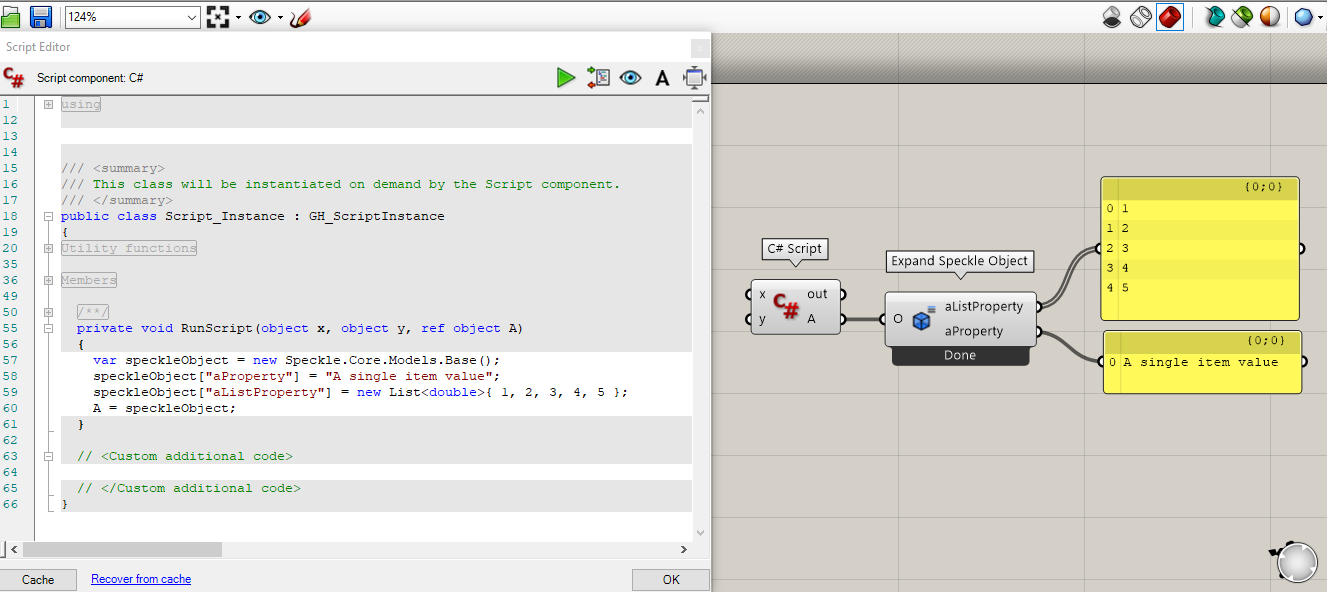
Python script
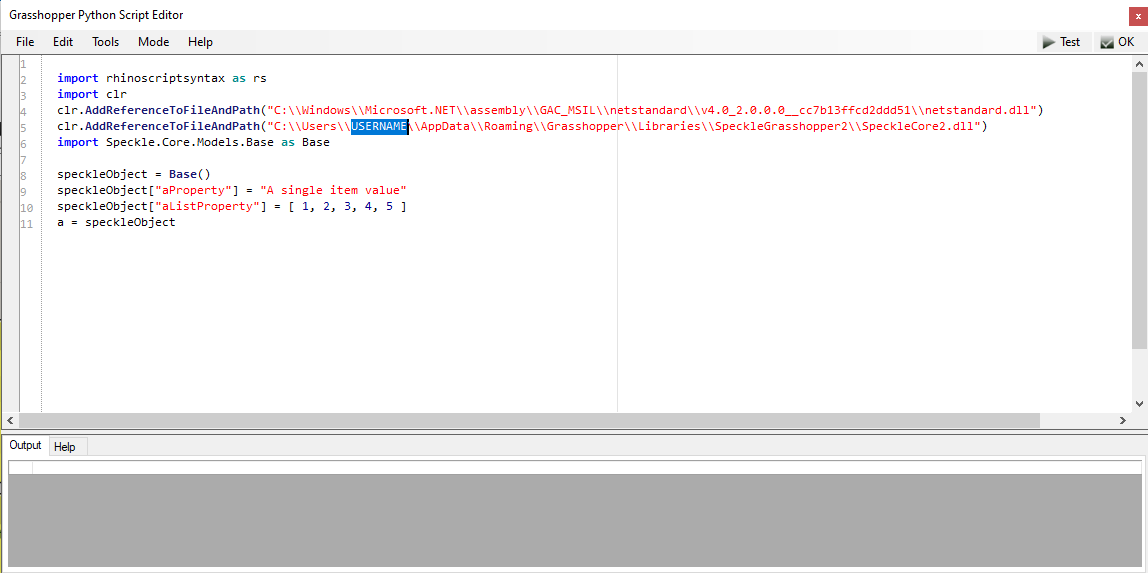
The process to use Speckle in a python script is similar to the C# node steps, only this time, we’ll reference the assemblies directly in our code usingclr.
- Add a new python node to your canvas
-
Double click it to open the editor, and paste this code to reference the libraries (remember to replace
USERNAMEfor the actual name in your computer) -
Bellow that, add this code to create a new Speckle object.
-
Your final result should look like this:
-
And that’s it! The output will be a
Baseobject you can operate with just like any other created with theObject Managementnodes.
Nodes
Send node

Input
- Stream: Supports any generated stream from within the
Streamcomponent category, but also stream urls in text format. - Message: The message you want to attach to the commit when you send the data. Defaults to
"Grasshopper push". - Data: This port will accept almost anything you give it. If the objects provided are not
Baseobjects, it will also perform the conversion to Speckle automatically.
Output
- Stream: The commit url pointing to the objects in the Speckle server.
Extra options
Variable inputs
Just as in theCreate Speckle Object node, you can add as many inputs as necessary. In the Send node, all inputs are set to tree to accept any type of information and grasshopper data structure.
Send automatically
There is also an option to set the node to automatically send every time there is a change in the data. You will find this option in the right-click menu of the node.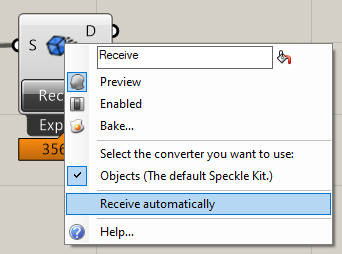 | 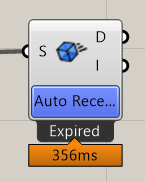 |
|---|
Detach input data
This option is enabled by default in all inputs, but it can be disabled on a per-input basis on the right-click menu of each input. You can find a more detailed explanation of this option here.Receive Node
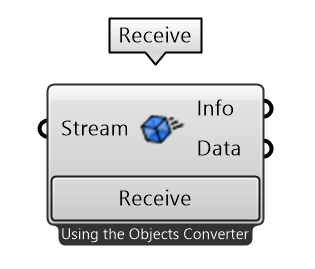
Stream or any other valid Transport. Whenever possible, the receiver node will try to convert all Speckle objects into Rhino-compatible objects.
Inputs
- Stream: Supports any generated stream from within the
Streamcomponent category, but also stream urls in text format.
Outputs
- Data: The data that was received from the stream.
Extra options
Expand received object
Enabled by default. This will expand the received object to expose it’s properties. If the specific speckle object has a supported conversion, it will be converted instead (i.e.: a point, line, mesh) This option can be disabled in the right-click menu of the Receive node. Here’s a quick animation of the process:
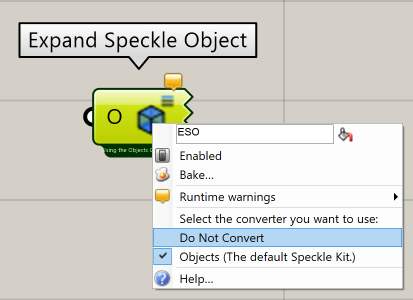
Do not convert
Similar to theDo not convert option in Create Speckle Object node, it will prevent any conversion from happening and output Speckle objects instead.
Receive Automatically
There is also an option to set the node to automatically send every time there is a new commit on the stream. You will find this option in the right-click menu of the node. This option is not available when the input stream url points to a specificcommit or an object.
Local Send Node
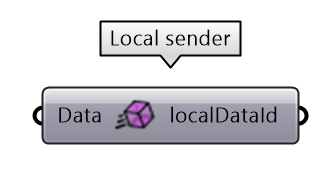
Inputs
- Data: The data to be sent locally. This port will accept almost anything you give it. If the objects provided are not
Baseobjects, it will perform the conversion to Speckle automatically.
Outputs
- localDataId: The unique
idfor the data that was locally sent.
Local Receive Node
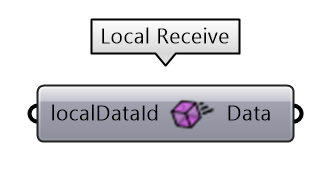
Inputs
- localDataId: The unique
idfor the data you want to fetch locally. This would be provided from a Local Send node
Outputs
- Data: The data that was received. This port will accept almost anything you give it. If the objects provided are not
Baseobjects, it will perform the conversion to Speckle automatically.
Synchronous Send Node
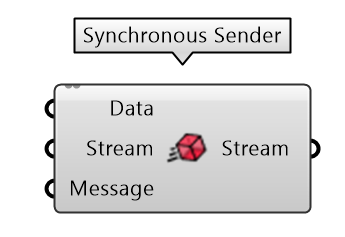
Input
- Data: This port will accept almost anything you give it. If the objects provided are not
Baseobjects, it will also perform the conversion to Speckle automatically. - Stream: Supports any generated stream from within the
Streamcomponent category, but also stream urls in text format. - Message: The message you want to attach to the commit when you send the data. Defaults to
"Grasshopper push".
Output
- Stream: The commit url pointing to the objects in the Speckle server.
Synchronous receive node
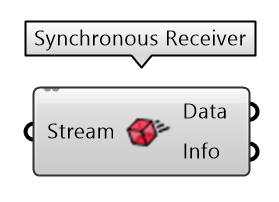
Inputs
- Stream: Supports any generated stream from within the
Streamcomponent category, but also stream urls in text format.
Outputs
- Data: The data that was received from the stream.
Create Speckle Object
Please refer to the Creating custom objects section.Create Speckle Object by Key/Value pairs
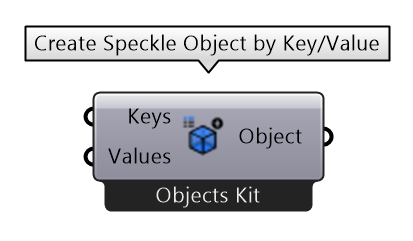
Keys to be used as the object’s properties, and a list of values (or nested list) to assign to each property.
When using this component, there is no option to specify a properties detached state, so all properties will be detached by default.
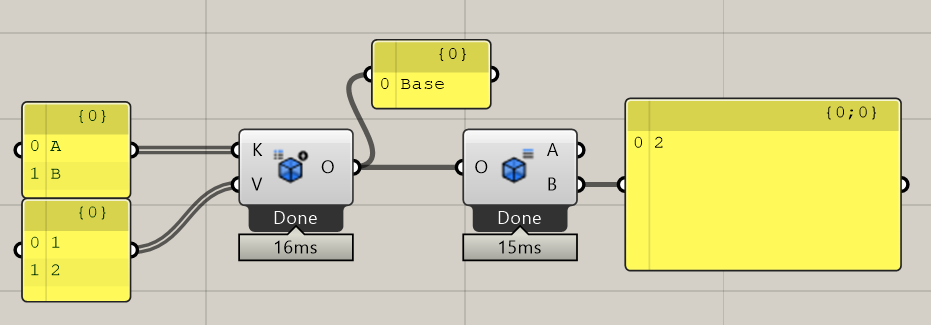
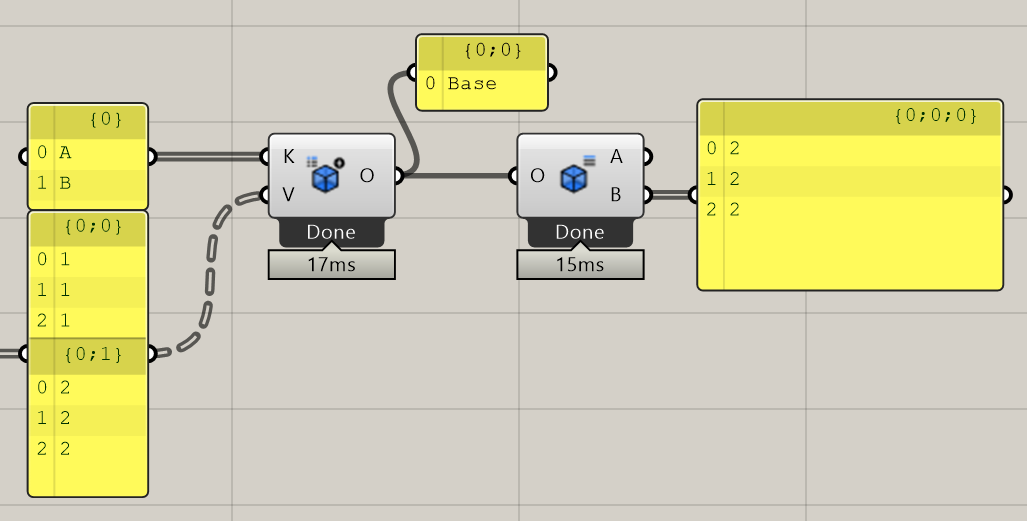
Notice when creating list items, the data structure must match. Meaning, the keys and values for each object must start with the same branch index.
Deconstruct Speckle Object
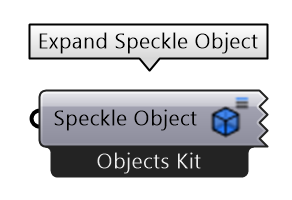
This node used to be called Expand Speckle Object
The Deconstruct Speckle Object works in the exact opposite way as the Create Speckle Object. When a Base object is plugged into the input, it will automatically create the outputs for each of the Base objects’ properties.
Inputs
Speckle Object: The Speckle object to extract the properties from.
Outputs
Outputs are dynamically generated according to the specific Base objects that have to be expanded. All outputs will appear in alphabetical order regardless on the order they were created/added to the object.Get Speckle Object Keys
Inputs
Speckle Object: The Speckle object to extract the properties from.
Outputs
Keys: The list of keys available for each object as text or, if the option is enabled, a unique list containing all available keys in any of the objects.
Extend Speckle Object
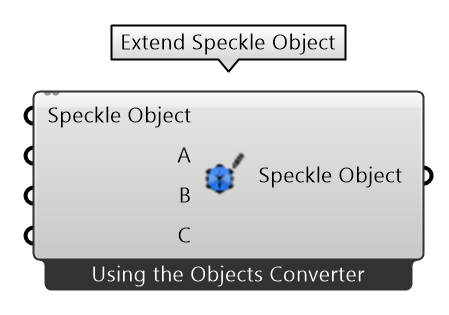
Base object using variable parameters.
Inputs
- Speckle Object: The Speckle object to be extended.
Outputs
- Speckle Object: The extended/updated Speckle
Baseobject.
Extend Speckle Object by Key/Value
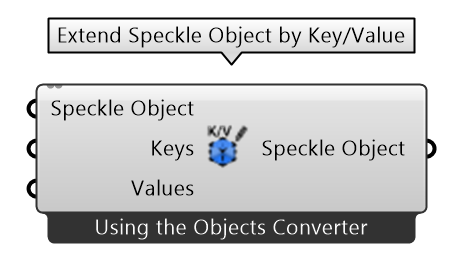
Base object.
Inputs
- Speckle Object: The Speckle object to be extended.
- Keys: The Keys to extend the object with. When an existing key is overriden, a warning will be displayed.
- Values: The values to assign to each individual key. Works in the same way as the Create Object by KeyValue node
Outputs
- Speckle Object: The extended/updated Speckle
Baseobject.
Schema Builder
Please refer to the Using the Schema Builder section.Inputs
Inputs are dynamically generated based on the user-selected schema.Outputs
Output is dynamically generated based on the user-selected schema.Accounts Node

Accounts must be set-up in your computer using the Speckle Manager. If no accounts are shown after setting up the solution
Create Stream
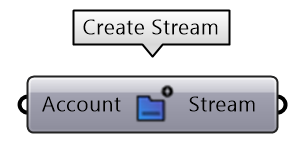
Create Stream component.
Inputs
- Account: A Speckle account, provided by the Accounts Node.
Outputs
- Stream: A
Streamobject pointing to the newly created stream.
Get Stream
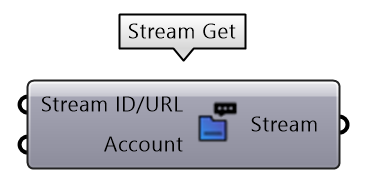
Stream, given its unique id (or its stream url) and a specific account to access that stream with.
You can also use a stream URL copied from your browser instead of using this node.
Inputs
- Stream: Supports any generated stream from within the
Streamcomponent category, but also stream urls in text format. - Account: A Speckle account, provided by the Accounts Node. If no account is provided, the default account will be used.
Outputs
- Stream: A
Streamobject. If the stream doesn’t exist, an error will be shown.
List Streams
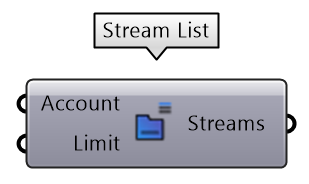
You can also use a stream URL copied from your browser instead of using this node
Inputs
- Account: A Speckle account, provided by the Accounts Node. If no account is provided, the default account will be used.
- Limit: The number of streams to fetch from the server.
Outputs
- Streams: List of
Streamobjects available to the specified account.
Stream details
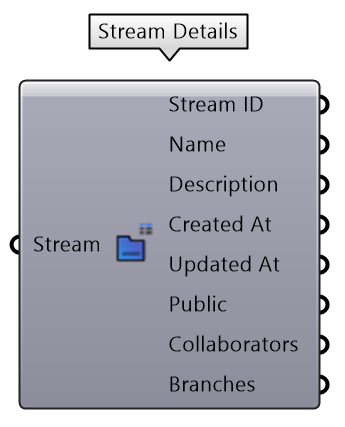
Stream.
Inputs
- Stream: Supports any generated stream from within the
Streamcomponent category, but also stream urls in text format.
Output
- Stream ID: The unique
idthat identifies the stream. - Name: The name of the stream.
- Description: The description of the stream.
- Created at: The date this stream was created.
- Updated at: The date marking the last time the stream was updated.
- Public: Boolean value indicating if the stream has link sharing enabled.
- Collaborators: A list of collaborators that have access to this stream, as well as their roles.
- Branches: A list of available branches for this stream.
Stream Update
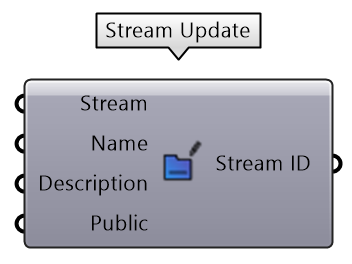
Inputs
- Stream: Supports any generated stream from within the
Streamcomponent category, but also stream urls in text format. - Name (optional): Text string with the new name for the stream.
- Description (optional): Text string with the new description for the stream.
- Public: Boolean value to activate/deactivate this stream’s link sharing.
Output
- Stream ID: A
Streamurl pointing to the updated stream.
Developer Tools
These nodes where developed exclusively for testing/development purposes. If you don’t know what these are, you most likely won’t ever need them.Convert to Speckle Node
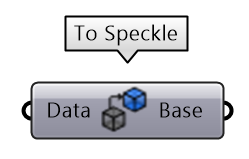
base object, it will traverse through the properties and try to convert each value, leaving the structure intact.
Convert to Native Node
The Convert to Native node will try to convert any Speckle objects into Rhino compatible objects. This node works recursively, meaning that if given any non-convertiblebase object, it will traverse through the properties and try to convert each value, leaving the structure intact.
Serialize Speckle objects Node
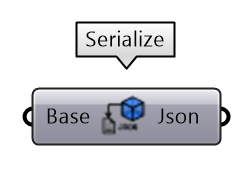
JSON formatted text.
Deserialize Speckle objects node
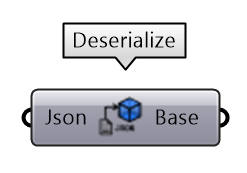
Base speckle objects.
Send to Transport

id of the object.
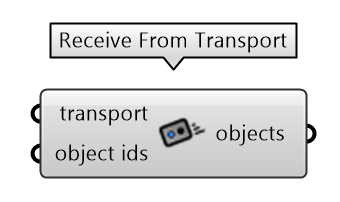
Receive from Transport
Receives an object from the specified transport using it’sid
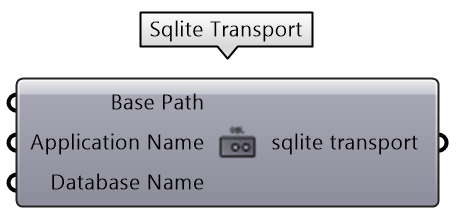
SQLite Transport
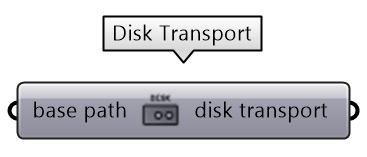
Disk Transport
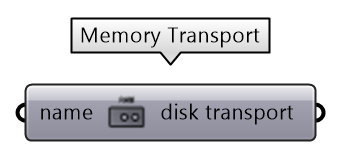
Memory Transport
Flatten Collection
Introduced in 2.14
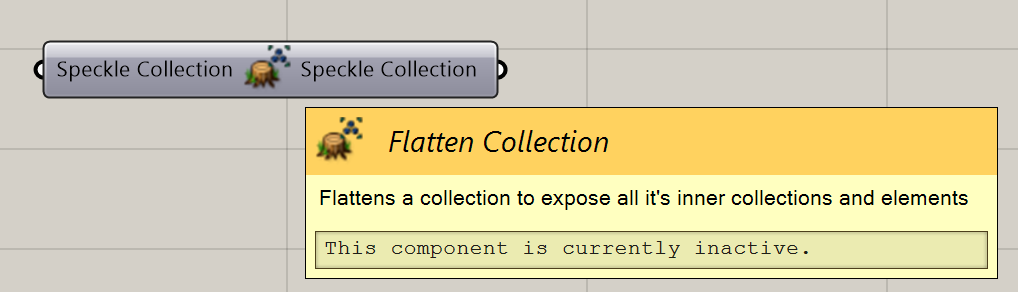
For a given layer structure in Rhino you can easily extract the information from all the layers in grasshopper