Notice: This user guide is based on the legacy Manager for Windows and Mac.
We recommend using our new connectors instead installed directly from https://app.speckle.systems, as they are easier to use and actively maintained. This legacy documentation may not be up to date.
We recommend using our new connectors instead installed directly from https://app.speckle.systems, as they are easier to use and actively maintained. This legacy documentation may not be up to date.
Download
Manager is available for both Windows and Mac (with limitations). Manager automatically updates when new versions are available.Manager does not require admin privileges! Just double click and run to install it.
Logging in and adding accounts
You can now log into your Speckle account/s directly from our main application, without the need to have Manager installed.
From Speckle Manager
Once you have downloaded the Manager, you’ll be able to easily add an account. All you need to do is head to the “Accounts” menu, click the “Add Account” button, and provide your server URL. This will open a browser window where you can log in or register an account on that server and authorise the Speckle Manager.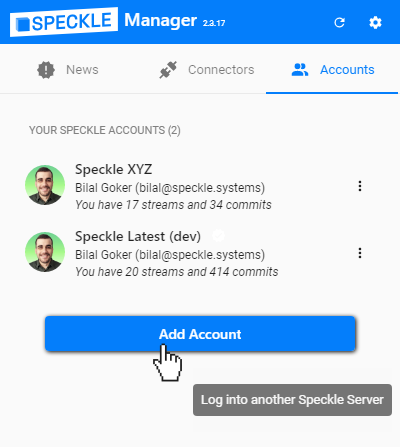
During onboarding
You can also add an account directly from Speckle Web as part of the onboarding process you will see after registering on a new server.Adding accounts manually
Using Manager to handle your accounts and connectors is the recommended way, but if you’d like to do without it a manual flow is also available. To manually add an account you first need to generate a token for your account. Then you can proceed to create a.json file with the following data structure:
- on Windows, under:
%appdata%\Speckle\Accounts\ - on Mac, under:
~/.config/Speckle/Accounts - on Linux, under
~/.local/share/Speckle/Accounts
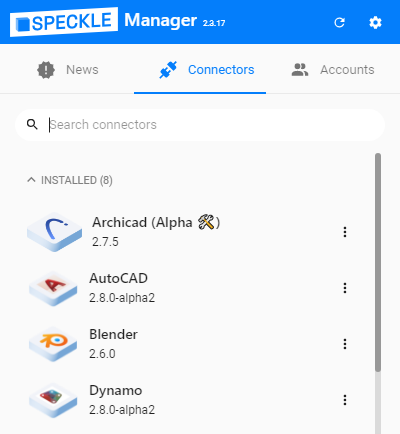
Installing connectors
Manager also shows you the currently available connectors and allows you to install or remove connectors from your machine. Head into the “Connectors” menu to see what connectors you have installed and which are available to download. You’ll also be able to check which version of each connector you have and update a connector as new versions are released.
Updating connectors
You will receive a notification in Speckle Manager when updates for your installed connectors are available. You can then update them from the connectors page.
Uninstalling connectors
Just head over the connectors page in Speckle Manager and click Remove.
Advanced settings
You can access the Settings page by clicking the ⚙ icon on the top right of the Speckle Manager window.

Resetting the local cache
The local cache is used when sending and receiving to Speckle to speed up similar operations in the future. If you notice your cache is significantly large, you can delete it from here.Using beta versions of Manager
Toggling this setting on will enable beta versions of Manager. This means that every time we make a beta release you’ll be able to install it as well. If you are experiencing issues with Manager we might ask you do so to try a new version we have made.Installing early versions of our connectors
To install early version of our connectors, simply head to the versions tab inside a connector.
Changing the default Speckle server address
You can change the default address of the Speckle server in two ways:- by adding a file named
servercontaining the server URL in%appdata%/Speckle/(or equivalent Speckle folder in your system) - by adding an Environment Variable
SPECKLE_SERVERcontaining the server URL
Uninstalling Manager
On Windows, simply head over Apps & Features, find Manager for Speckle and then click Uninstall.
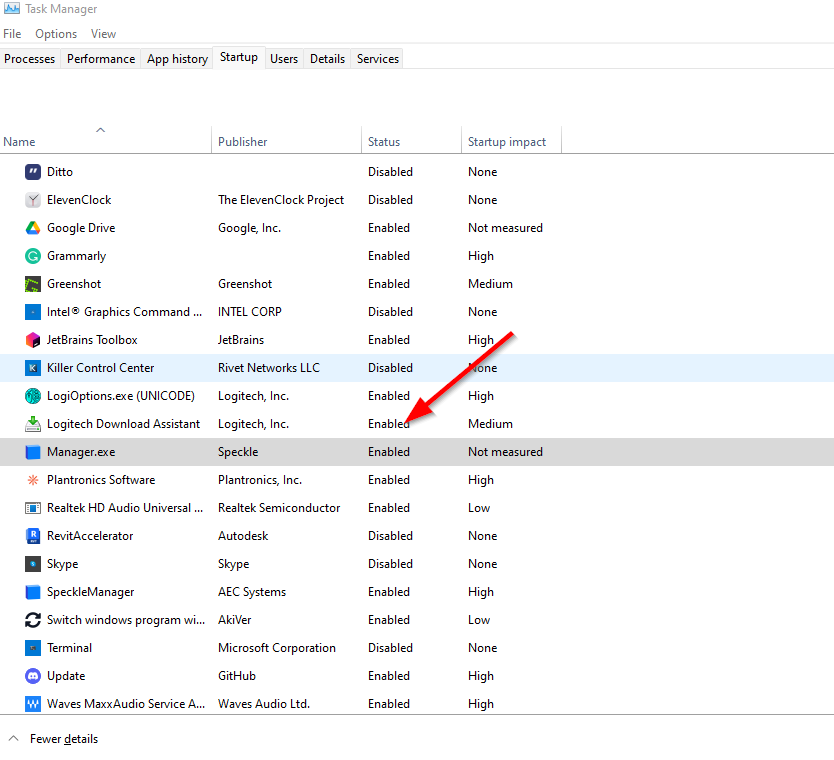
Preventing Manager from running at startup
On Windows, Manager will automatically launch on startup to check for new updates. If you want to disable this functionality, you can simply do so:- Open the Task Manager, using (e.g.)
Ctrl + Shift + Esc - Navigate to the Startup tab.
- Find the row with Manager.exe and set its Status to Disabled
Troubleshooting
Having issues with Speckle Manager? Try the solutions below:- Cannot log into your account? Check if the Speckle server might be blocked
- Cannot see any connectors? Check if the connectors url might be blocked
- Open the Settings ⚙ page
- Turn the log on
- Try reproducing your issue and copy paste the text in the Connector log
- Send us a message on the forum!
