Our Unity Connector differs from the other connectors described in our User Guide;
It has only a simple UI, and is missing some of the comforts present in other connectors.
But it offers several Unity Components to send and receive data from Speckle, and allows developers to easily develop their own
components and features.
In addition to this page, you should also take a look at our developer documentation.
Getting started
Before using this connector, you’ll need to follow our standard setup instructions
to install Speckle Manager and add a Speckle account. After this, you can proceed
to clone the Speckle Unity repository on GitHub.
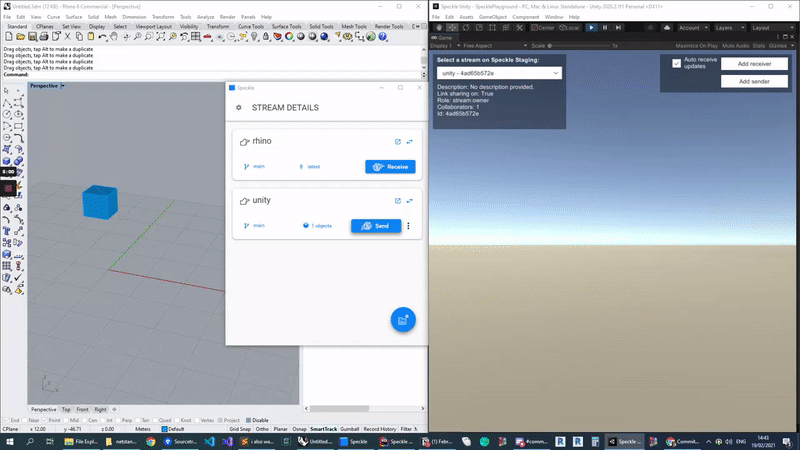
The repo contains a sample scene named SpecklePlayground that shows an in-game
example of how to send and receive data from your default speckle account.
The example is minimal, but demonstrates what is possible using the Speckle Unity Connector.
Package installation
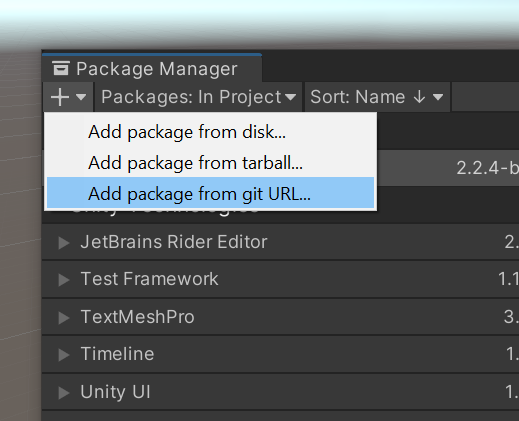
To install the connector into your own Unity project, rather than using sample project (see above), open the Package Manager (Windows -> Package Manager)
and select Add Package from git URL.
Paste in the following URL
https://github.com/specklesystems/speckle-unity.git?path=/Packages/systems.speckle.speckle-unity
Editor time sending and receiving
Receiving
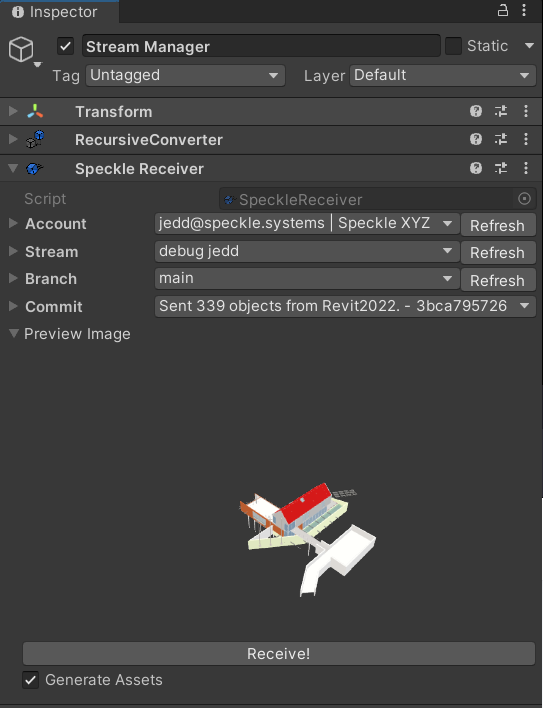
To receive data directly from the editor, just add the SpeckleReceiver.cs component to a GameObject, in the inspector you’ll now be able to select accounts, streams, branches and commits.
The Generate Asset option, when enabled, will generate Mesh, Material, and Prefab assets in the Resource folder.
Sending
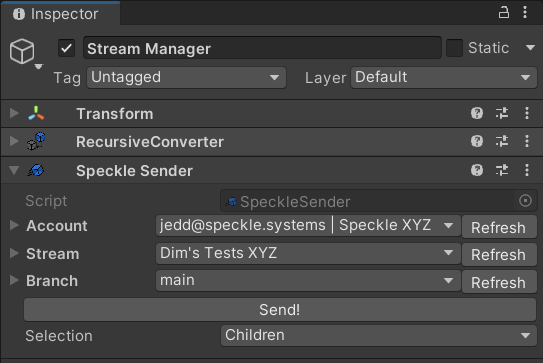
To Send data directly from the editor, just add the SpeckleSender.cs component to a GameObject.
With the Selection dropdown, you can switch between sending:
- Children: All children of this GameObject.
- Selection: Editor Selection (may want to lock the inspector to stop it switching away).
- All (excl. disabled): All enabled objects in the current scene.
- All (incl. disabled): All objects in the current scene.
Game time sending and receiving
Receiving
To receive data, please refer to the Receiver.cs class in Assets\Speckle Connector. This is just a wrapper around methods in Core, an example usage follows:
var receiver = myGameObject.AddComponent<Receiver>();
receiver.Init(projectId);
receiver.Receive();
Init() method accepts additional optional arguments to use different accounts, automatically receive updates, delete the old objects, report progress and errors etc. Please check the source code for a complete list.
Sending
To send data, please refer to the Sender.cs class in Assets\Speckle Connector. This is just a wrapper around methods in Core, an example usage follows:
var sender = myGameObject.AddComponent<Sender>();
sender.Send(projectId, objs);
Send() method accepts additional optional arguments to use different accounts, report progress and errors etc. Please check the source code for a complete list.
Geometry alone isn’t much fun, that’s why we’ve made it easy to also transfer BIM and custom data with your objects.
When receiving data, a SpeckleProperties component is attached to each object. Inside it there is a Dictionary<string,object> called Data that contains all the metadata coming from Speckle. This works similarly when sending data; if any objects have a SpeckleProperties component attached to them, it will be used.
This data is visible from the inspector (read only)
This data is fully accessible from code (read/write), like so:
SpeckleProperties props = myGameObject.GetComponent<SpeckleProperties>();

// props.Data is a IDictionary<string, object>

// you can check for a property like this:
if(pros.Data.ContainsKey("area")
   && Data["area"] is int area)
{
    Debug.Log(area);
}

//And Add a property like this
pros.Data.Add("area", 250);
Materials
We have included basic material support in Speckle and in some of our connectors.
When receiving, the Unity connectors first checks if a shader exists in the scene that matches the incoming object’s material by name. If a match cannot be found, Speckle will try to create a basic material with the same color and transparency. If an incoming object has no materials set, a default material will be applied.
Project setup
In order to successfully build a project using the Unity Connector, please ensure the following:
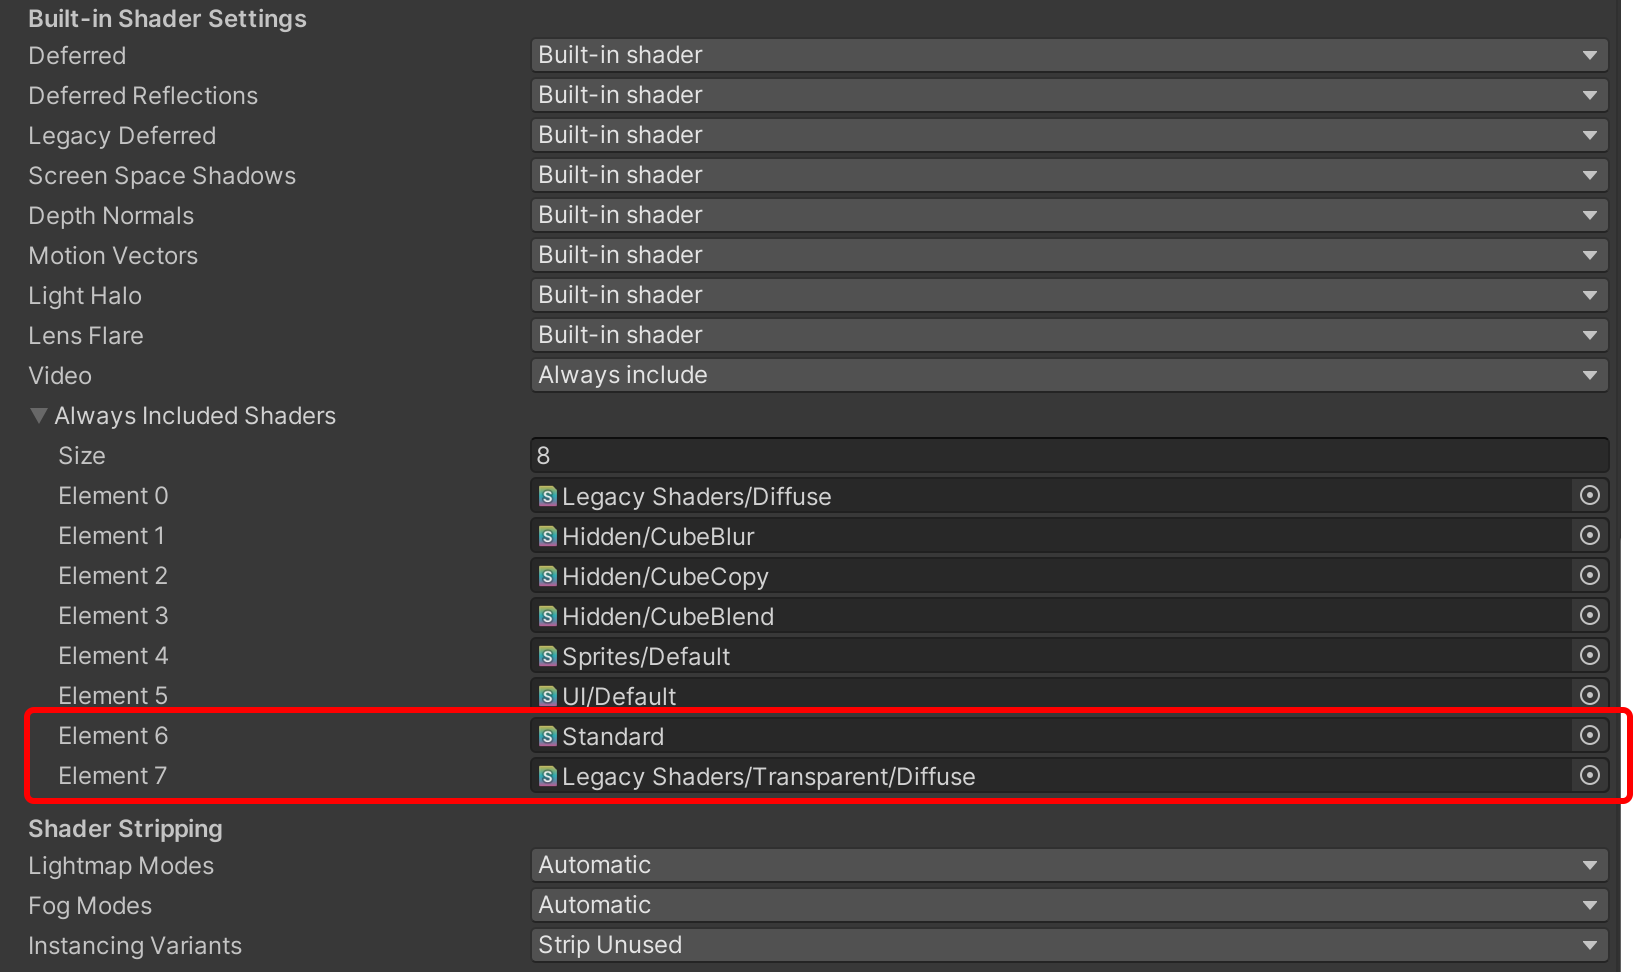
- Include
Standard and Diffuse shaders in project settings. To do so, just add them in Project Settings → Graphics → Built-in Shader Settings → Always Included shaders.
Note that these steps have already been applied to the Speckle Playground sample project. Last modified on June 3, 2026