What are issues?
Issues in Speckle let you report problems, request changes, and manage feedback tied directly to specific objects in your models. Create issues by clicking on geometry, assign them to teammates, set priorities and due dates, and track progress from creation to completion.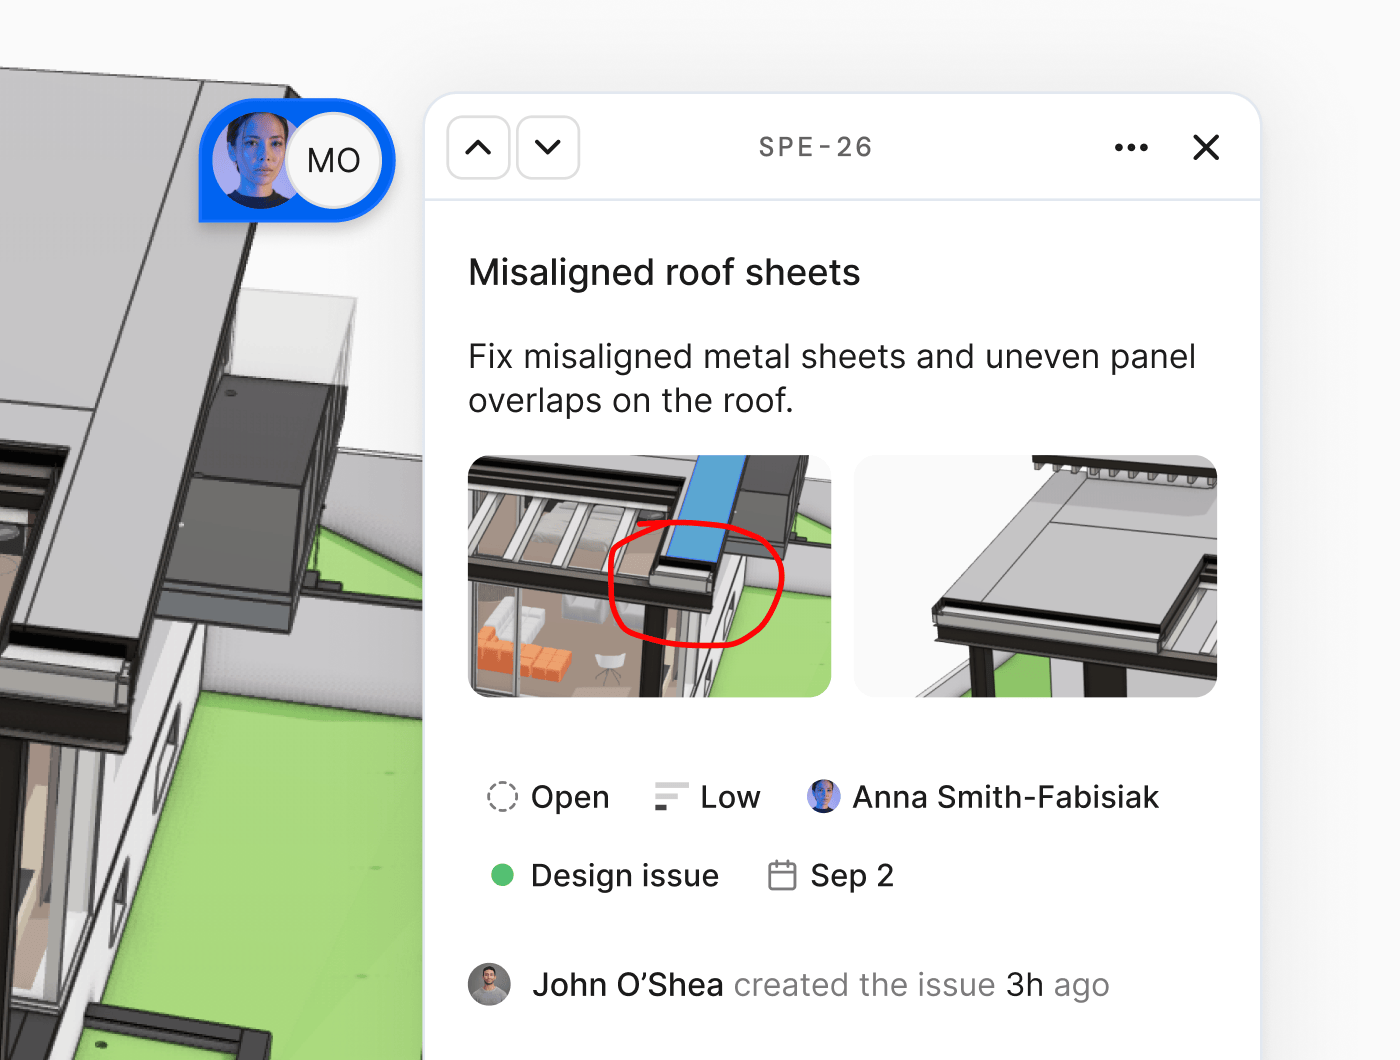
Create
Coordinate
Track
Creating issues
Complete issue fields
Can I create an issue without selecting an object?
Can I create an issue without selecting an object?
What if I need to reference multiple objects in one issue?
What if I need to reference multiple objects in one issue?
Can I create issues on mobile or tablet?
Can I create issues on mobile or tablet?
Issue properties
Each issue has multiple fields to help you organize and prioritize work.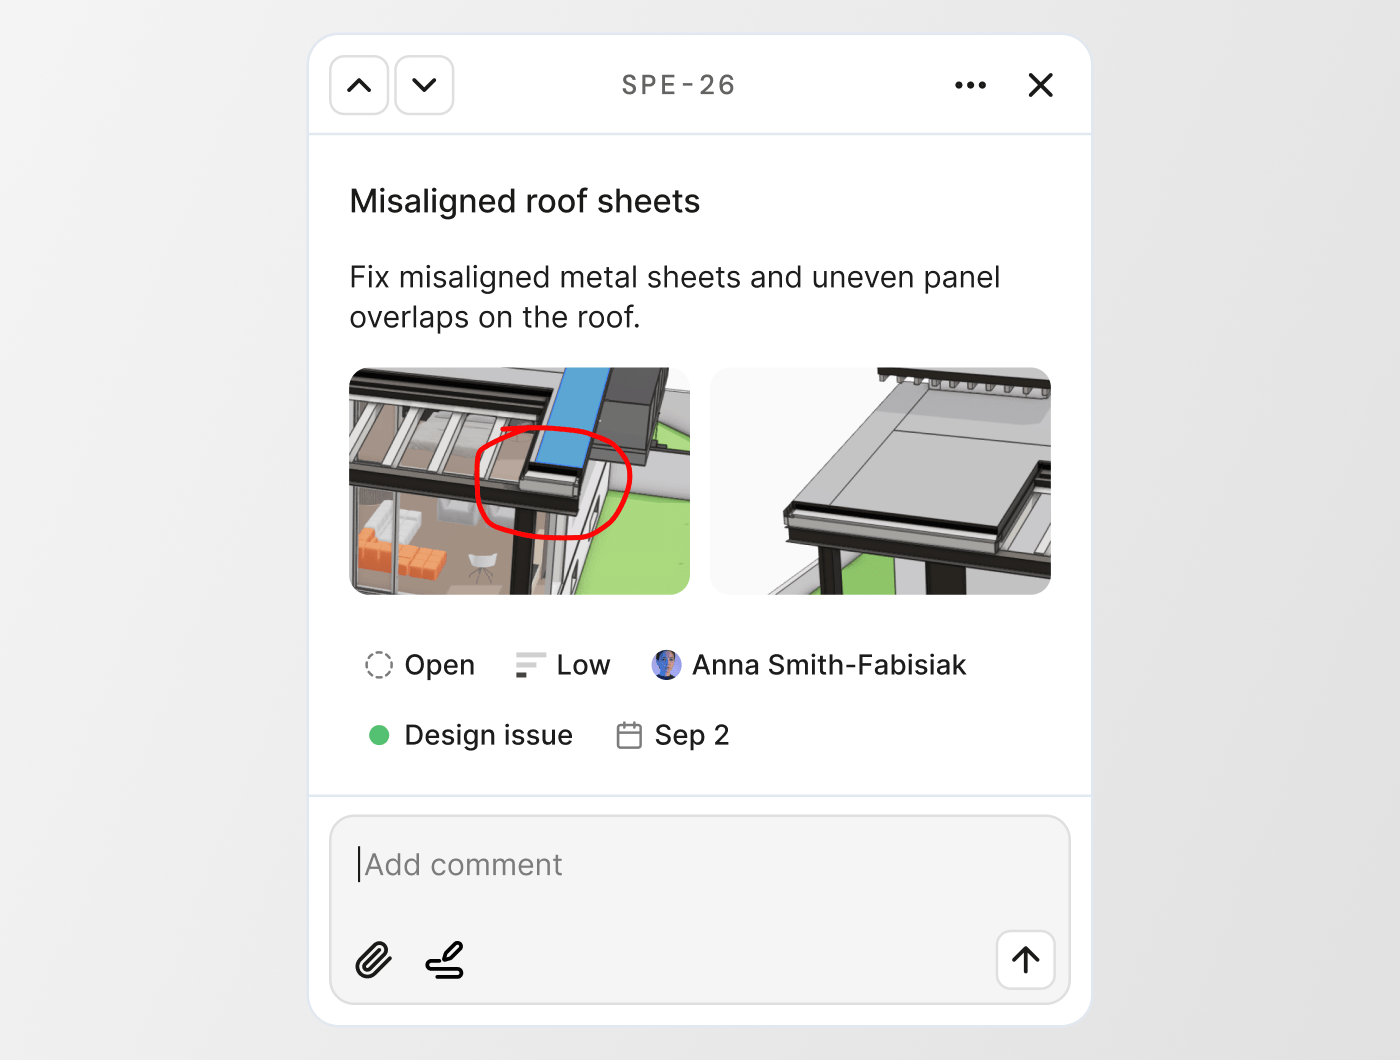
Title and description
Give your issue a clear title and add details in the description. Usecmd/ctrl+B for bold and cmd/ctrl+I for italics.
Status
Track progress with three status options:- Open - Issue needs attention (default)
- Ready for Review - Work is complete and needs verification
- Done - Issue is resolved
Assignee
Assign issues to any user in your workspace. For private projects, you can only assign users who have been explicitly added to the project as collaborators. Assigned users receive an email notification.Due date
Set a deadline for when the issue should be resolved. Overdue issues can be filtered and highlighted in issue lists.Priority
Indicate urgency with four priority levels: No priority (default), Low, Medium, High.Labels
Tag issues with one or multiple labels. Labels help categorize issues by discipline, phase, issue type, or any other criteria relevant to your project. Your workspace comes with a set of default labels, but workspace admins can create custom labels from Workspace settings > Issue labels. Each label has a name and color, and labels are available across all projects in your workspace.Can I change properties after creating an issue?
Can I change properties after creating an issue?
What happens if I delete a label that's used on issues?
What happens if I delete a label that's used on issues?
Collaboration
Replies
Add comments to any issue to discuss the problem, propose solutions, or provide updates. Replies appear chronologically below the issue description. Anyone with the Reviewer project role or higher can reply to issues. Anyone who created an issue, is assigned to it, or has previously commented will receive email notifications when new replies are added.Mentions
Mention specific users in issue descriptions or replies by typing @ followed by their name. Mentioned users receive an email notification directing them to the issue. In private projects, you can only mention users who have access to the project.Attachments
Attach images, files, and markups to give more detail:- Click Attach image or file to upload from your device
- Drag and drop files directly into the issue window
- Click Attach markup to create an annotated screenshot using Speckle’s markup tools
Is there a file size limit for attachments?
Is there a file size limit for attachments?
Can I attach files from my desktop apps like Revit?
Can I attach files from my desktop apps like Revit?
What file types can I attach?
What file types can I attach?
Issue activity
Below the replies, the issue activity log shows all changes over time. You can see who changed status, priority, labels, and due dates.Managing issues
Issues panel in the viewer
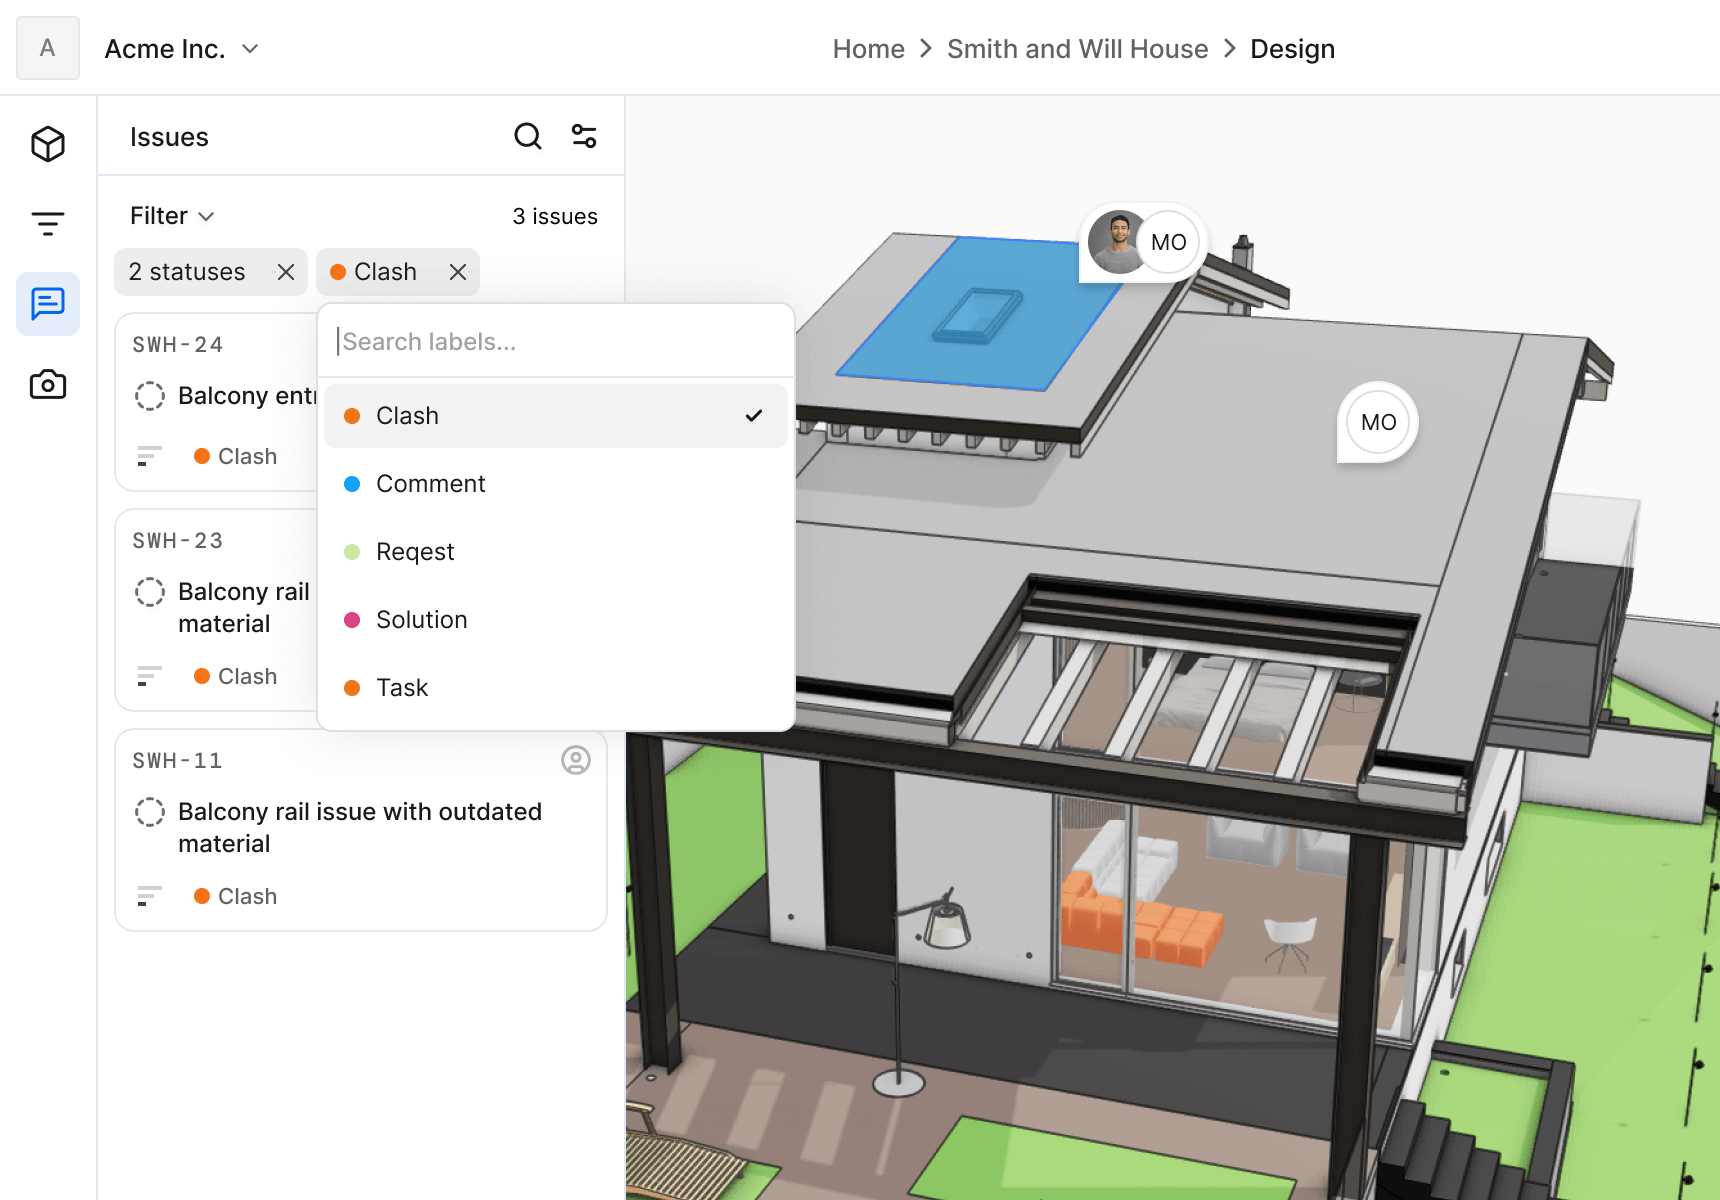
- Status
- Assignee
- Due date
- Priority
- Labels
- Overdue status
- Current version only (show only issues created on the loaded model version)
Can I see issues from multiple models at once?
Can I see issues from multiple models at once?
Why don't I see an issue I know exists?
Why don't I see an issue I know exists?
Issues tab in the project
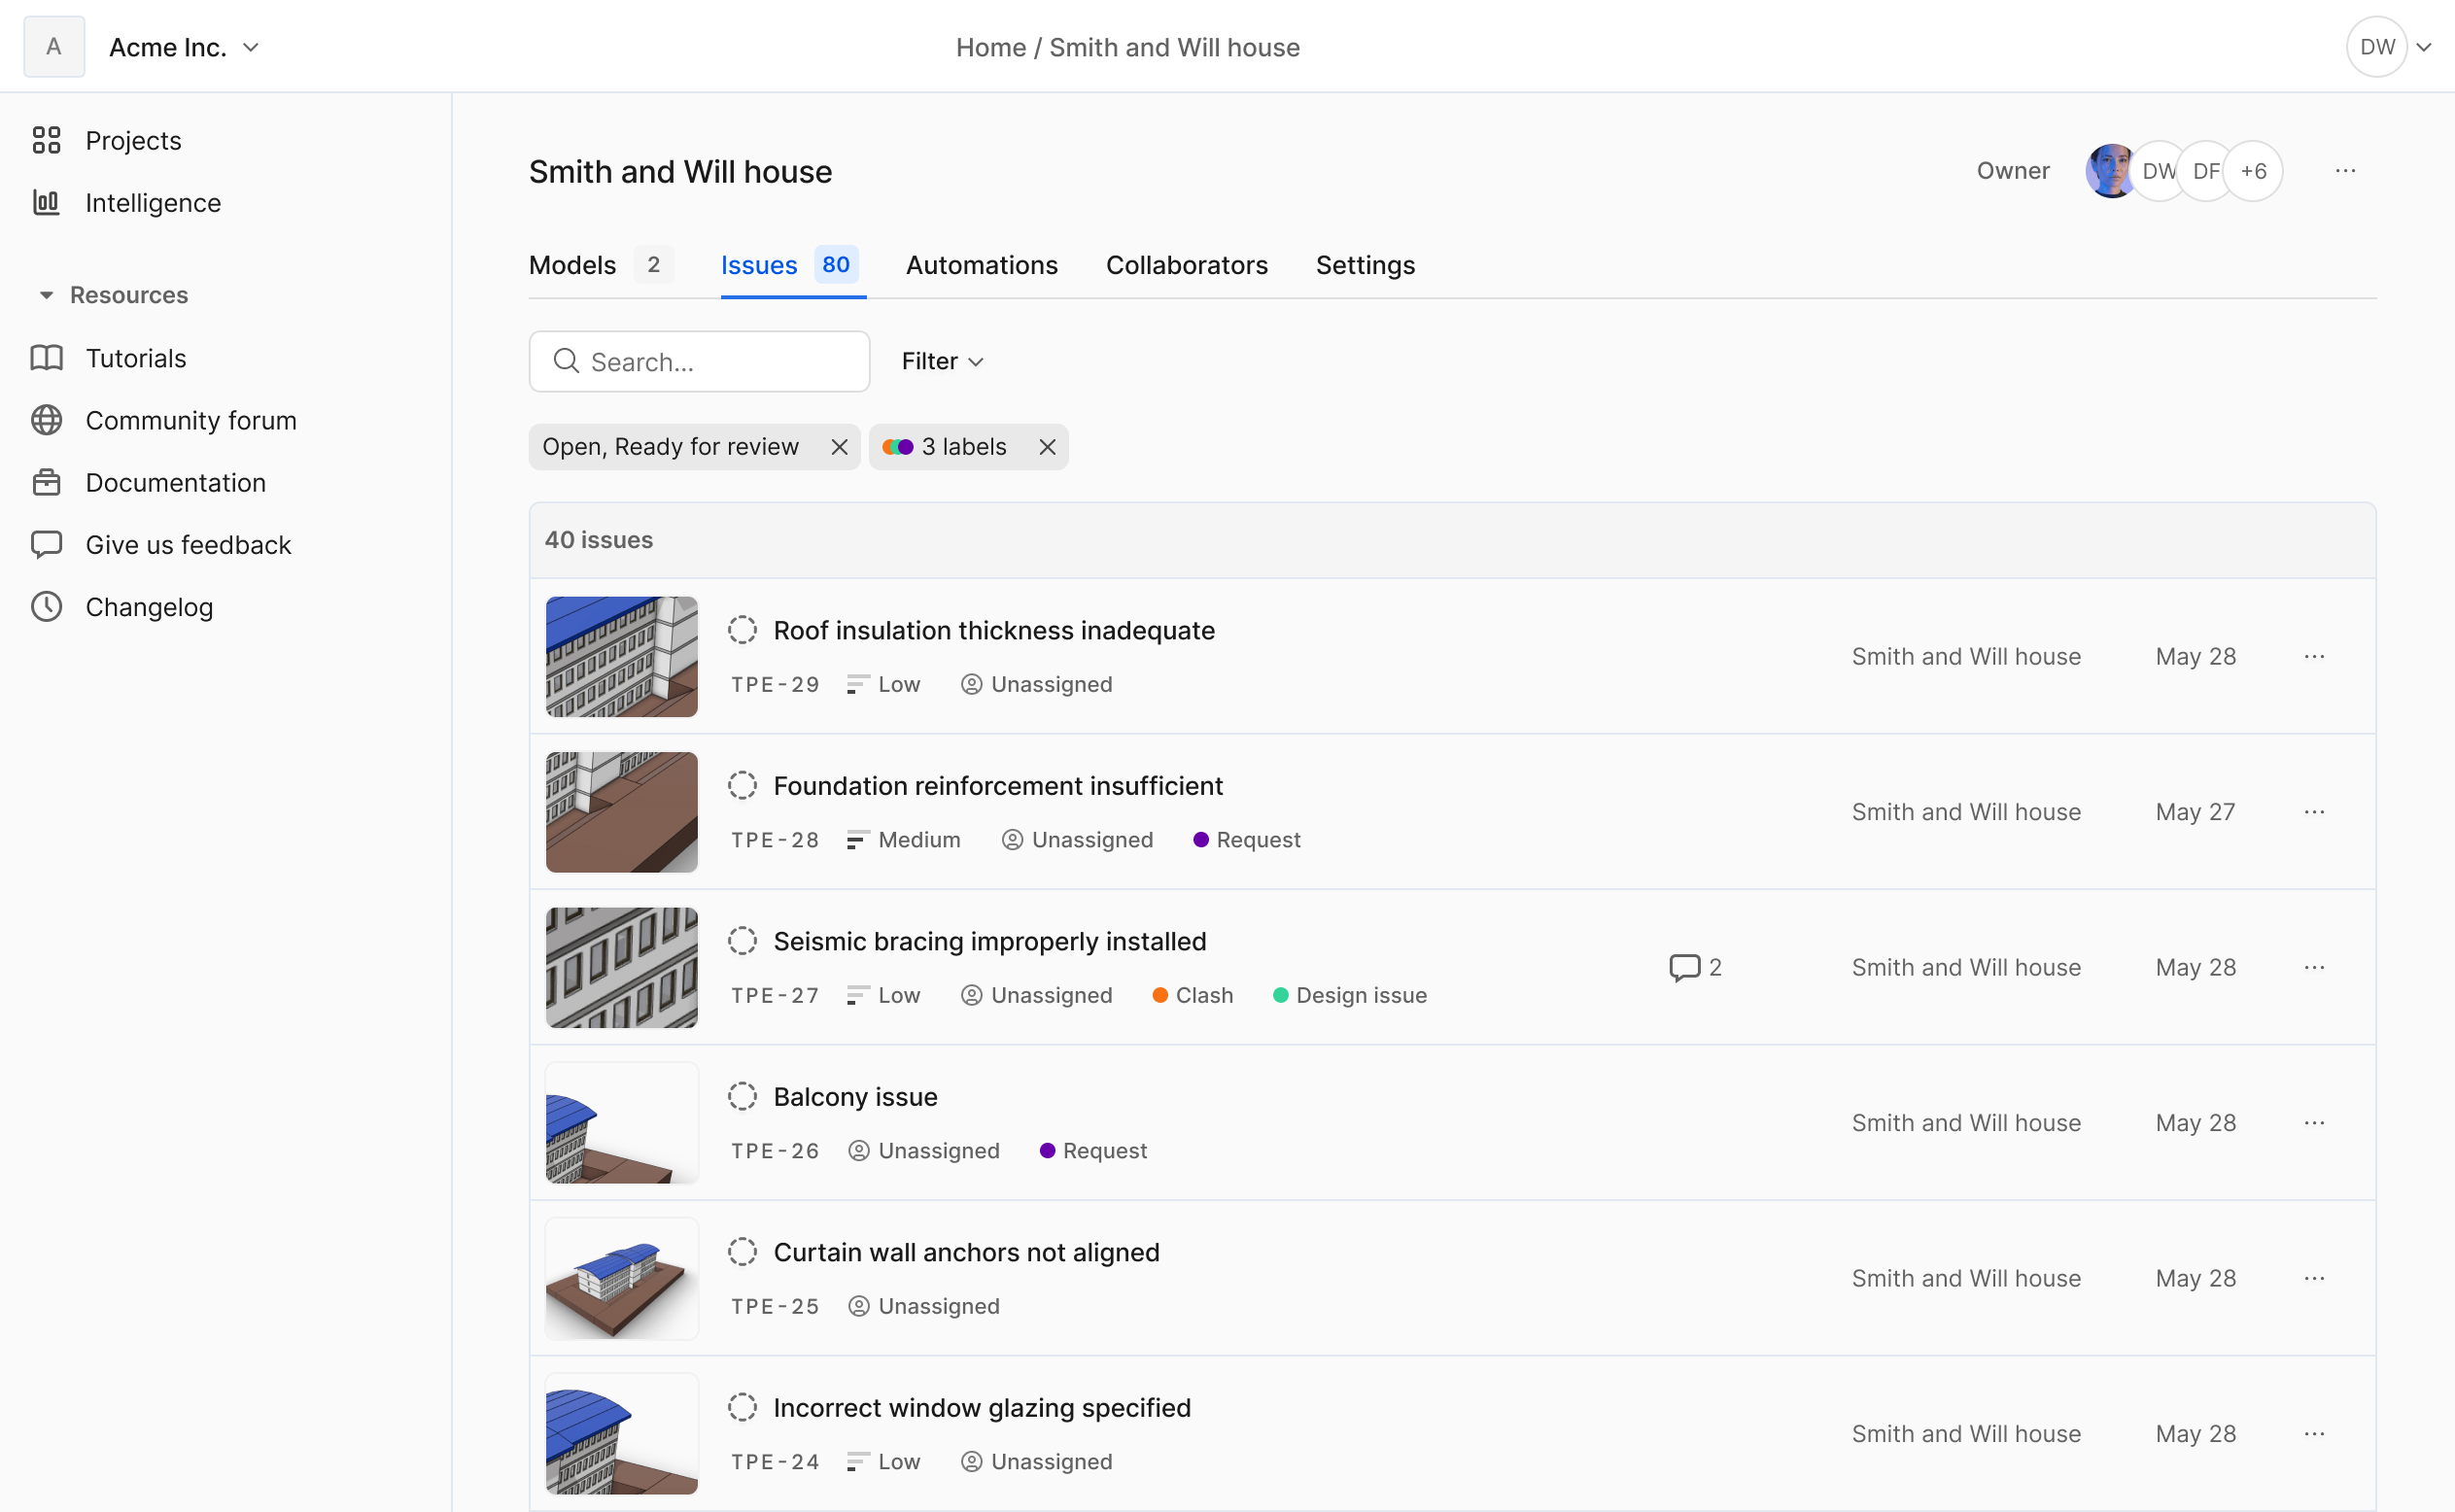
What's the difference between the Issues panel and the Issues tab?
What's the difference between the Issues panel and the Issues tab?
Can I export the issues list?
Can I export the issues list?
Issues in connectors
Issues are accessible directly in your desktop applications through Speckle connectors for Revit, Rhino, SketchUp, Navisworks, and other supported applications. When you load a model in a connector, you’ll see an issue icon with the count of open issues. Click it to view the full list of issues for that model, complete with all properties like labels, priority, and assignees. Click any issue to see the associated object highlighted in your host application. This lets you address problems without switching between your desktop app and the web interface.Can I create issues from the connector?
Can I create issues from the connector?
Can I comment on issues from the connector?
Can I comment on issues from the connector?
Can I resolve an issue from the connector?
Can I resolve an issue from the connector?
Will issues update in real-time in my desktop app?
Will issues update in real-time in my desktop app?
Issues in Speckle Intelligence
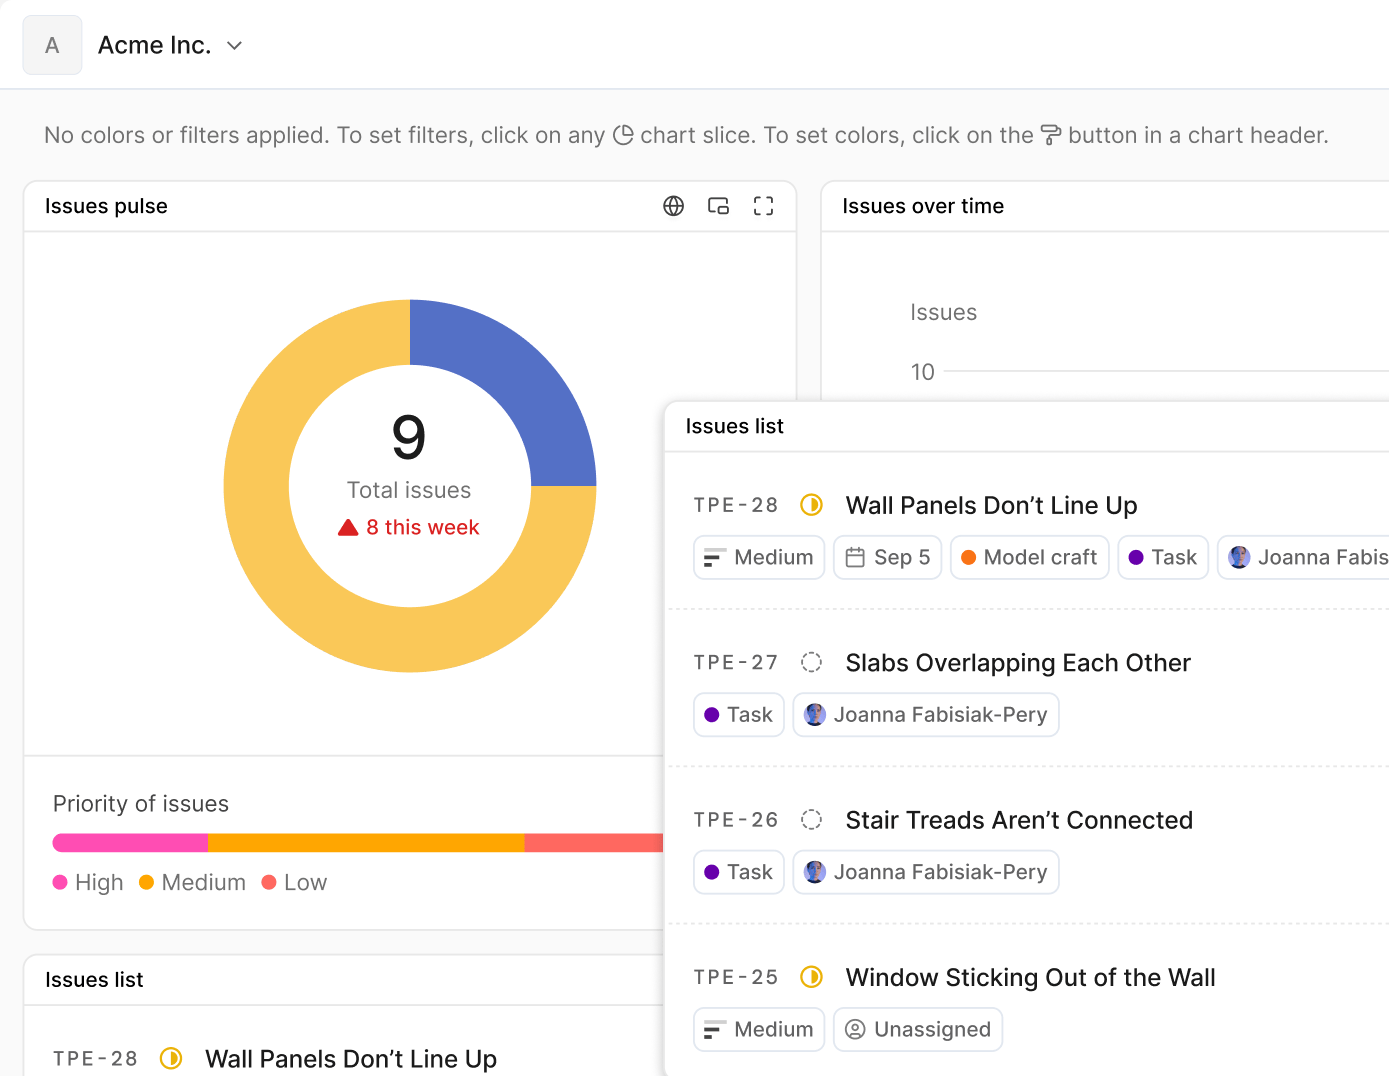
- List all issues for loaded models
- Filter by label, assignee, or other properties
- Track issue counts over time by model version
- Visualize issue distribution across your project
Version tracking
Issues are tied to the model version they were created on. This ensures you can always see the exact state of the model when the problem was identified. When you open an issue, it shows the latest model version by default. To see the original model state:- Open the issue
- Click the ··· menu on the issue in the Issues panel
- Select Load with original version
What if the object an issue references was deleted in later versions?
What if the object an issue references was deleted in later versions?
Should I close issues when I publish a new version with fixes?
Should I close issues when I publish a new version with fixes?
Notifications
You receive email notifications when:- An issue is assigned to you
- Someone mentions you in an issue or reply
- Someone replies to an issue you created, are assigned to, or have previously commented on
Permissions
Issue permissions depend on your project role and whether you created or are assigned to a specific issue.| Reviewer | Contributor | Owner | Public users | |
|---|---|---|---|---|
| View issues | Yes | Yes | Yes | Yes – if public project |
| Create issues | Yes | Yes | Yes | Yes – if allowed on project |
| Edit title and description | Yes – if issue creator or assignee | Yes – if issue creator or assignee | Yes | Yes – if issue creator |
| Add/Edit status, assignee, labels, date, priority | Yes – if issue creator or assignee | Yes – if issue creator or assignee | Yes | No |
| Get assigned an issue | Yes | Yes | Yes | No |
| Delete issues | Yes – if issue creator | Yes – if issue creator | Yes | Yes – if issue creator |
| Comment on issues | Yes | Yes | Yes | Yes – if enabled on project |
| Edit comments | No | No | No | No |
Important notes
- Nobody can edit issue comments after posting, including project owners
- You must have a Speckle account to create issues or comment, even in public projects
- Anyone in the workspace can be assigned to an issue, regardless of their project role
- Being assigned to an issue grants you edit permissions for that issue’s title, description, and properties
- Configure external user permissions from Project settings > Visibility
If an issue action is blocked
Check these conditions:- Cannot create issue -> confirm at least one object is selected.
- Cannot edit issue -> only issue creator, assignee, or owner can edit.
- Cannot comment -> confirm user has project access and signed-in account.
- Cannot see expected issue -> check filters and include Done if needed.
- Cannot assign user -> confirm user has access to that project.
Why can't I edit someone else's issue?
Why can't I edit someone else's issue?
Can I remove myself as an assignee?
Can I remove myself as an assignee?
Why can't I edit my own comment?
Why can't I edit my own comment?
Can external users see who's assigned to issues?
Can external users see who's assigned to issues?
Availability
The Issues feature is fully available without limits in all Speckle plans, including Free. For self-hosted Speckle servers, the core Issues functionality is available including issue title, description, status tracking, attachments, and replies. Additional features like labels, priority, assignee, due dates, and markup attachments are available only in hosted Speckle workspaces.Why don't self-hosted servers have all features?
Why don't self-hosted servers have all features?
Will self-hosted servers get feature parity in the future?
Will self-hosted servers get feature parity in the future?