Visual style
Spatial focus
Readability
Share presentations securely
Presentations can be shared with a tokenized link from the Share button.- Expiry: Set an expiration date so access ends automatically.
- Password: Add a password to require an unlock step before viewing.
- Revocation: Revoke issued links from Project settings > Tokens.
View modes
Use view modes to find the perfect visual setup for presenting, reviewing, or working on your model.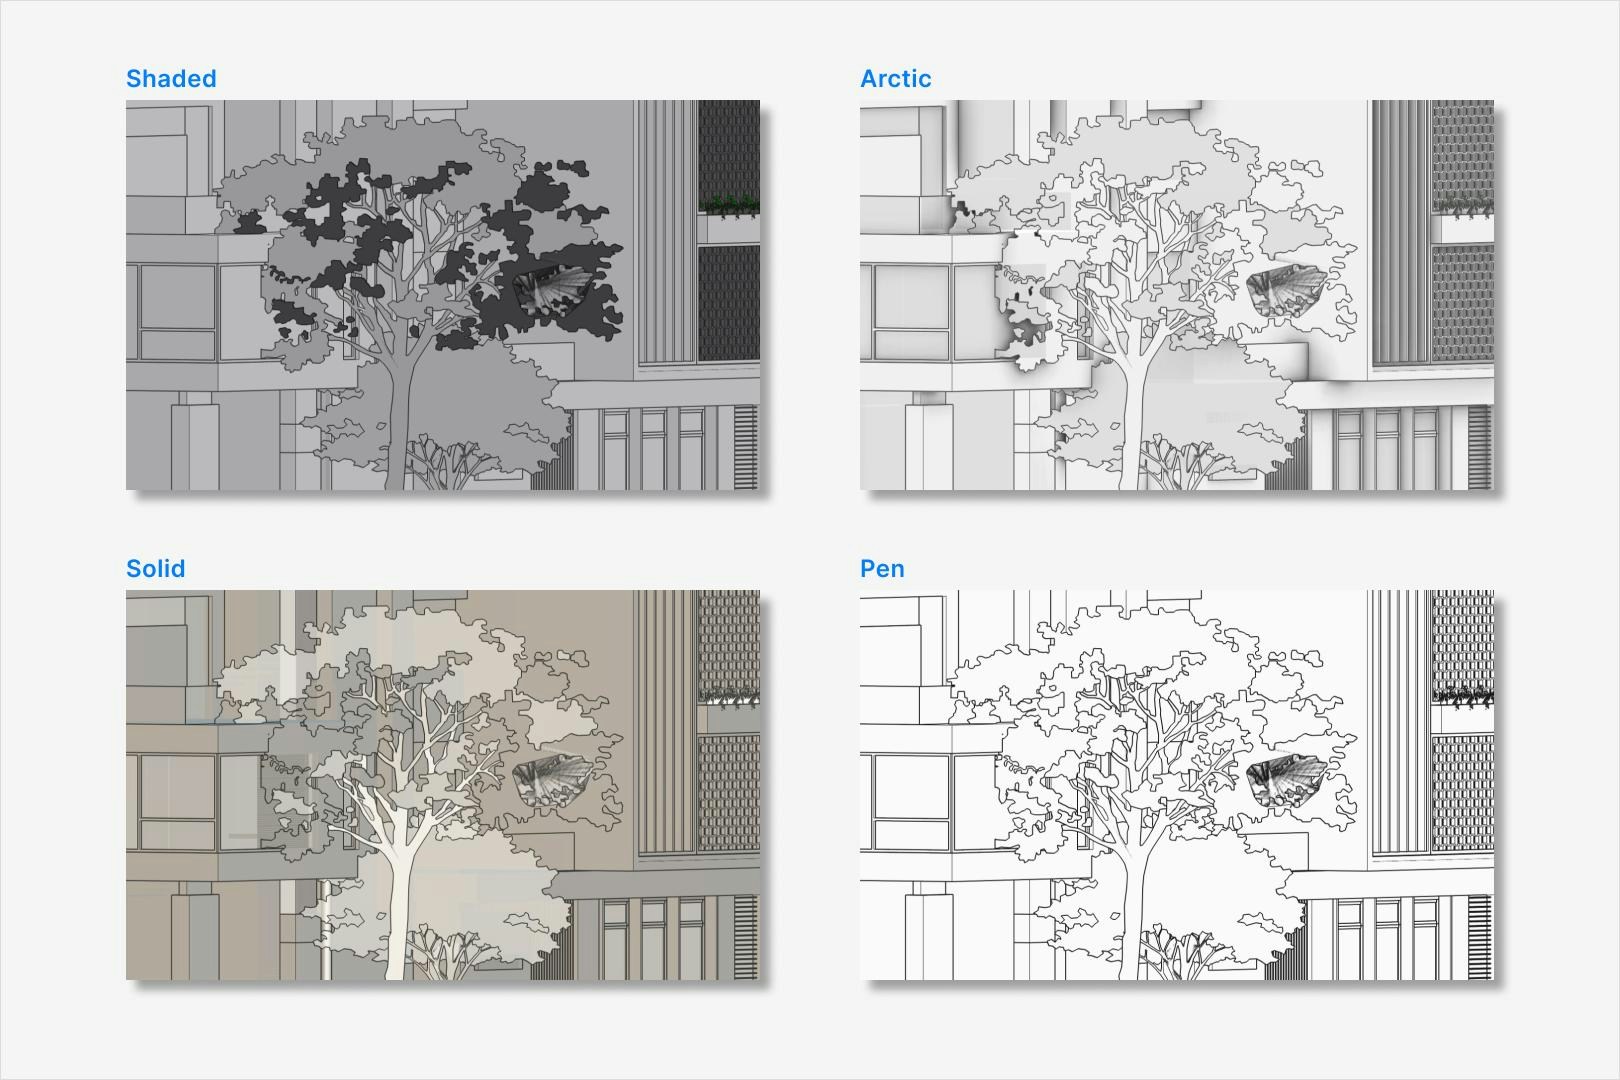
The different appearance of the available view modes
View mode settings
Speckle’s view modes let you switch visual styles and tweak display settings to suit your needs:- Pick a style. Pick from Pen, Arctic, Shaded and more styles.
- Edge toggle. Turn edge lines on or off to highlight or simplify your view.
- Line thickness. Easily make lines thicker or thinner for clearer outlines and emphasis.
- Change color. Change the color of the model outlines to match your presentation or for clarity.

Select and configure the view modes
Can I set a default view mode?
Can I set a default view mode?
Can I set the edges to always be off?
Can I set the edges to always be off?
I have a very detailed model, will the edges be visible?
I have a very detailed model, will the edges be visible?
Sectioning
The Section box lets you carve out a 3D region in your model to reveal and inspect its interior geometry. Simply position and resize the box to slice through walls, floors, or any elements, exposing hidden details for review or presentation without permanently altering your model.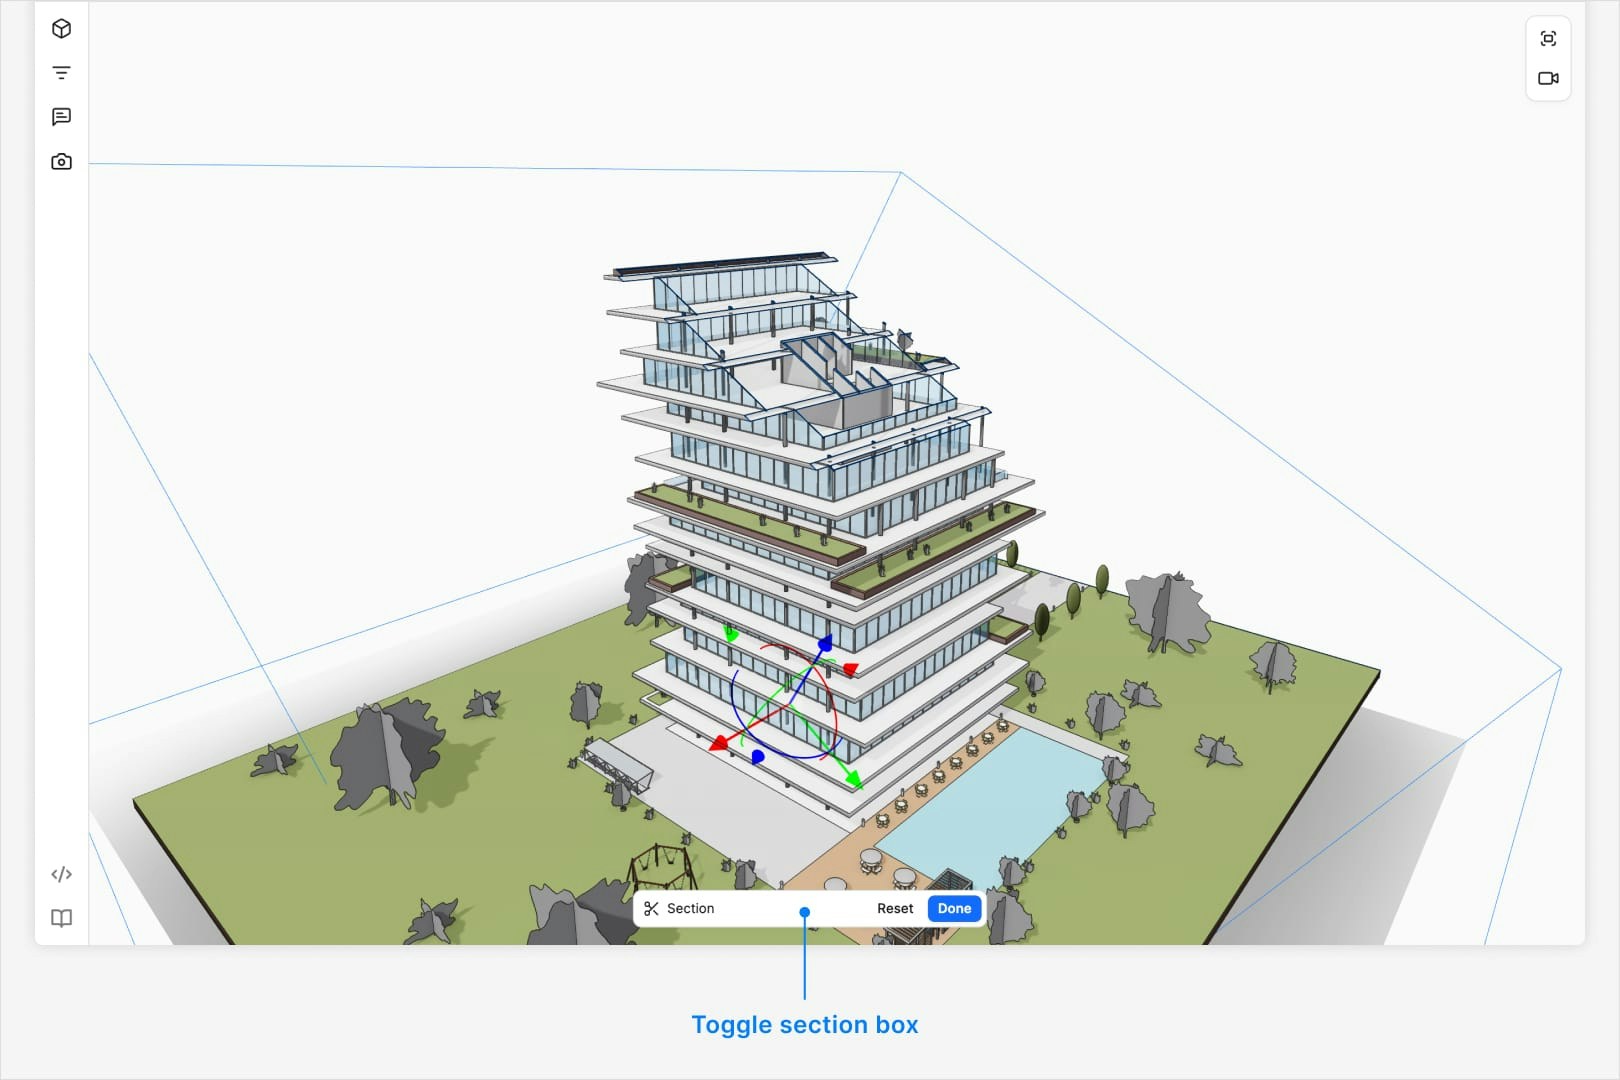
- Position: Use the translation gizmo at the center of the section box to move in the direction of each axis.
- Rotation: Use the rotation gizmo at the center of the section box to rotate in the direction of each axis.
- Size: Select a virtual face of the section box and then use the translation gizmo at the center of the face to move it in the perpendicular direction.
Can I set a default section?
Can I set a default section?
Can I set individual section planes?
Can I set individual section planes?
Can I set multiple section boxes?
Can I set multiple section boxes?
Lighting controls
Use Light Controls to make sure every part of your model is clearly visible, whether you’re inspecting fine details or presenting to stakeholders.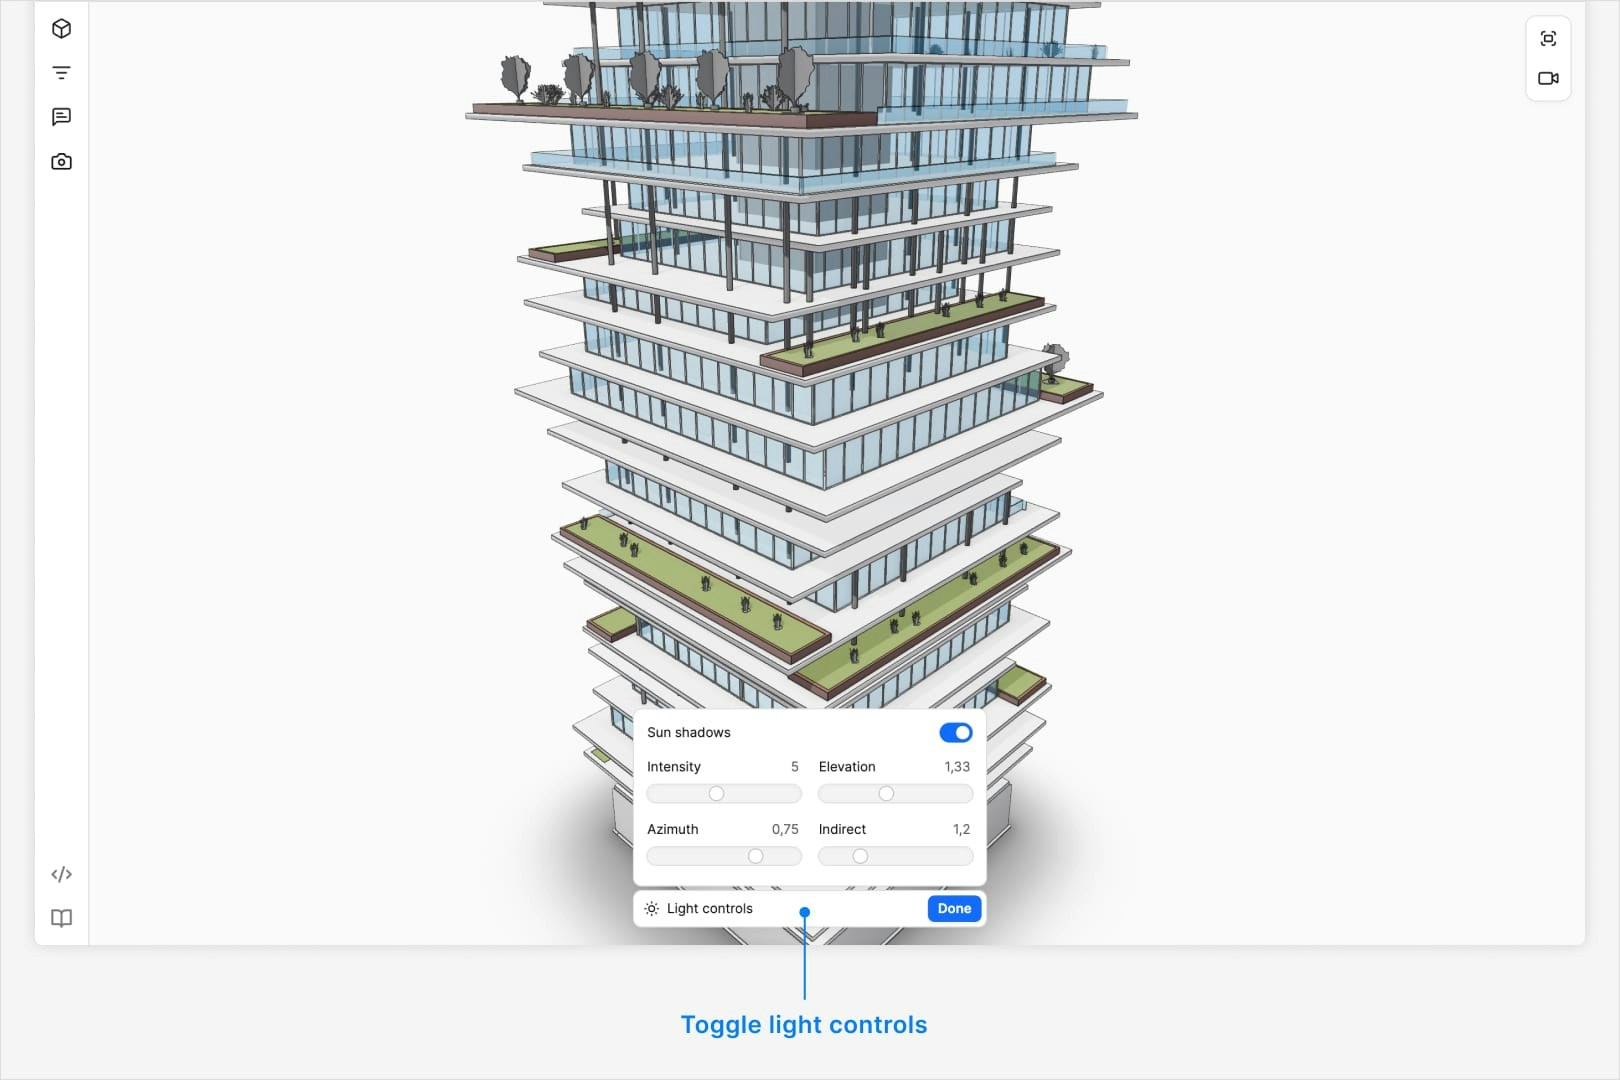
Light controls settings
Speckle’s lighting controls let you tweak how your model is lit to improve visibility and contrast:- Intensity. Increase or decrease overall brightness to suit your environment.
- Elevation. Adjust the vertical angle of the light source to highlight different surfaces.
- Azimuth. Change the horizontal rotation of the light to control shadow direction.
- Indirect. Modify the amount of ambient or bounced light for softer, more realistic shading.
Can I set a default light control?
Can I set a default light control?
Can I set the lighting to be a real time of day?
Can I set the lighting to be a real time of day?
Can I specify a location in the world for the lighting?
Can I specify a location in the world for the lighting?
Can I export the shadows?
Can I export the shadows?
Explode
The Explode tool breaks your model into its individual components, spreading them apart in the 3D space. This works best for small details or products to understand how they come together.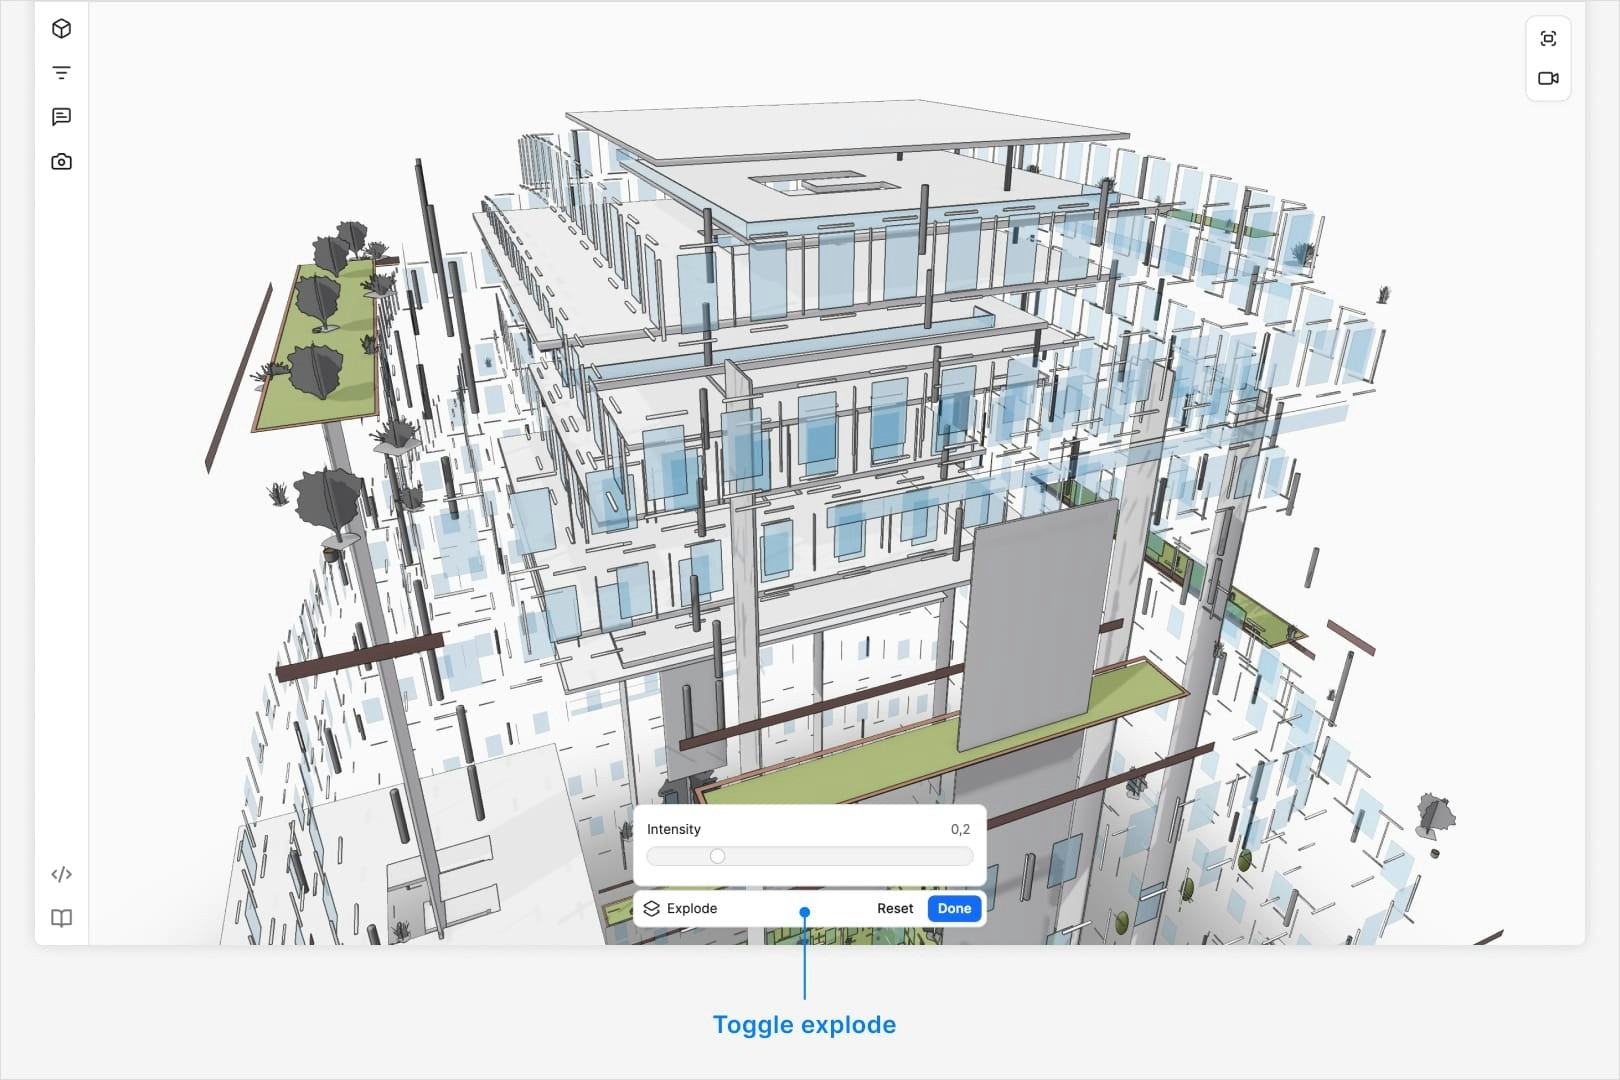
Can I constrain the explode to a single axis?
Can I constrain the explode to a single axis?
Can I explode by floor or other model elements?
Can I explode by floor or other model elements?
Can I explode a section?
Can I explode a section?
Why do some parts of the model explode more than others?
Why do some parts of the model explode more than others?
Camera controls
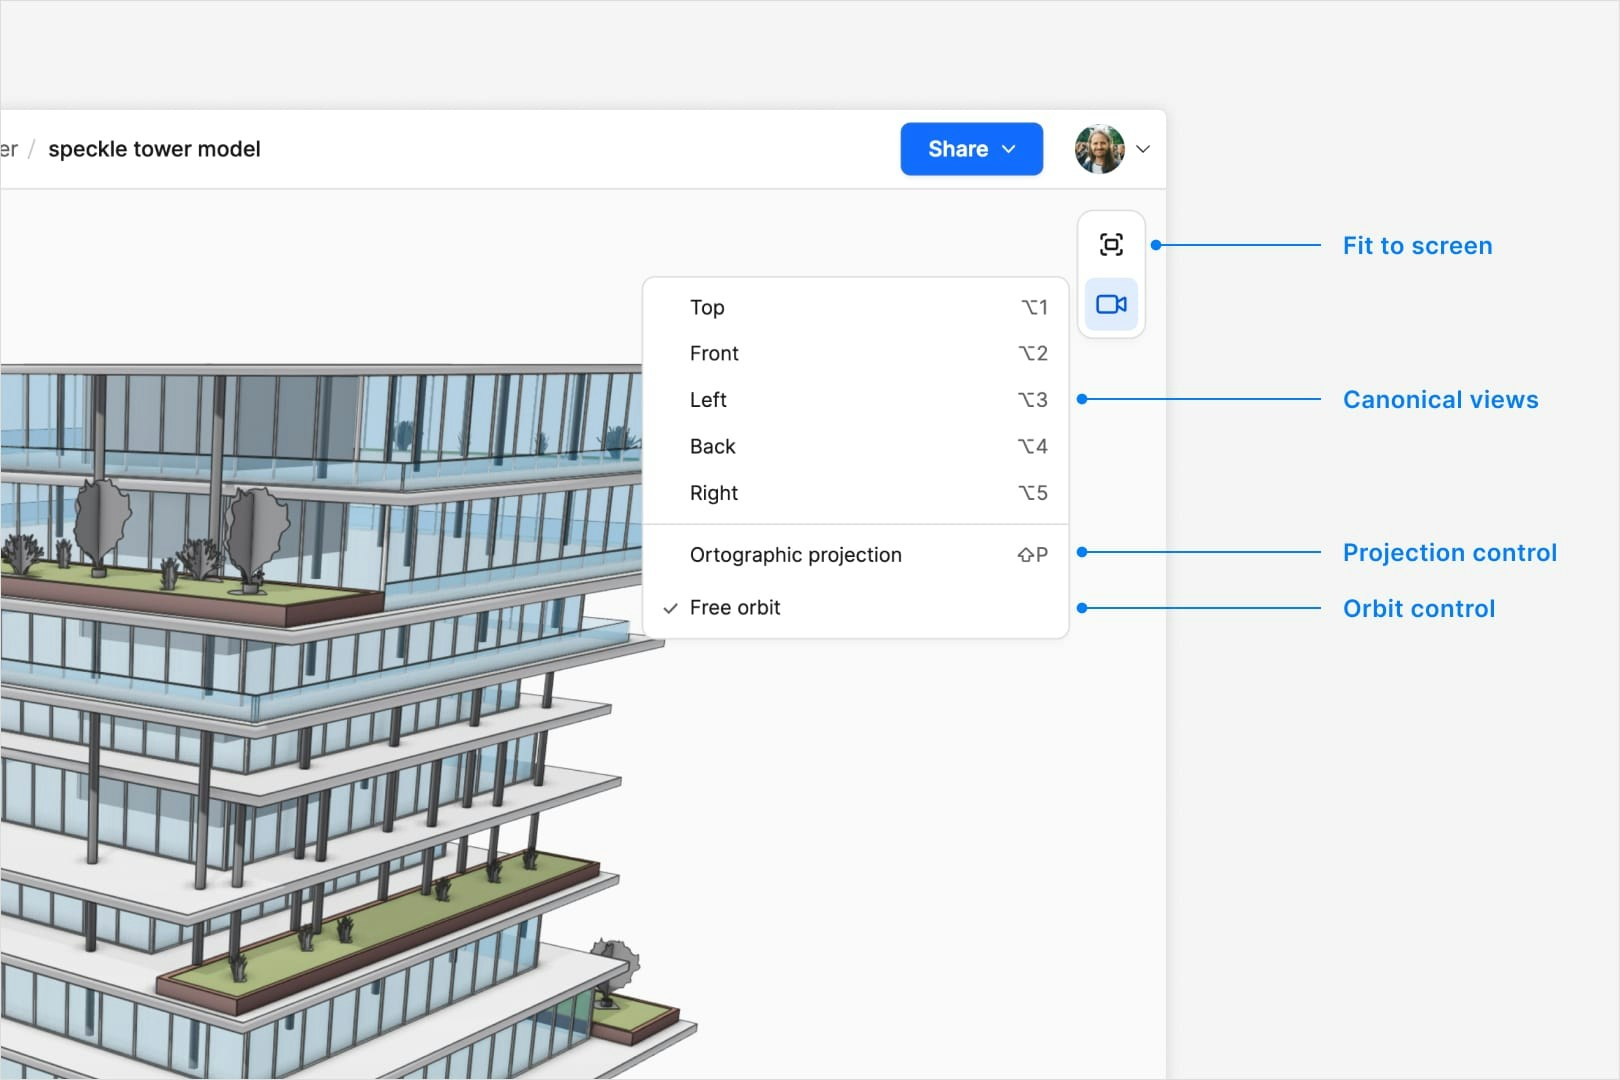
Fit to screen
The Fit button adjusts the camera to fit the entire model in the view. If an object or objects are selected, clicking the button will fit the camera to the selected objects.Canonical views
You can set the camera position and view to a canonical view: Top, Front, Left, Right, and Back.Can I set a default canonical view?
Can I set a default canonical view?
Can I set additional canonical views?
Can I set additional canonical views?
Can I add 2d plan or section drawings to include in the view?
Can I add 2d plan or section drawings to include in the view?
Can I show the levels/grids of the model in the view?
Can I show the levels/grids of the model in the view?
Projection
Speckle’s Projection settings let you switch between different camera views:- Perspective. A realistic view with vanishing points, perfect for presentations and spatial understanding.
- Orthographic. A flat, scale-accurate view without perspective distortion, ideal for precise measurement and technical review.
Can I set a default projection?
Can I set a default projection?
Can I change the FOV of the perspective view?
Can I change the FOV of the perspective view?