Setup
Install the connector
Open the ETABS connector
- Go to Tools.
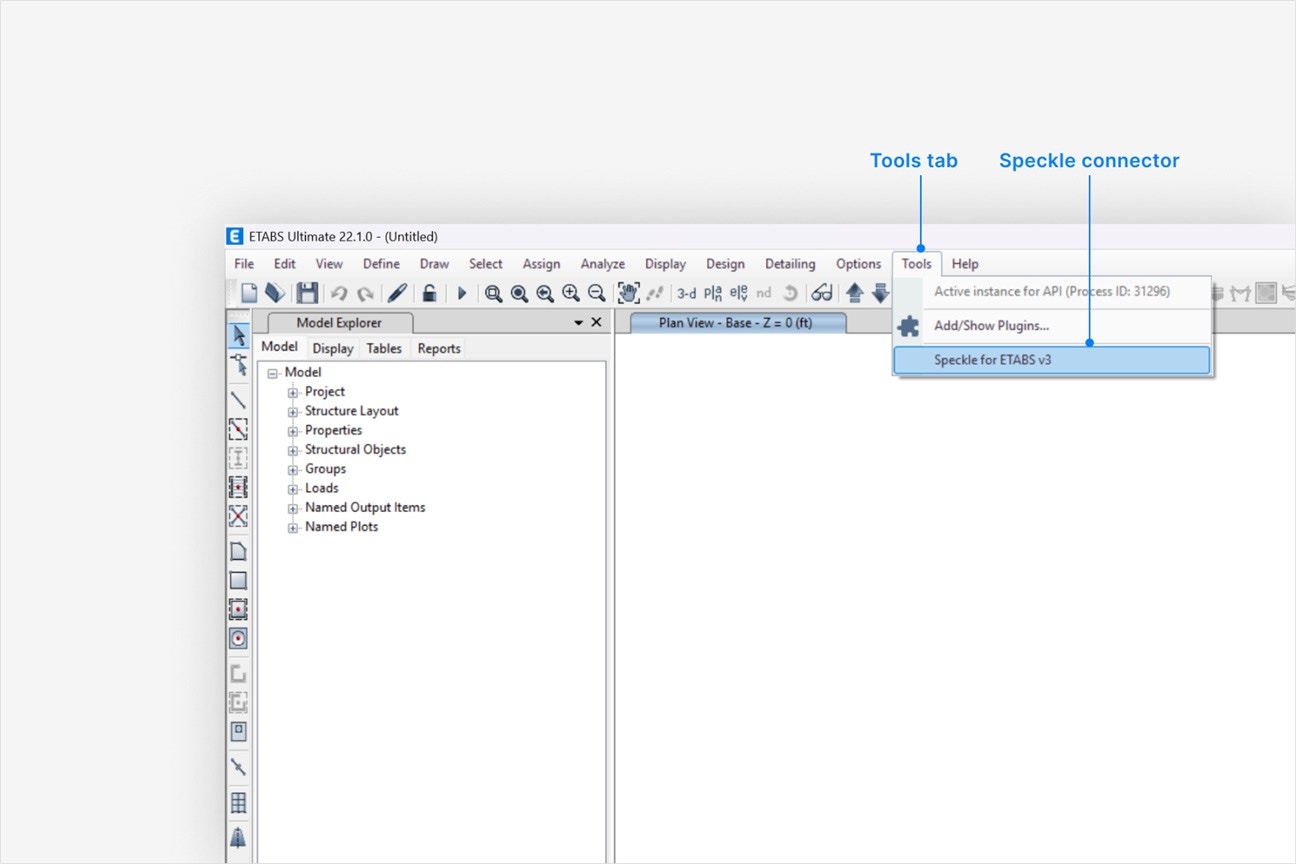
- Select Speckle to open the ETABS connector.
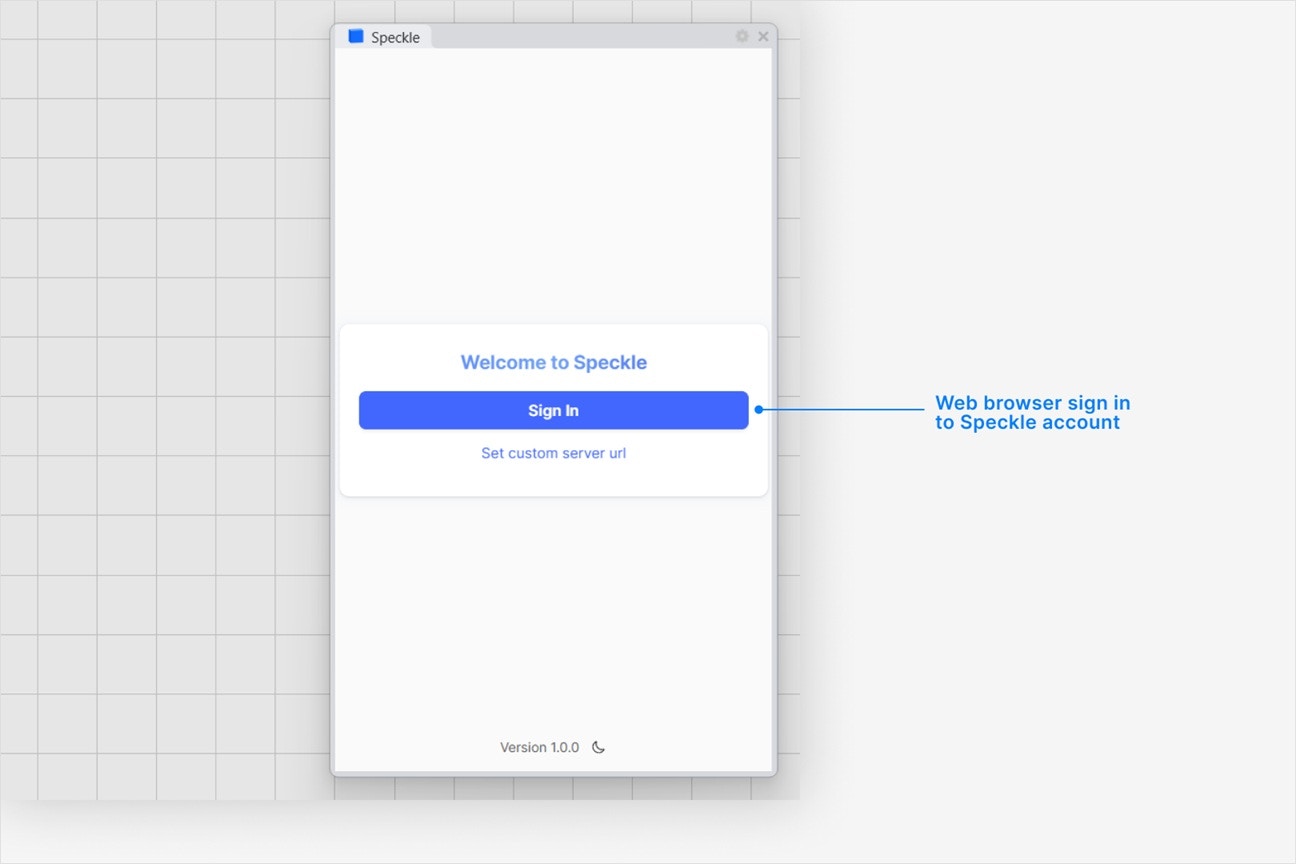
- Select Sign in if you haven’t linked your Speckle account.
How do I manually load the connector?
How do I manually load the connector?
- Navigate to
Tools -> Add/Show Plugins... - Click
Browseand navigate to the path{localappdata}\Computers and Structures\ETABS xx\Speckle\ - Select the
SpeckleConnectorCSI.dllfile. ClickAddand thenOk.
Why is the Speckle plugin not showing up after I installed the connector?
Why is the Speckle plugin not showing up after I installed the connector?
- Make sure your version of is one of the supported versions.
- Uninstall and reinstall your connector.
.exe or right-clicking and then selecting Open to run the installer.
Installation issues can also be caused by conflicting plugins.If you’re still experiencing problems, please report it in our Community Forum and include the following information:- Your application version
- Your Speckle connector version
What should I do if the plugin UI is empty or unresponsive, or if my application crashes?
What should I do if the plugin UI is empty or unresponsive, or if my application crashes?
log file in your directory at
AppData\Roaming\Speckle\Logs. Please report your problem in our Community
Forum and include the following information: - Your application
version - Your Speckle connector version - A copy of the logWhy can't I add a new account?
Why can't I add a new account?
How do I uninstall my connector?
How do I uninstall my connector?
Applications. For a full uninstall, you should also remove Speckle Desktop
Services as well as your Speckle connector.How do I update my connector to the latest version?
How do I update my connector to the latest version?
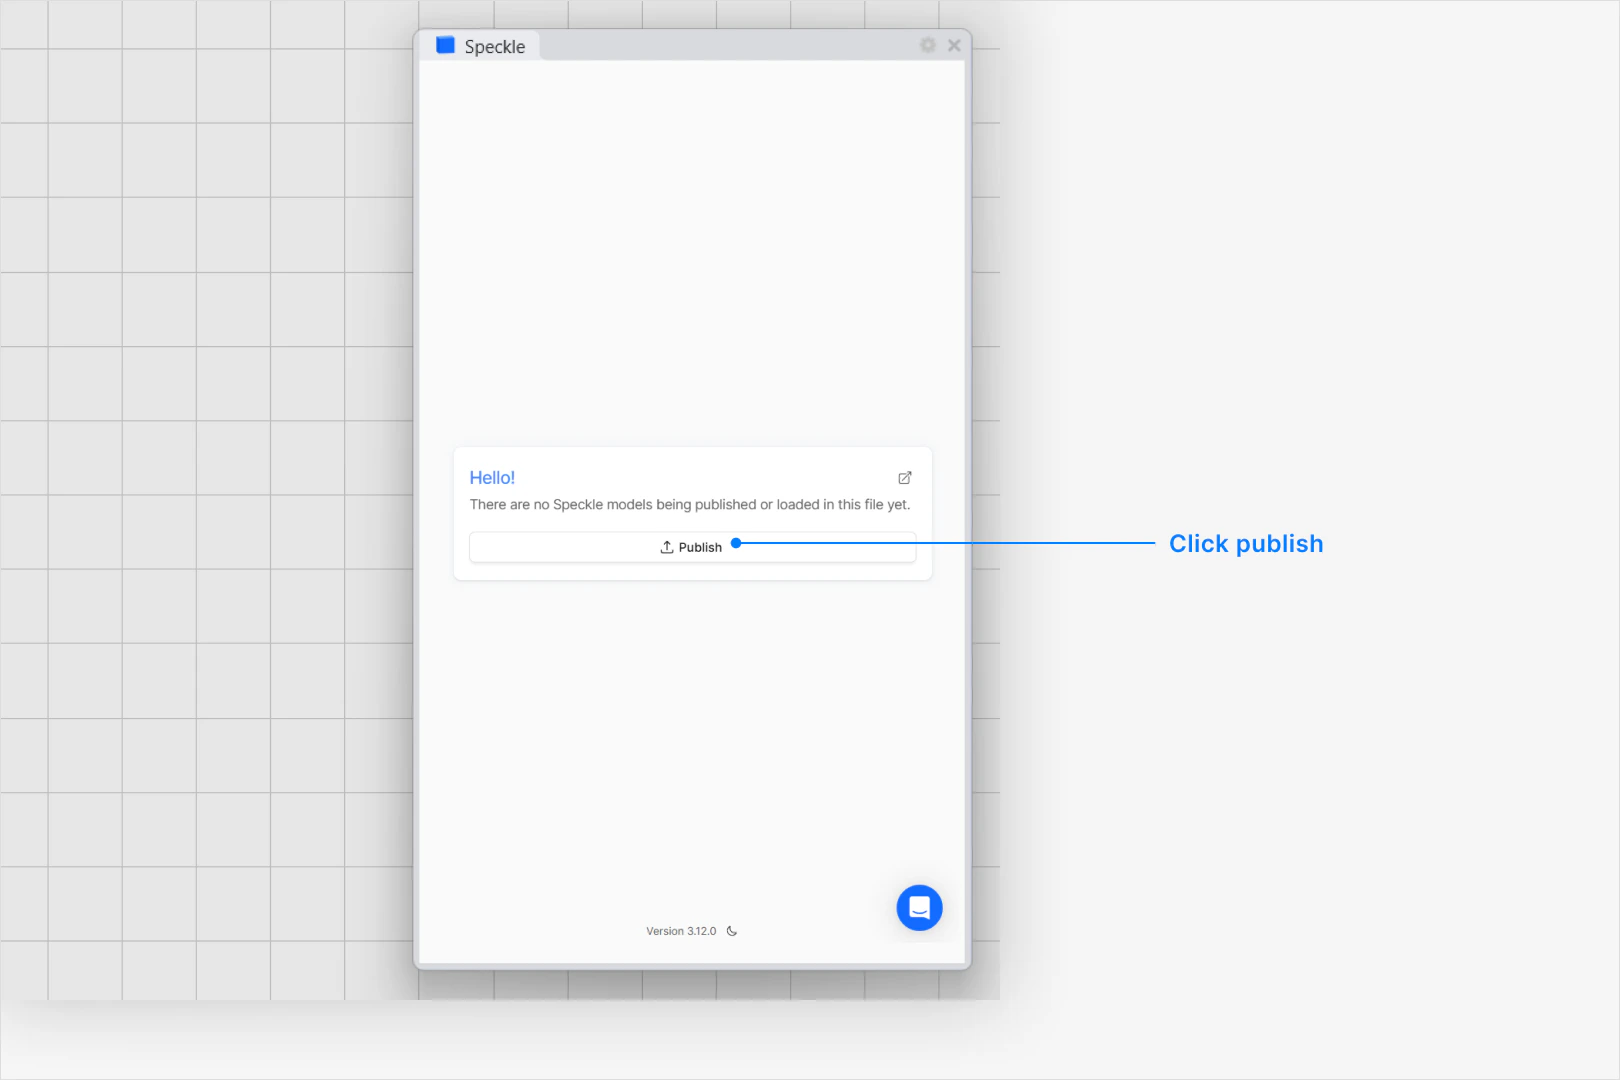
Publishing a Model
Select Publish
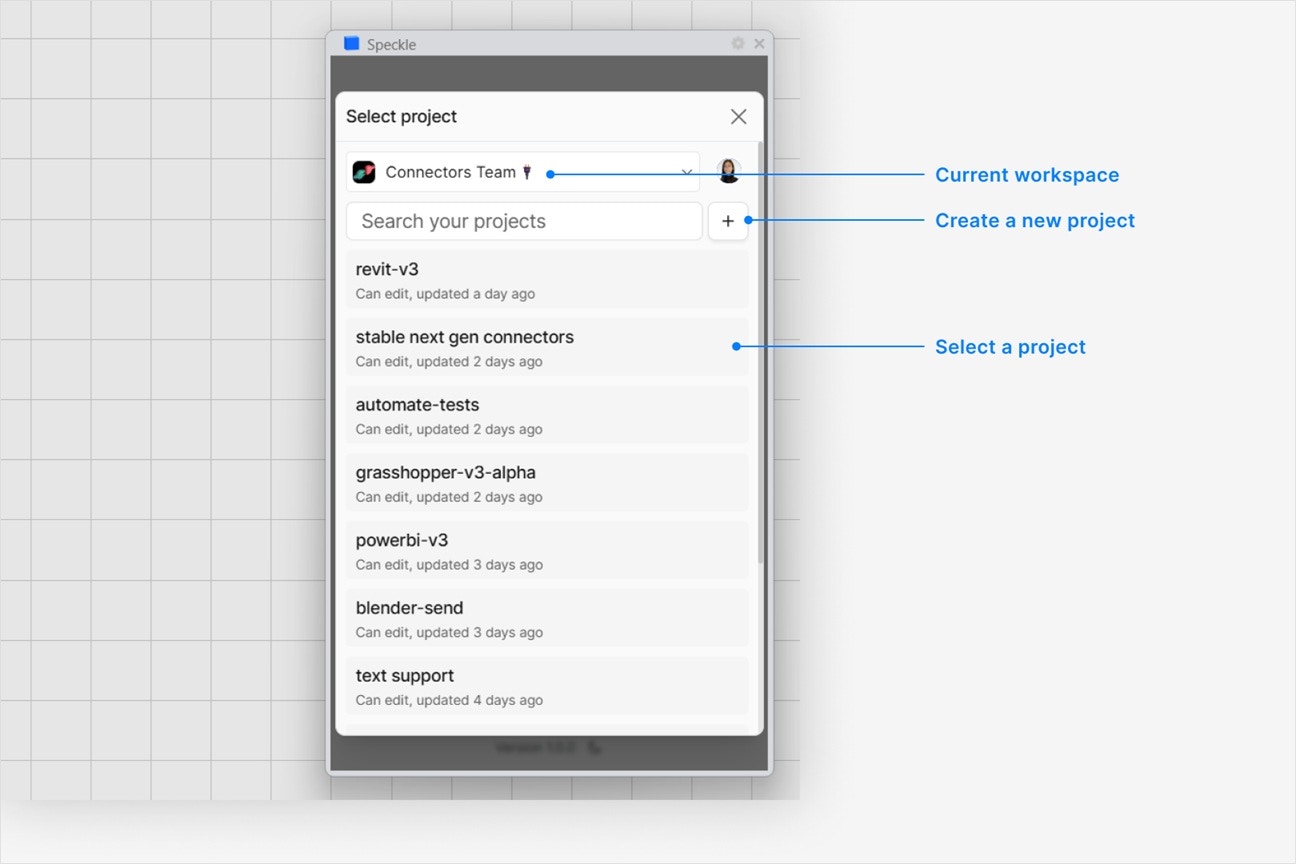
Choose a project
- Select an existing project - or select New Project to create one
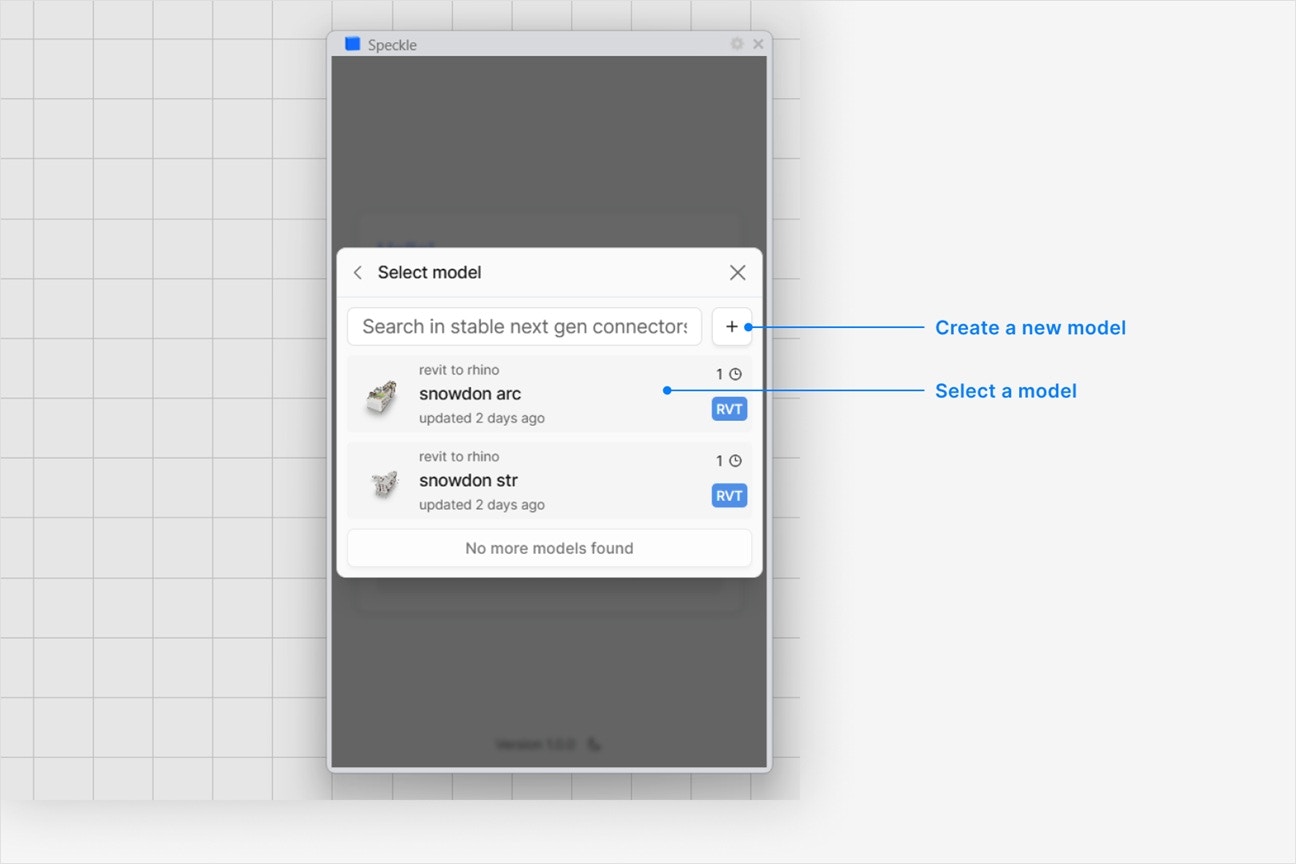
Choose a model
- Select an existing model - or select New Model to create one
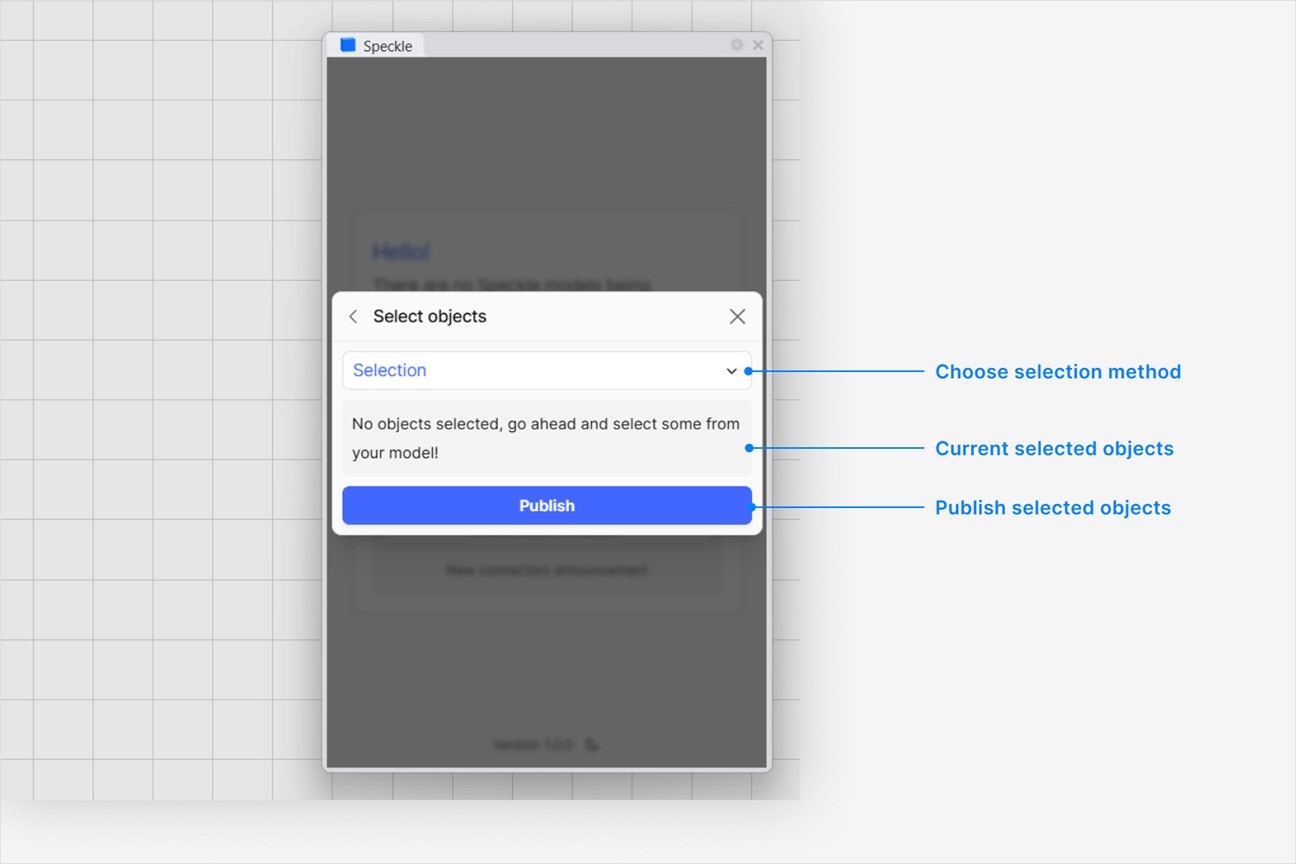
Select objects to publish
- In your application viewport, select the elements you want to publish.
- Select Publish.
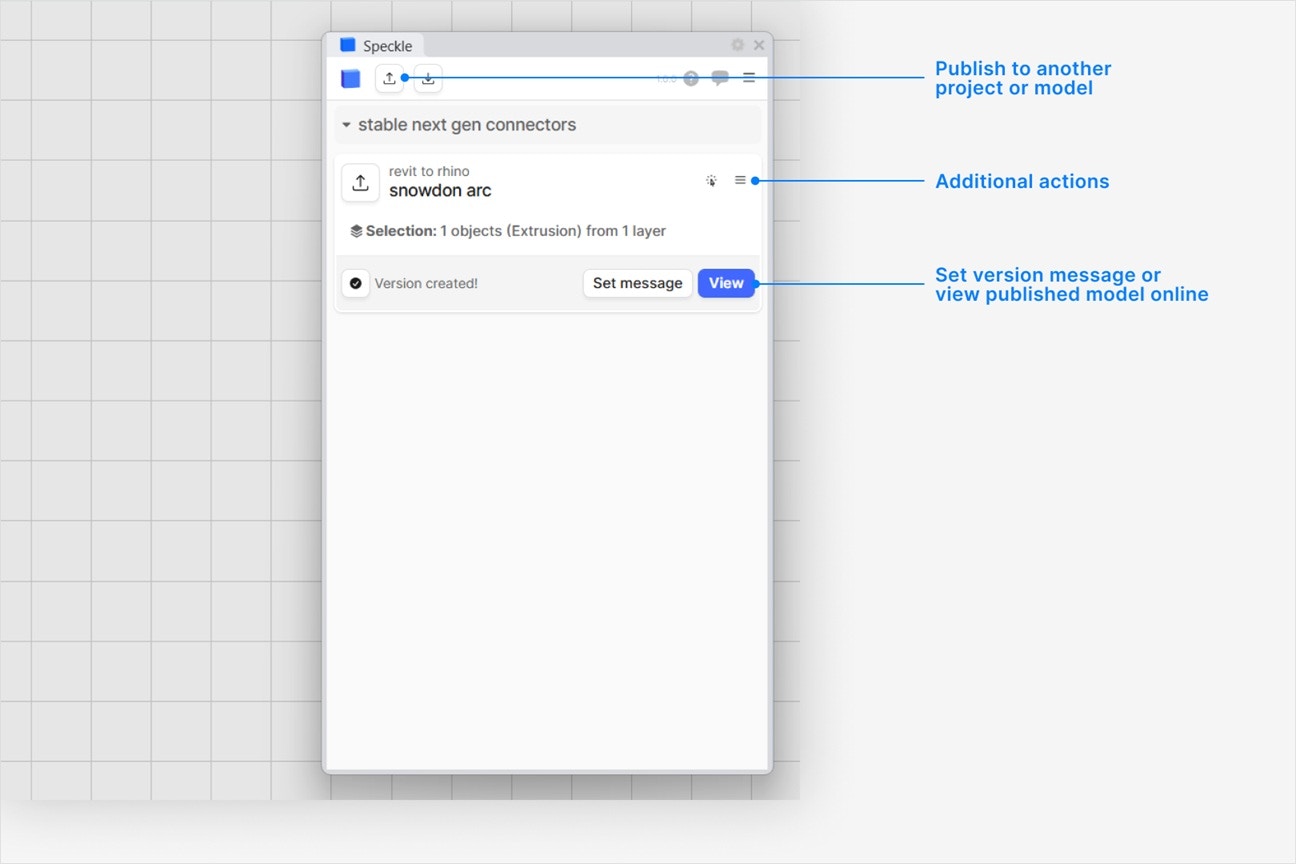
- Your model is now published to Speckle and is available to the rest of your team.
What types of ETABS elements can I publish to Speckle?
What types of ETABS elements can I publish to Speckle?
Joints, Frames, Tendons, Shells and Links. Each published object contains the following information:- Type
- Geometry as
Mesh,CurveorPoint - Children objects, such as
Joints - Custom properties
How do I see the custom properties on my published ETABS elements, like sections or area metrics?
How do I see the custom properties on my published ETABS elements, like sections or area metrics?
properties field when you select and view an ETABS object in your browser. Custom properties vary depending on the type of ETABS element, and can include:- Assignments (e.g.
materialandsection) - Geometry metrics (e.g. length or area)
- Object ID (e.g. sub-classification for
Frame->Column,Beam, orBrace, label, and associated level)
Where can I find the material or section used for an object in my Speckle model?
Where can I find the material or section used for an object in my Speckle model?
- Open the
Scene Explorertab in the Navigation Bar to the left (or pressShift+E) - Click
Switch to Dev Mode. This will give you full access to all objects and properties in your model. - Expand the
sectionProxiesormaterialProxiesitem. - Expand any item in this list to see a
SectionorMaterialwith all of its properties. The section can be matched back to any element based on itsname, and the material can be matched to any section based on itsname.
Does the ETABS connector publish model analysis results?
Does the ETABS connector publish model analysis results?
info.analysisResults.To inspect them in the browser, open the model version, switch the Scene Explorer to Dev Mode, and inspect the root object instead of selecting an individual frame, shell, joint, or link.Which object properties do not get published with the ETABS connector?
Which object properties do not get published with the ETABS connector?
- Load cases, patterns and combinations
- Grids and grid information
- Analysis results, which are published at the root object level under
info.analysisResults
Why does my model have the wrong colors in the web browser viewer?
Why does my model have the wrong colors in the web browser viewer?
Are bitmap or image-based material textures supported?
Are bitmap or image-based material textures supported?
Why are some objects that I published missing from my model?
Why are some objects that I published missing from my model?