Documentation Index
Fetch the complete documentation index at: https://docs.speckle.systems/llms.txt
Use this file to discover all available pages before exploring further.
Setup
Install the connector
Why is the Speckle plugin not showing up after I installed the connector?
Why is the Speckle plugin not showing up after I installed the connector?
- Make sure your version of is one of the supported versions.
- Uninstall and reinstall your connector.
.exe or right-clicking and then selecting Open to run the installer.
Installation issues can also be caused by conflicting plugins.If you’re still experiencing problems, please report it in our Community Forum and include the following information:- Your application version
- Your Speckle connector version
What should I do if the plugin UI is empty or unresponsive, or if my application crashes?
What should I do if the plugin UI is empty or unresponsive, or if my application crashes?
log file in your directory at AppData\Roaming\Speckle\Logs.
Please report your problem in our Community Forum and include the following information:- Your application version
- Your Speckle connector version
- A copy of the log
Why can't I add a new account?
Why can't I add a new account?
How do I uninstall my connector?
How do I uninstall my connector?
Applications. For a full uninstall, you should also remove Speckle Desktop Services as well as your Speckle connector.How do I update my connector to the latest version?
How do I update my connector to the latest version?
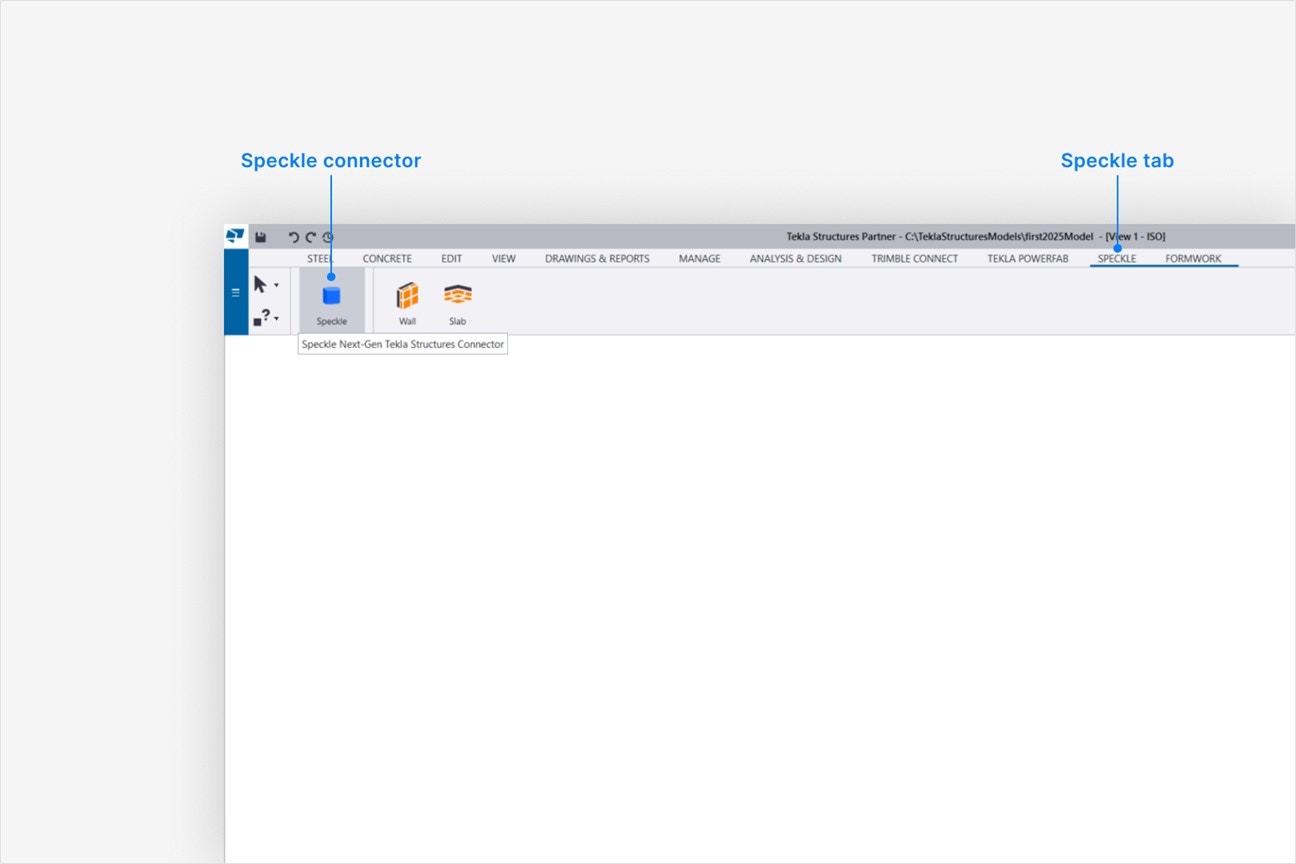
The Speckle tab doesn't appear in my Tekla Structures ribbon after installation
The Speckle tab doesn't appear in my Tekla Structures ribbon after installation
- VPN or IT security restrictions blocking file operations
- Tekla being installed on a non-standard drive
- Insufficient permissions during installation
-
Check if the connector files exist in the correct Tekla extensions folder:
- For Tekla 2025:
C:\TeklaStructures\2025.0\Environments\common\extensions\Speckle3TeklaStructures - For Tekla 2024:
C:\ProgramData\Trimble\Tekla Structures\2024.0\Environments\common\extensions\Speckle3TeklaStructures - For Tekla 2023:
C:\ProgramData\Trimble\Tekla Structures\2023.0\Environments\common\extensions\Speckle3TeklaStructures
- For Tekla 2025:
-
If the
Speckle3TeklaStructuresfolder is missing, manually copy it from the Speckle Manager installation directory to the appropriate Tekla extensions folder above. - Restart Tekla Structures after copying the files.
- Verify the connector appears in the Applications & Components panel within Tekla.
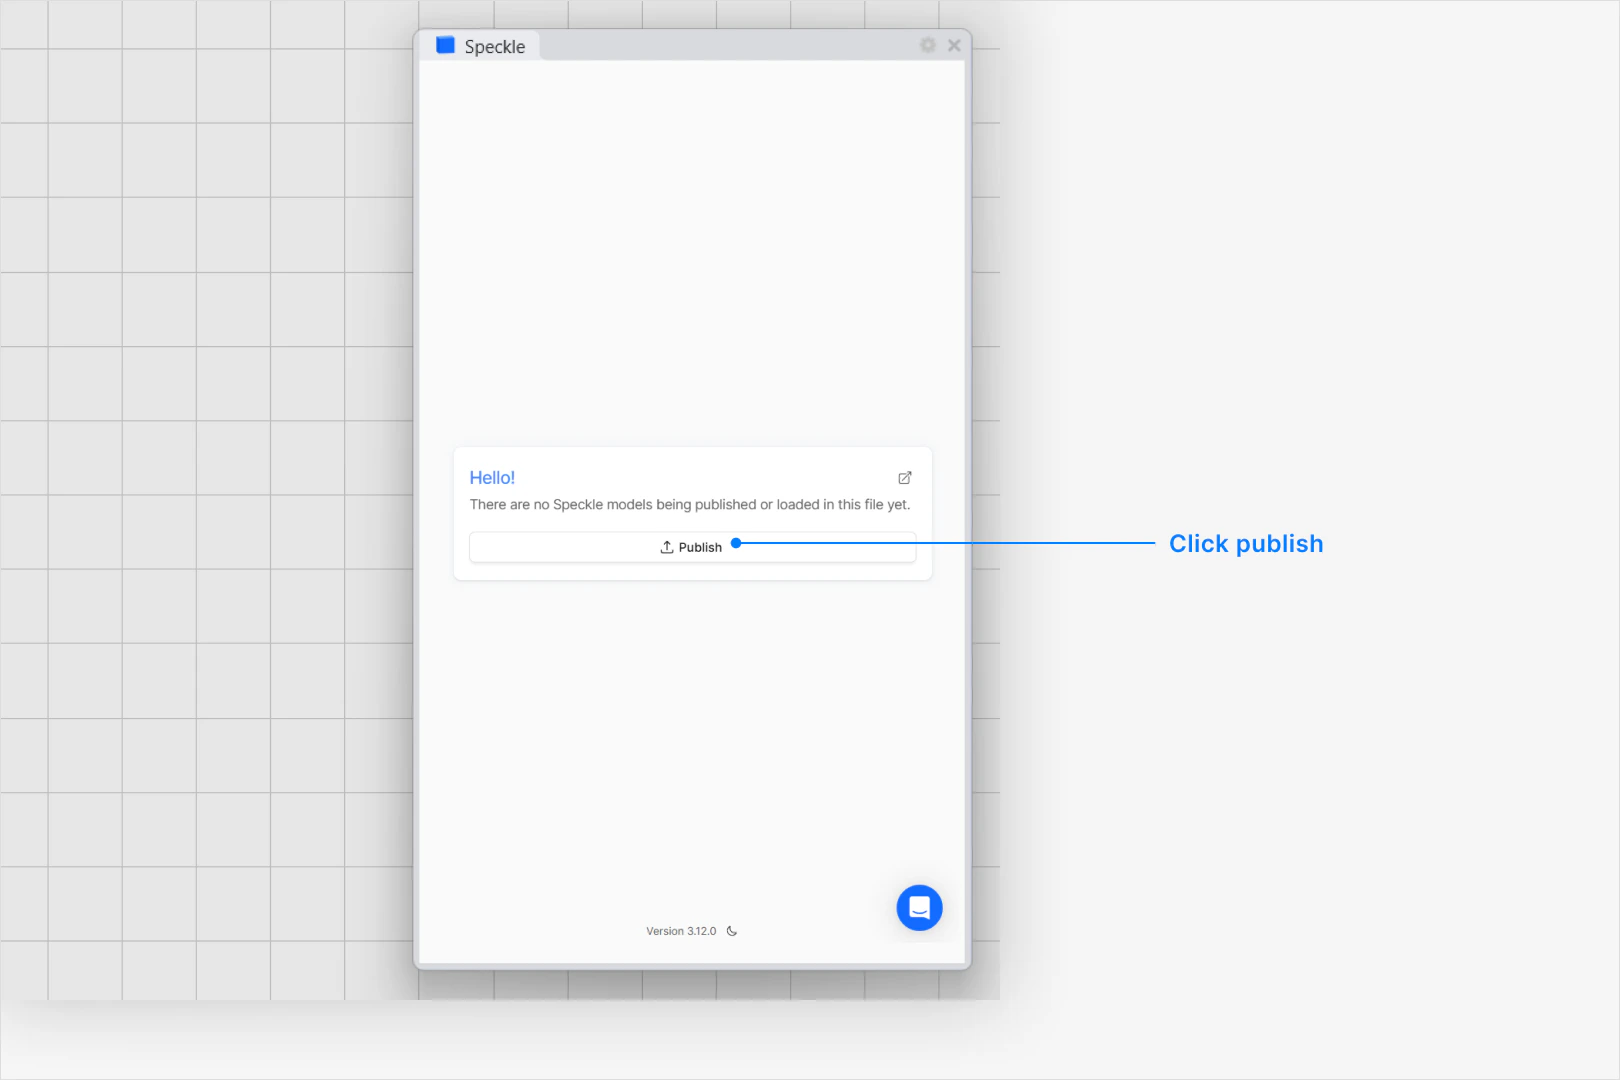
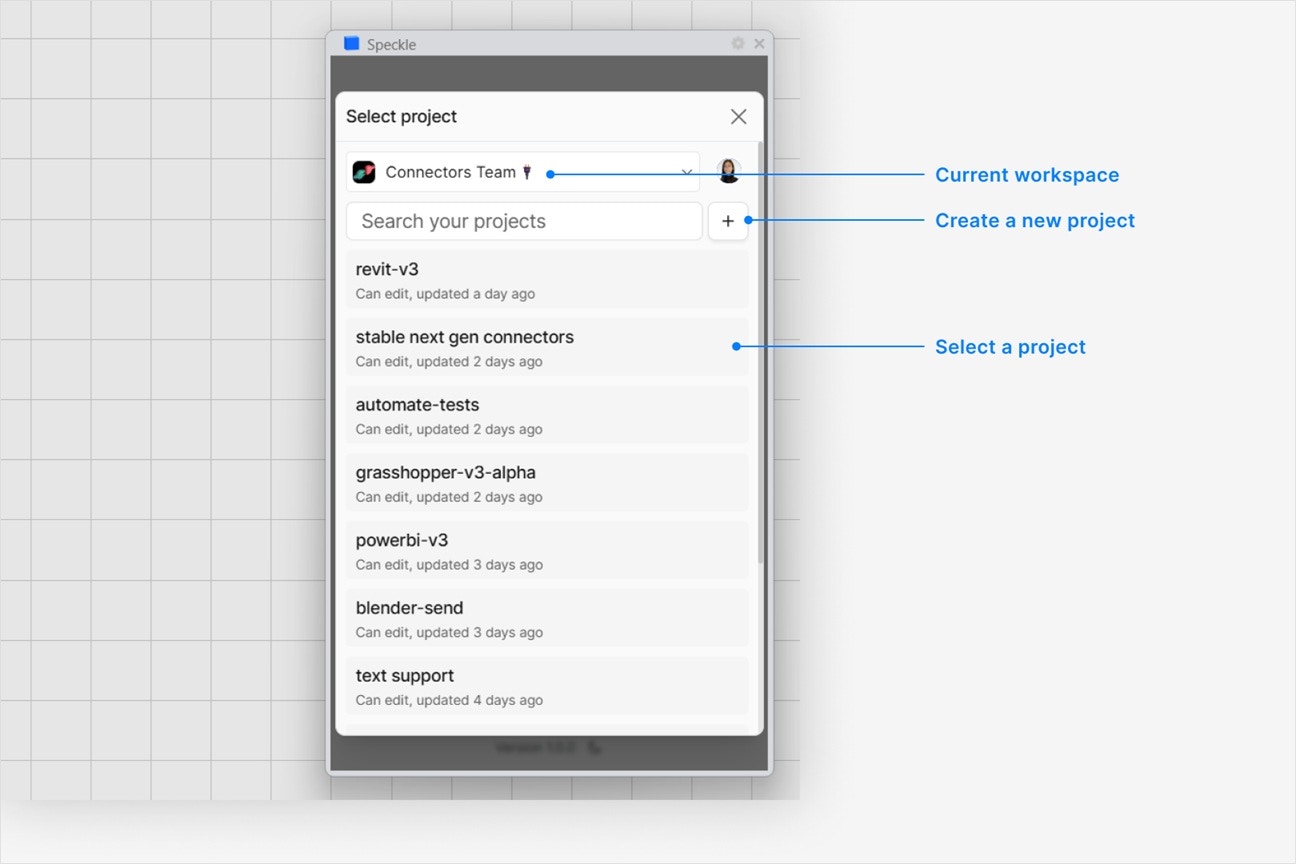
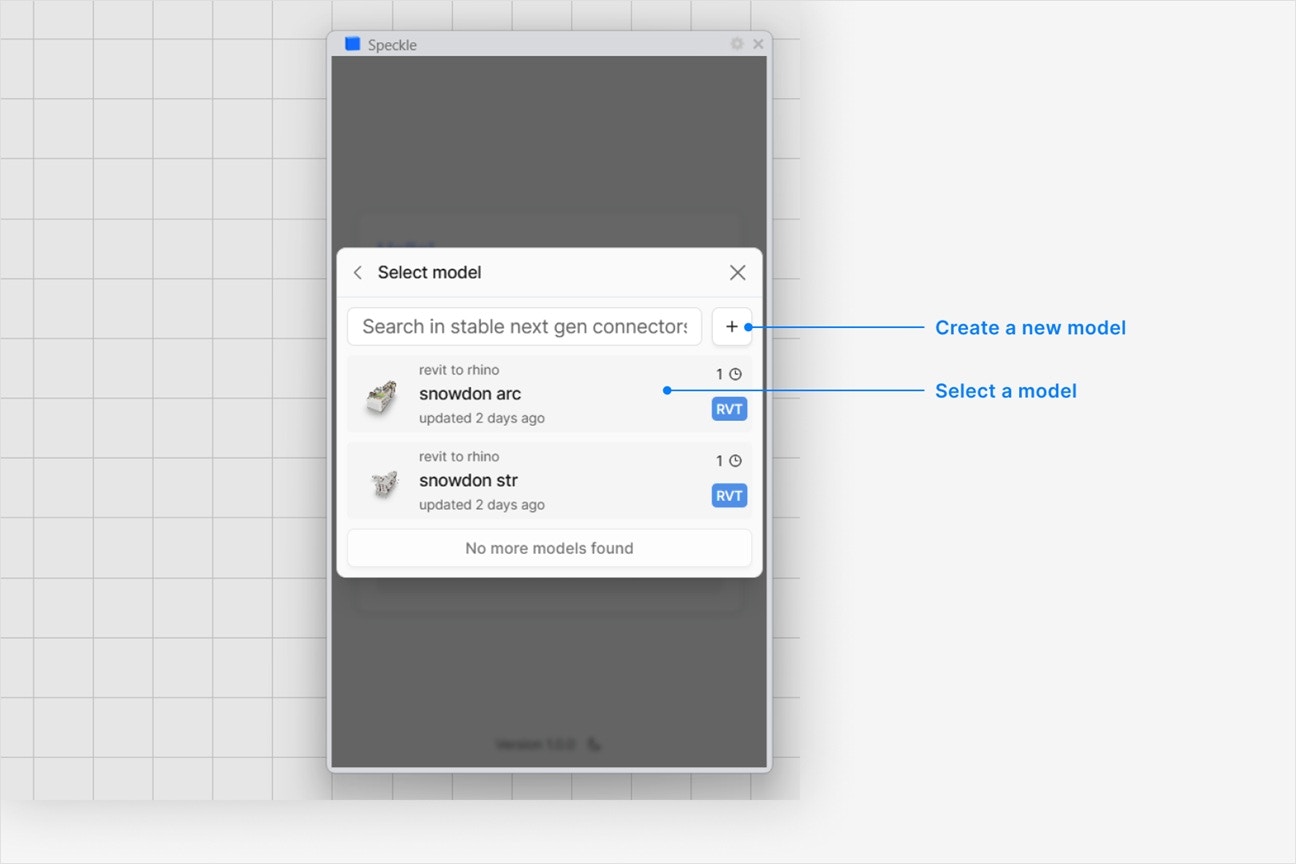
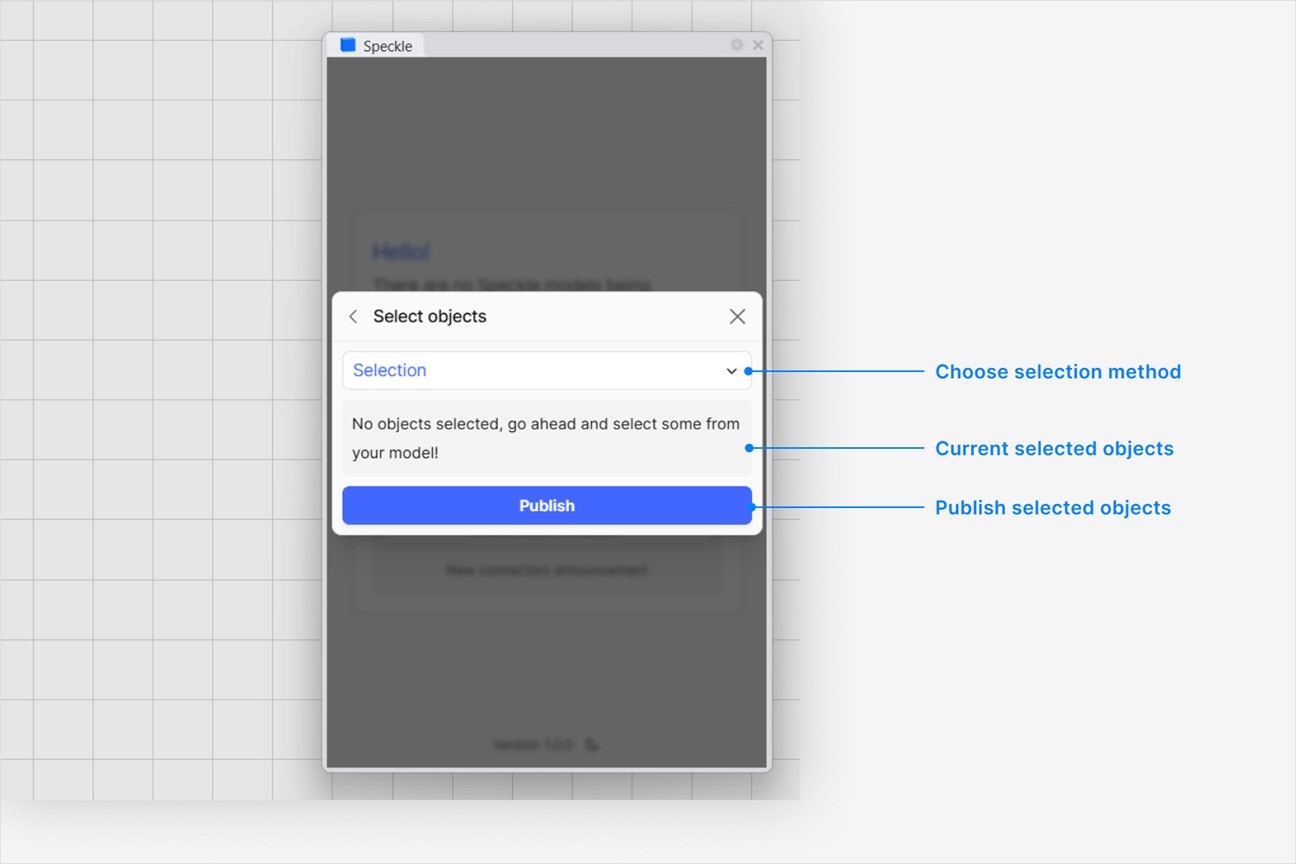
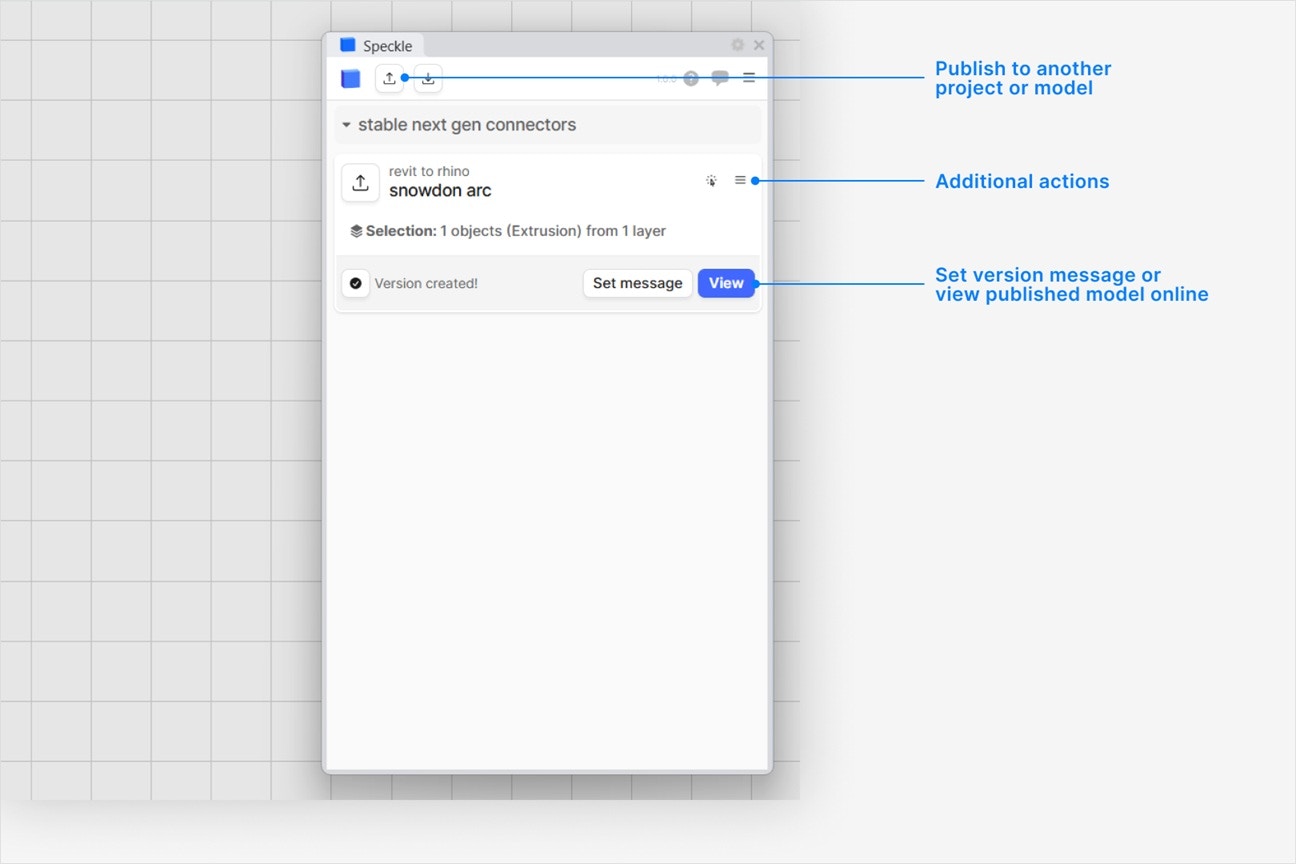
Publishing a Model
What types of Tekla Structures objects can I publish to Speckle?
What types of Tekla Structures objects can I publish to Speckle?
TeklaObject and contains the following information:- Type
- Render Material
- Custom Properties (e.g. Report)
How do I see the custom properties on my published Tekla Structures objects, like reports?
How do I see the custom properties on my published Tekla Structures objects, like reports?
properties field when you select and view a Tekla Structures object in your browser.Custom properties vary depending on the type of object, and can include:- Report (e.g.
Area,Volume, orPhase) - User-Defined Attributes
- Beams:
profileandmaterial
Which object properties do not get published with the Tekla Structures connector?
Which object properties do not get published with the Tekla Structures connector?
- Assemblies
- Drawing layout and title blocks
- Numbering series and sequence settings
Can I publish objects from a drawing view?
Can I publish objects from a drawing view?
Why does my model have the wrong colors in the web browser viewer?
Why does my model have the wrong colors in the web browser viewer?
Are bitmap or image-based material textures supported?
Are bitmap or image-based material textures supported?
Why are some objects that I published missing from my model?
Why are some objects that I published missing from my model?
Loading a Model
- Which application your Speckle model is published from
- Why you want to load your model into
- How frequently you would use this workflow (daily, weekly, monthly, longer).