Setup
Install the connector
Open the Archicad connector
- In Archicad, select Speckle from the menu.
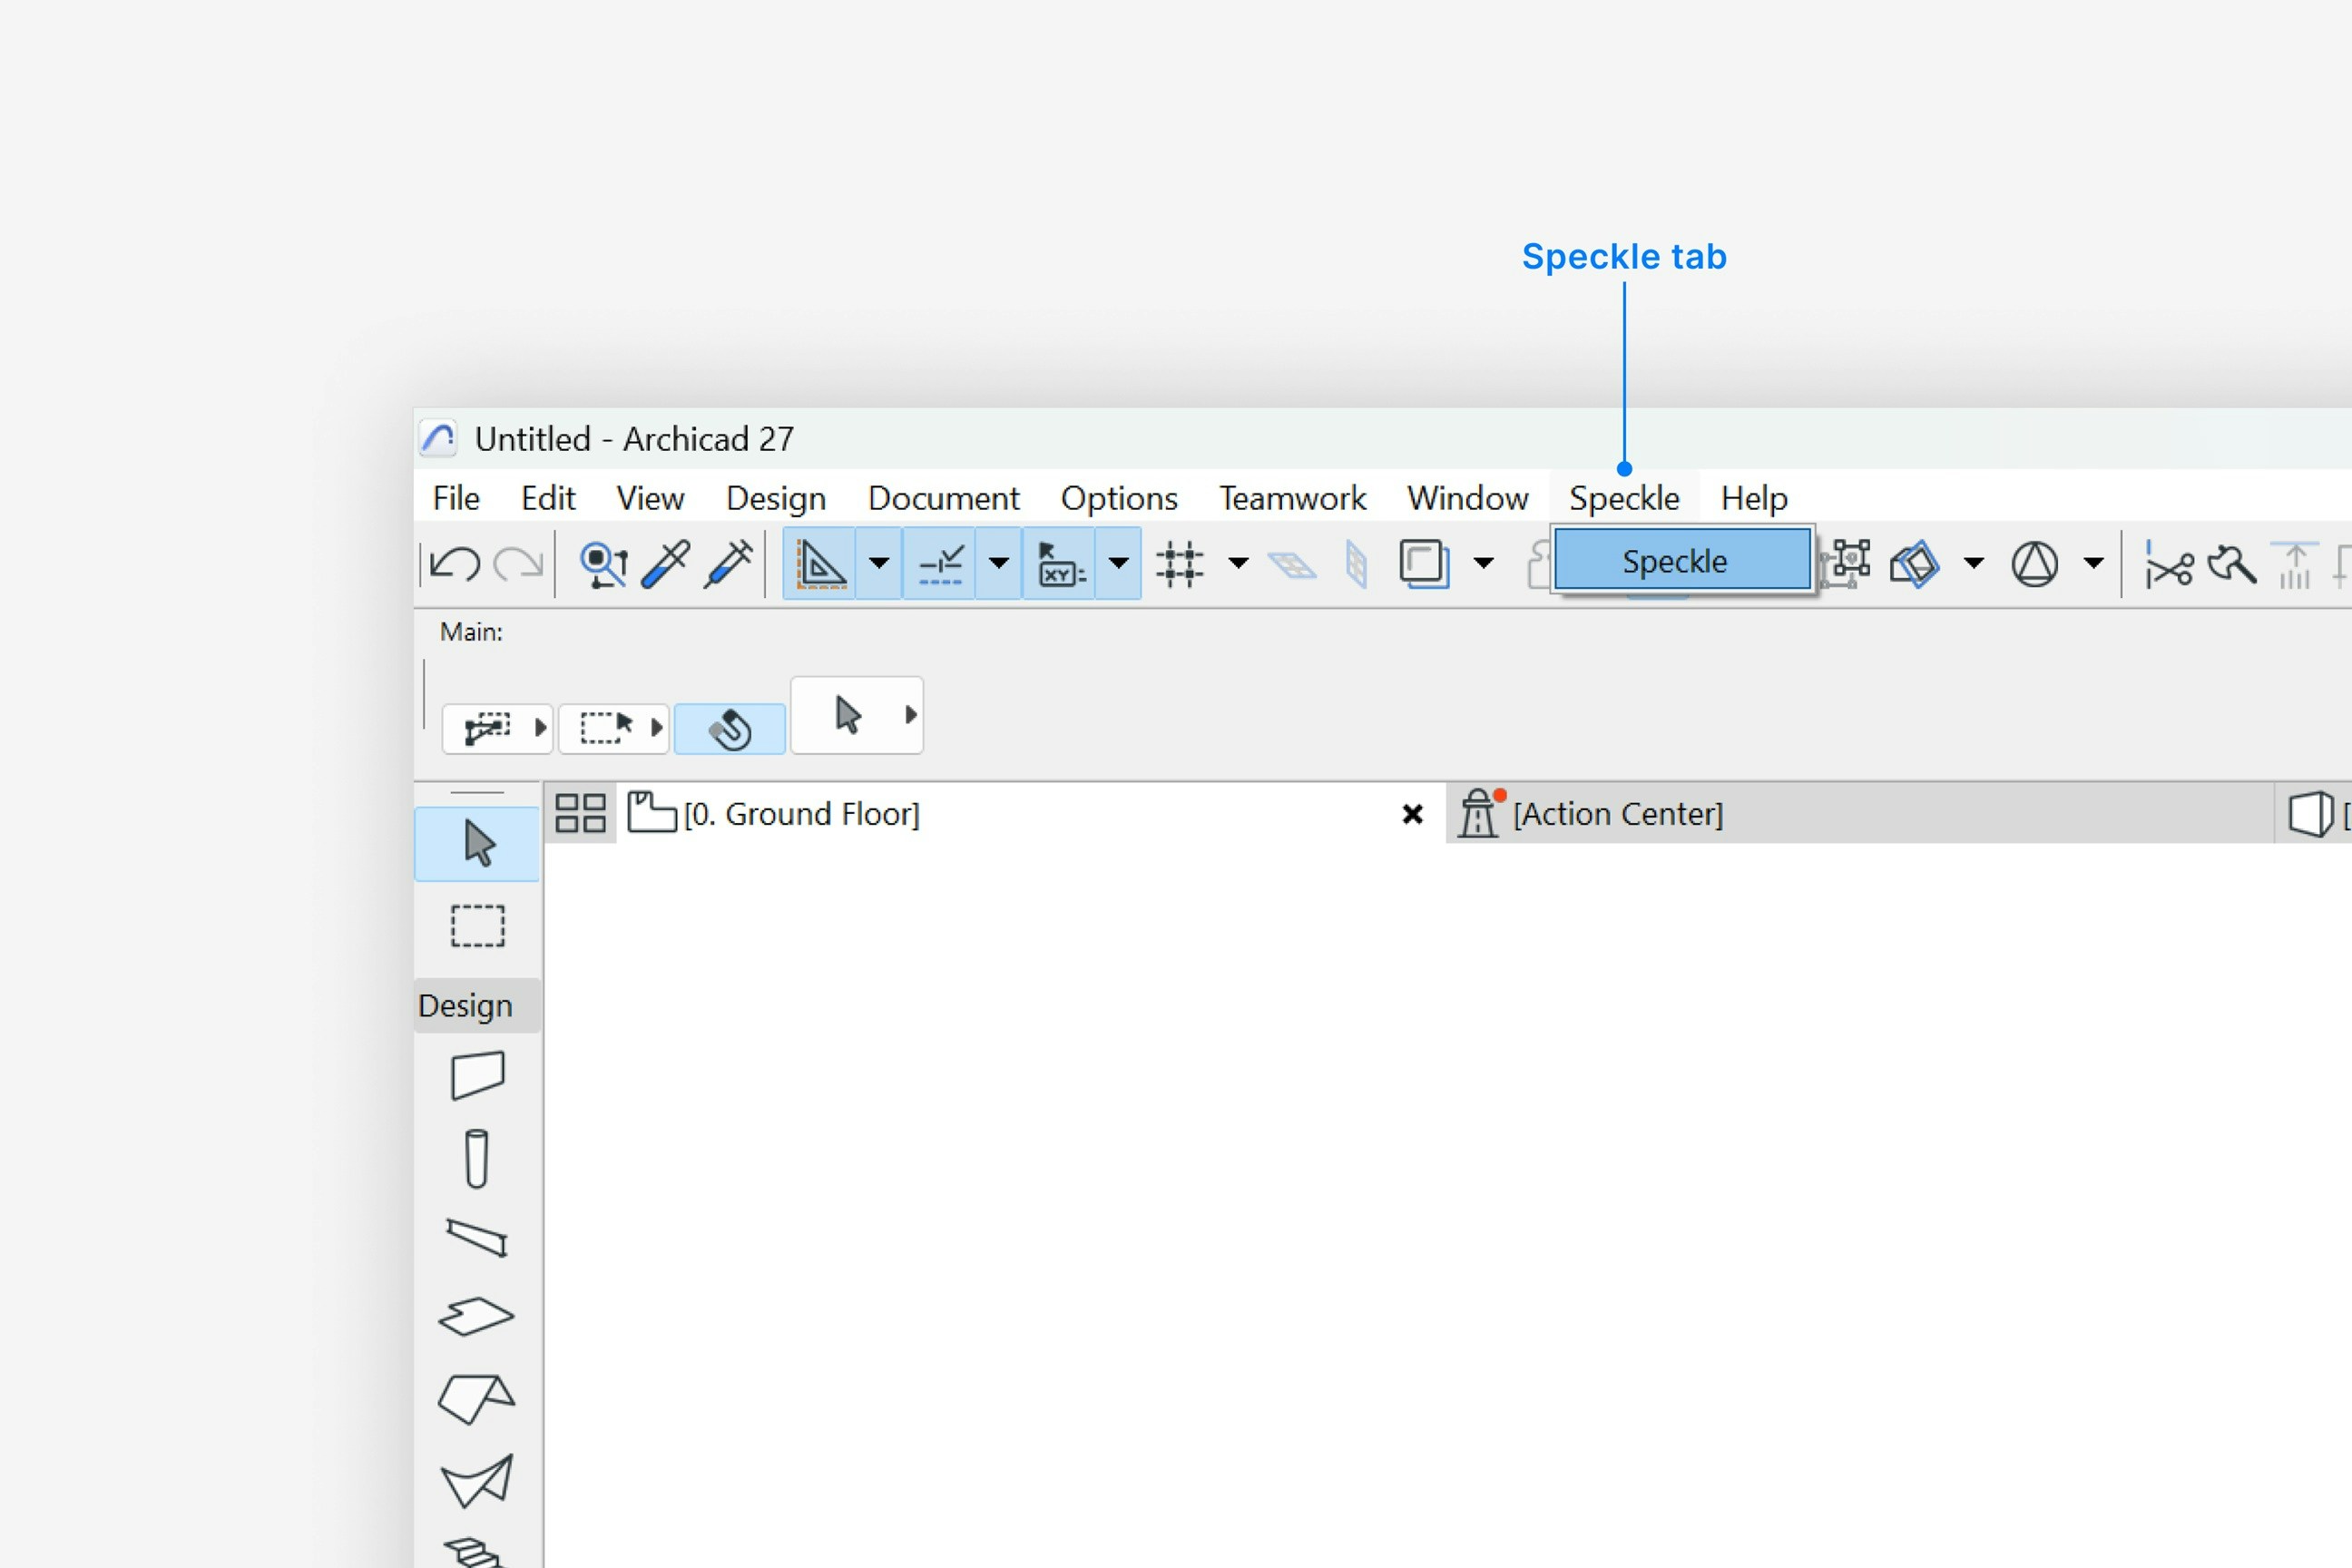
- Select Speckle to open the Archicad connector.
- Select Sign in if you haven’t linked your Speckle account.
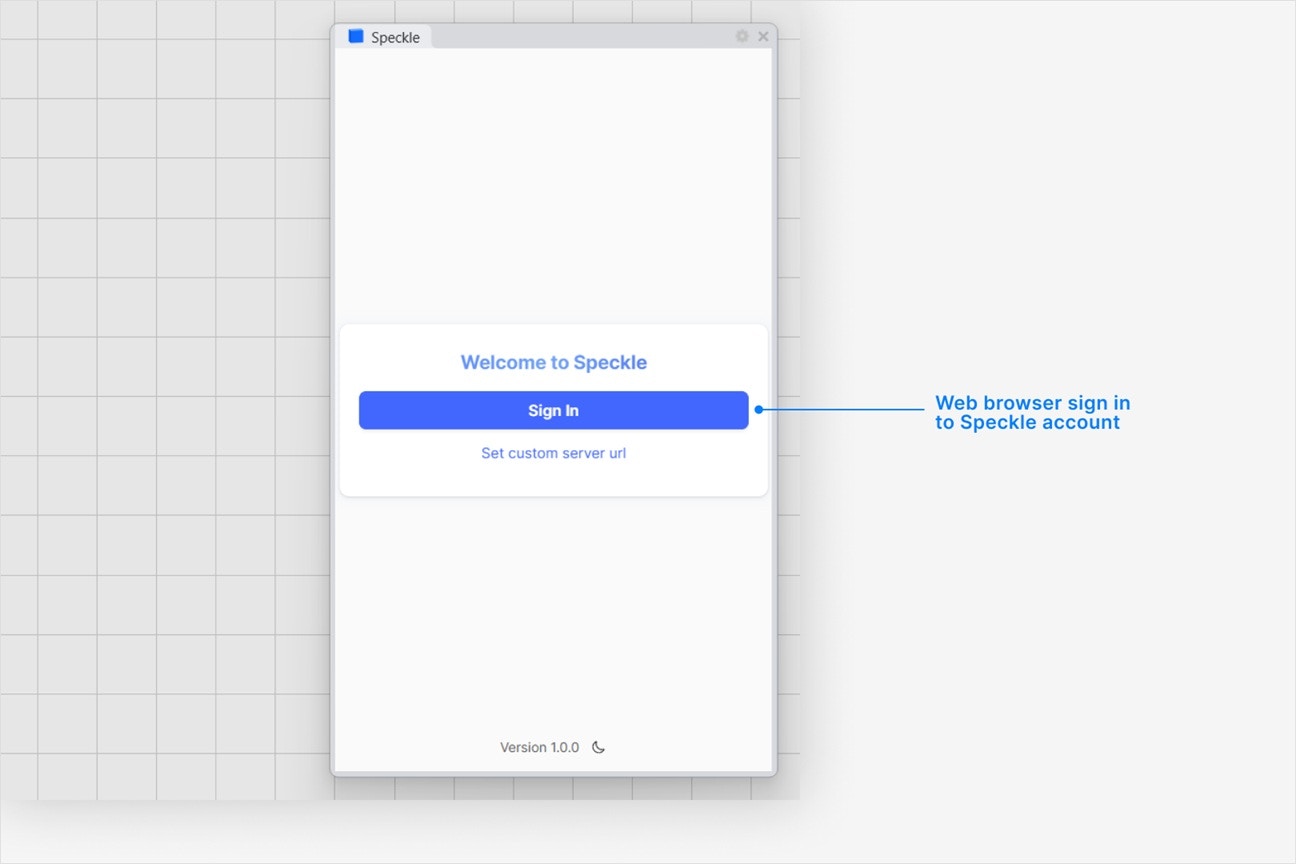
What is addon registration? What can I do if it fails?
What is addon registration? What can I do if it fails?
- Archicad 29:
C:\Users\{username}\AppData\Roaming\Speckle\Archicad\v3\29\Add-Ons\Speckle.apx - Archicad 28:
C:\Users\{username}\AppData\Roaming\Speckle\Archicad\v3\28\Add-Ons\Speckle.apx - Archicad 27:
C:\Users\{username}\AppData\Roaming\Speckle\Archicad\v3\27\Add-Ons\Speckle.apx
Why is the Speckle plugin not showing up after I installed the connector?
Why is the Speckle plugin not showing up after I installed the connector?
- Make sure your version of is one of the supported versions.
- Uninstall and reinstall your connector.
.exe or right-clicking and then selecting Open to run the installer.
Installation issues can also be caused by conflicting plugins.If you’re still experiencing problems, please report it in our Community Forum and include the following information:- Your application version
- Your Speckle connector version
What should I do if the plugin UI is empty or unresponsive, or if my application crashes?
What should I do if the plugin UI is empty or unresponsive, or if my application crashes?
log file in your directory at AppData\Roaming\Speckle\Logs.
Please report your problem in our Community Forum and include the following information:- Your application version
- Your Speckle connector version
- A copy of the log
Why can't I add a new account?
Why can't I add a new account?
How do I uninstall my connector?
How do I uninstall my connector?
Applications. For a full uninstall, you should also remove Speckle Desktop Services as well as your Speckle connector.How do I update my connector to the latest version?
How do I update my connector to the latest version?
Publishing a Model
Select Publish
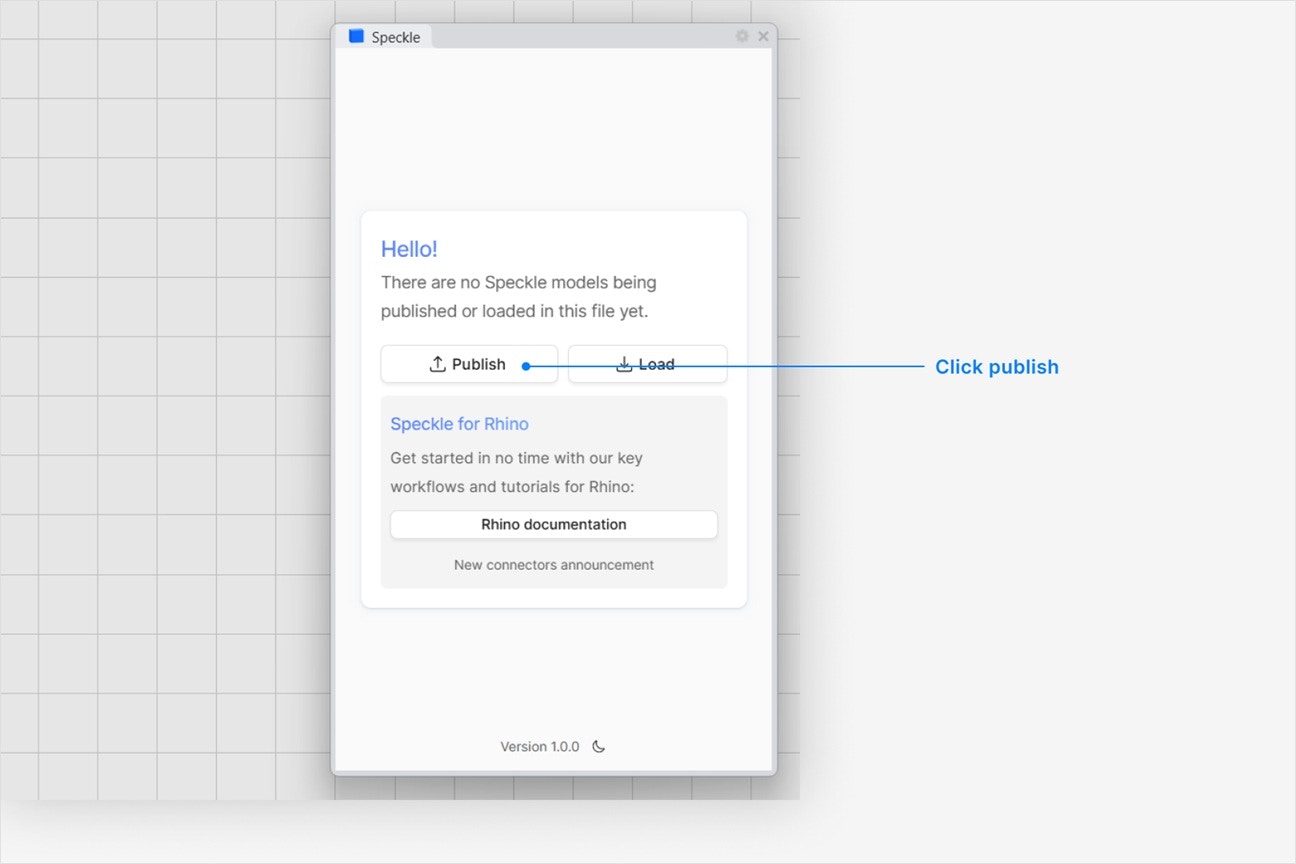
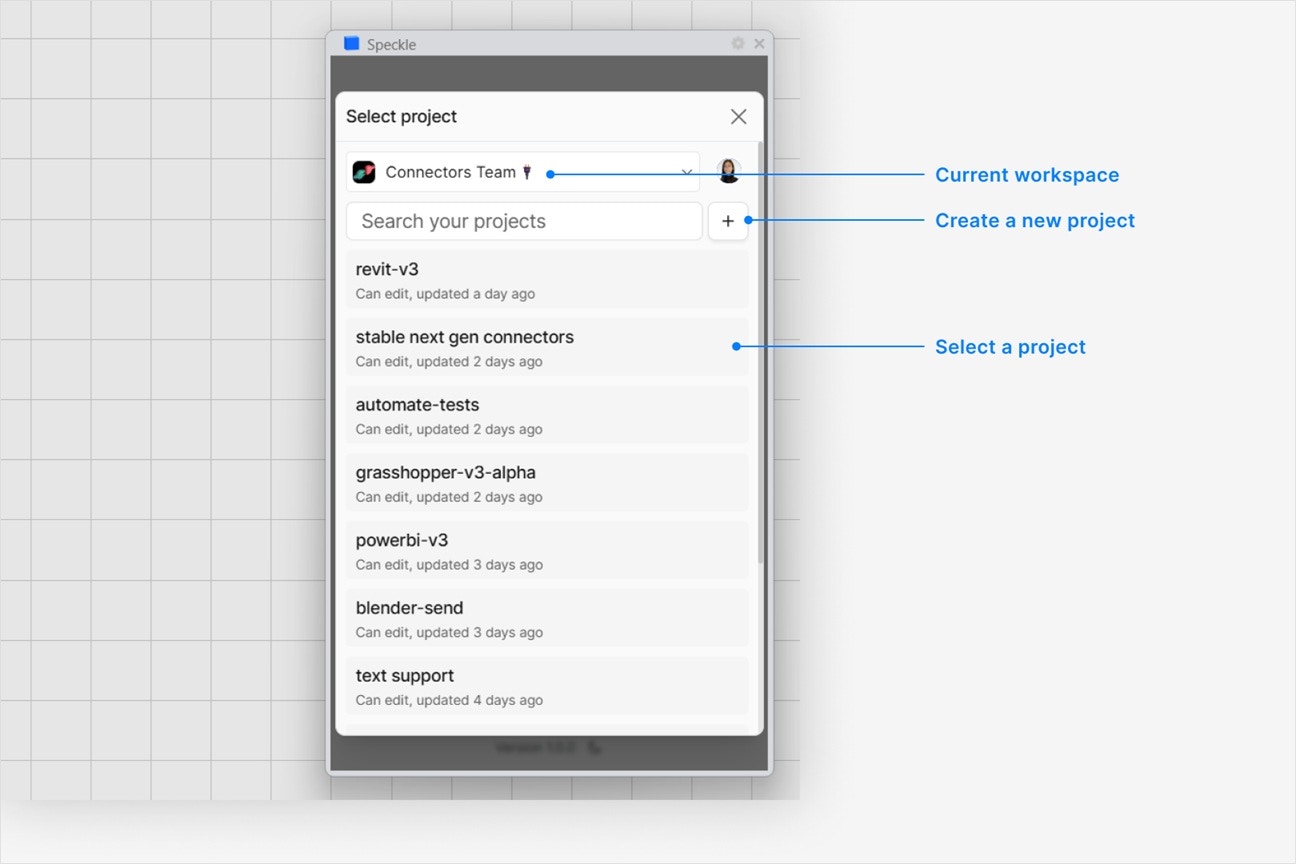
Choose a project
- Select an existing project
- or select New Project to create one
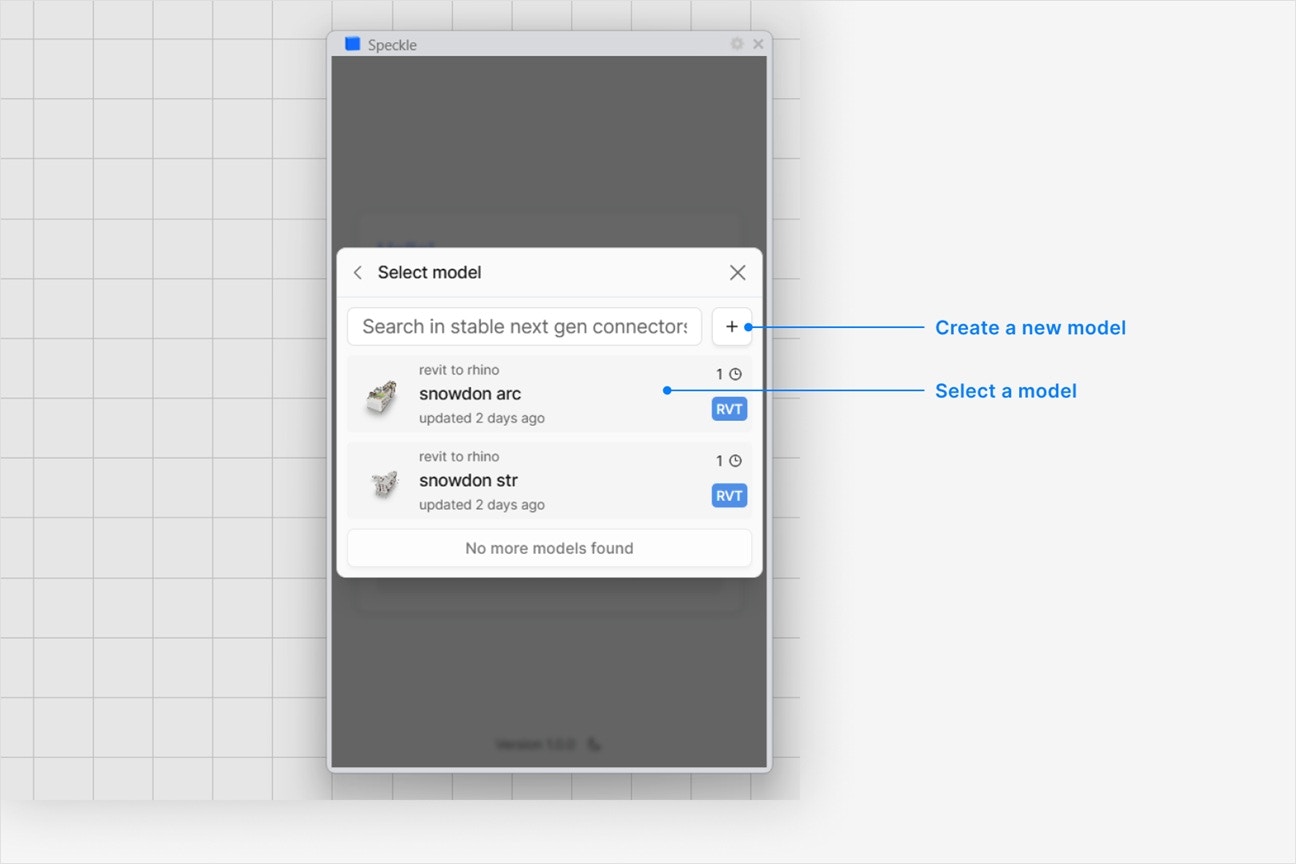
Choose a model
- Select an existing model
- or select New Model to create one
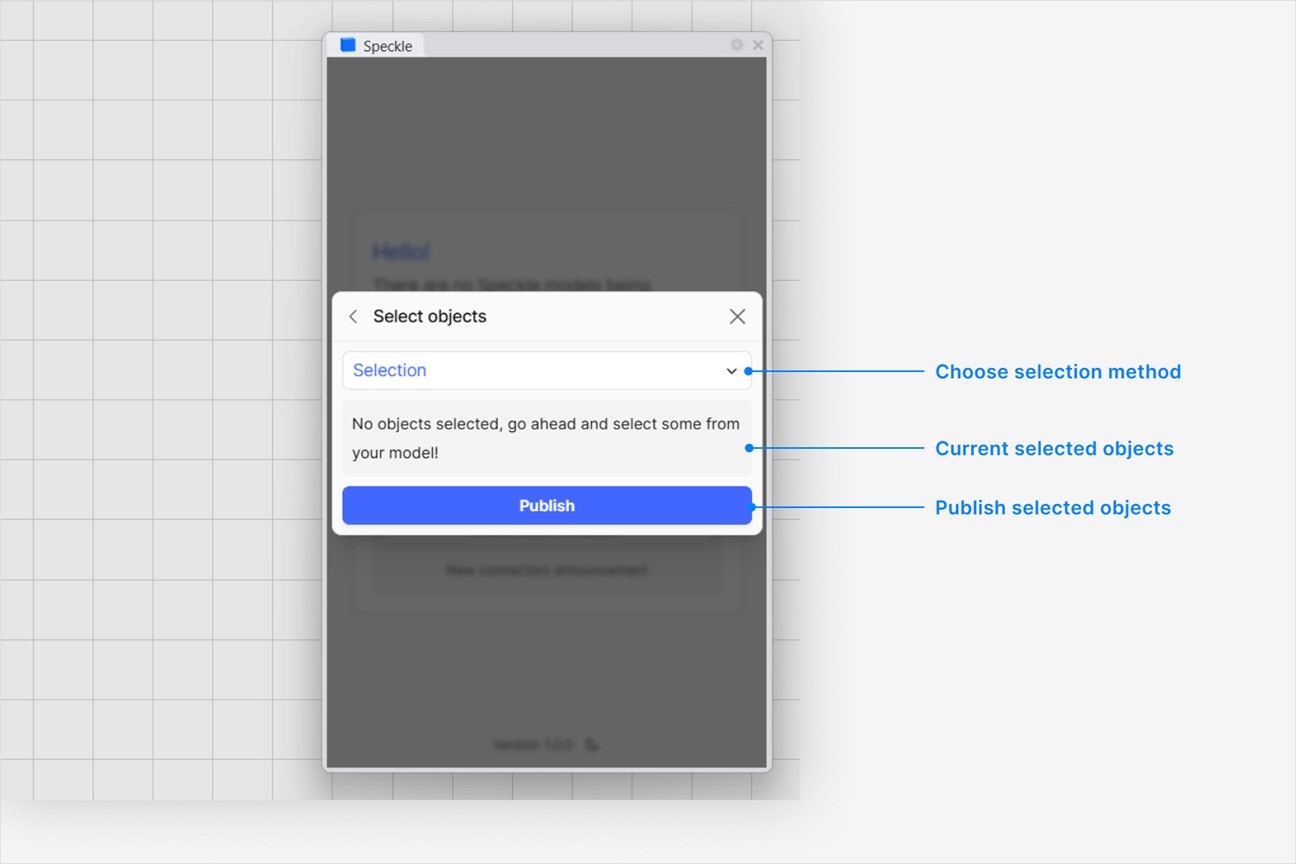
Select objects to publish
- In your application viewport, select the elements you want to publish.
- Select Publish.
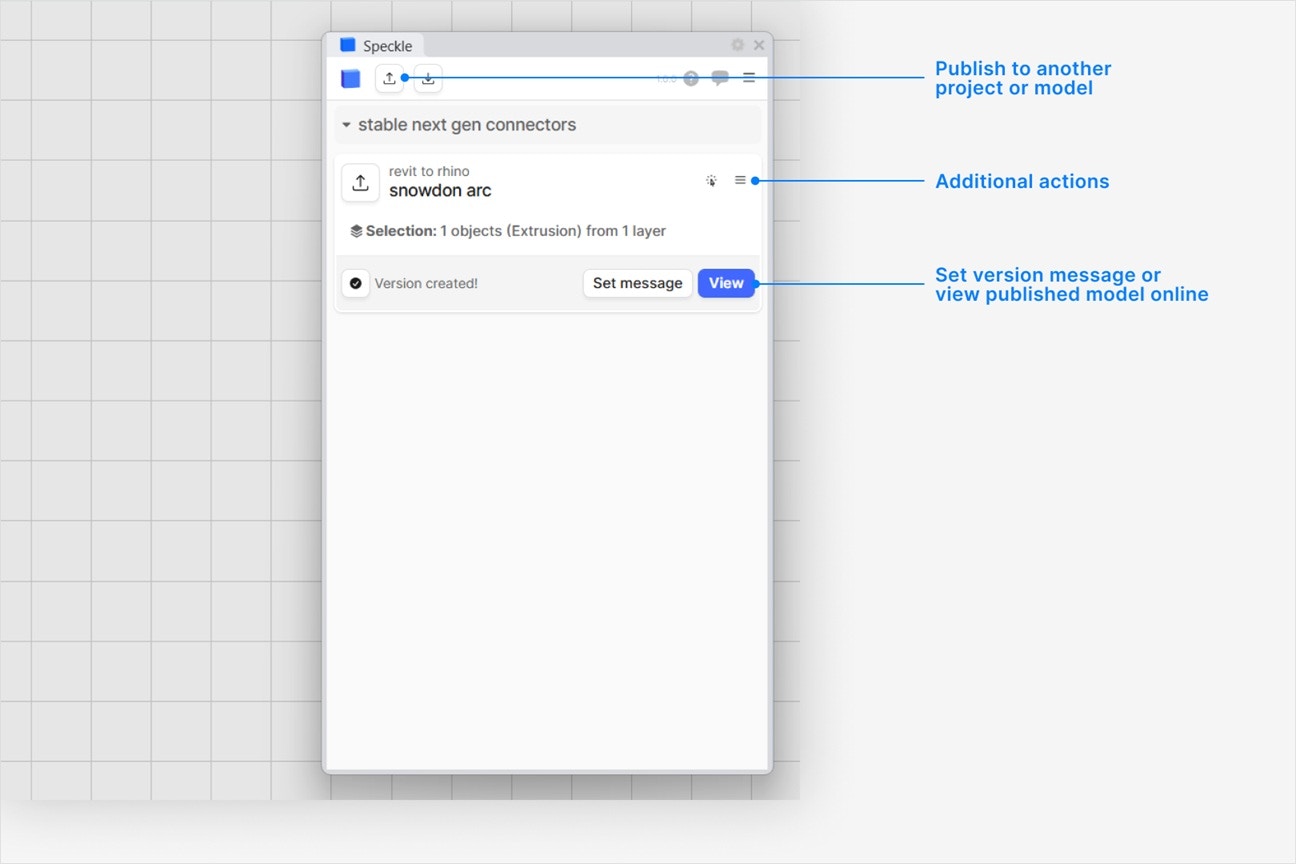
- Your model is now published to Speckle and is available to the rest of your team.
What types of Archicad elements can I publish to Speckle?
What types of Archicad elements can I publish to Speckle?
Wall,slab,beam,columnDoor,window,curtain wall,skylight,objectRoof,shell,morph,meshStair,railing
How do I publish models from Archicad views?
How do I publish models from Archicad views?
- Set the Filter setting to Views while publishing a new version to your Speckle model.
- Select the view you want to publish from.
How do I publish models by Archicad element type?
How do I publish models by Archicad element type?
- Set the Filter setting to Element Types while publishing a new version to your Speckle model.
- Select the element types you want to publish.
How do I see custom properties on my published Archicad elements?
How do I see custom properties on my published Archicad elements?
- Element ID, element type, element name, level
- Classifications
- Dimensional properties
- Material quantities
- User-defined properties
- IFC properties
Publishing my model takes a long time. Can I speed it up?
Publishing my model takes a long time. Can I speed it up?
- Open the Send Settings.
- Turn off the Include Object Properties option.
Disabling property extraction can significantly reduce publish time.
What doesn't get published with the Archicad connector?
What doesn't get published with the Archicad connector?
- 2D documentation: floor plans, sections, elevations
- 2D elements: lines, hatches, dimensions
- Surface textures
Which element properties aren't published with the Archicad connector?
Which element properties aren't published with the Archicad connector?
Why does my model have the wrong colors in the web browser viewer?
Why does my model have the wrong colors in the web browser viewer?
Why are some objects that I published missing from my model?
Why are some objects that I published missing from my model?
Loading a Model
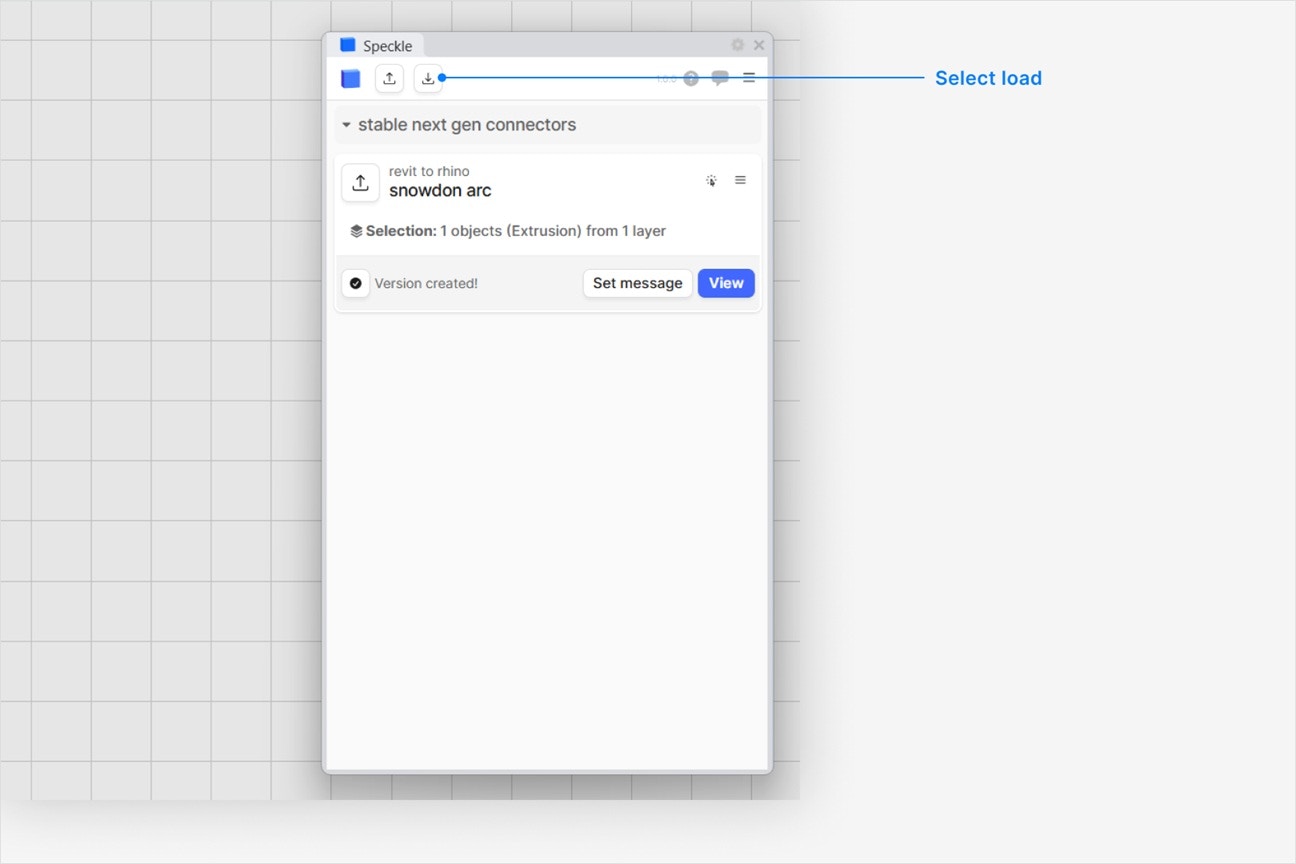
Select Load
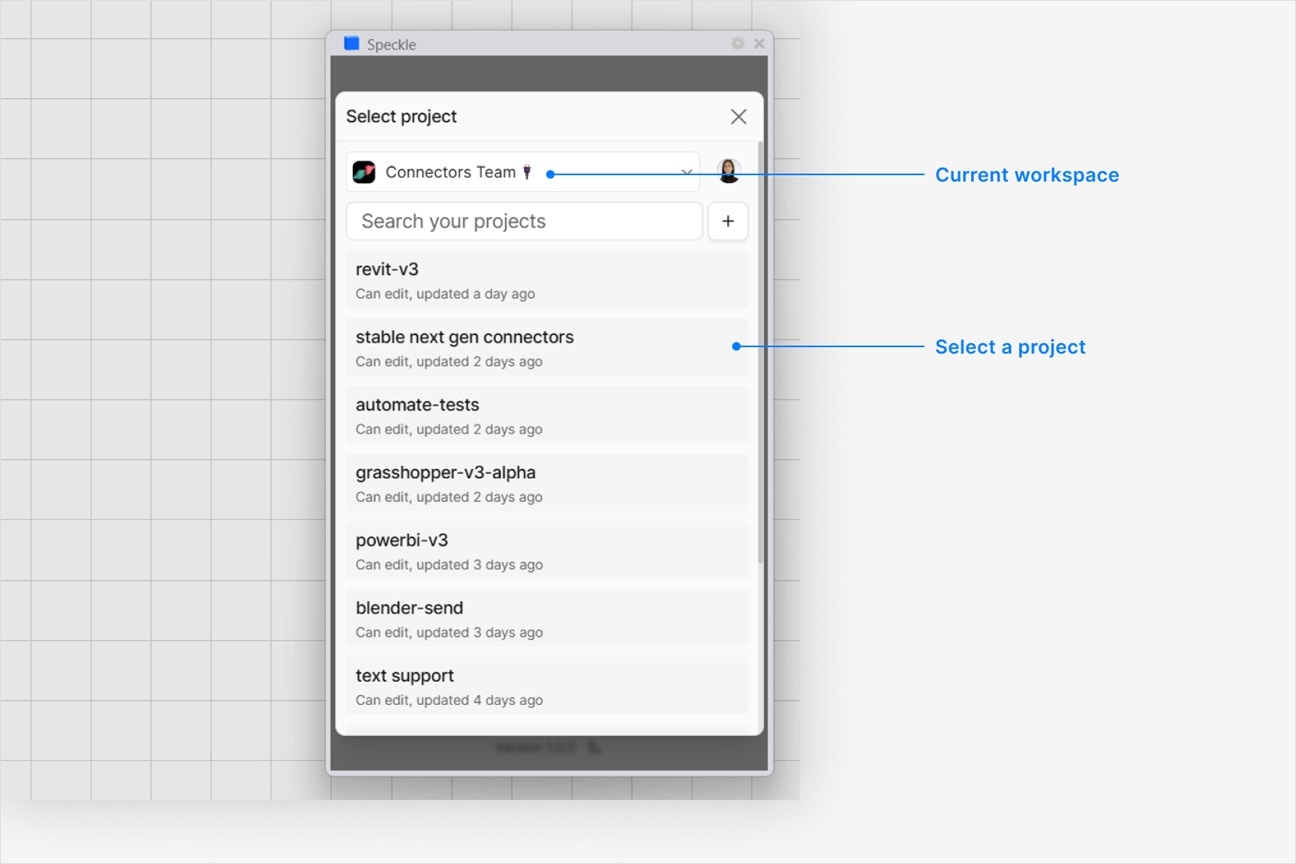
Choose a project
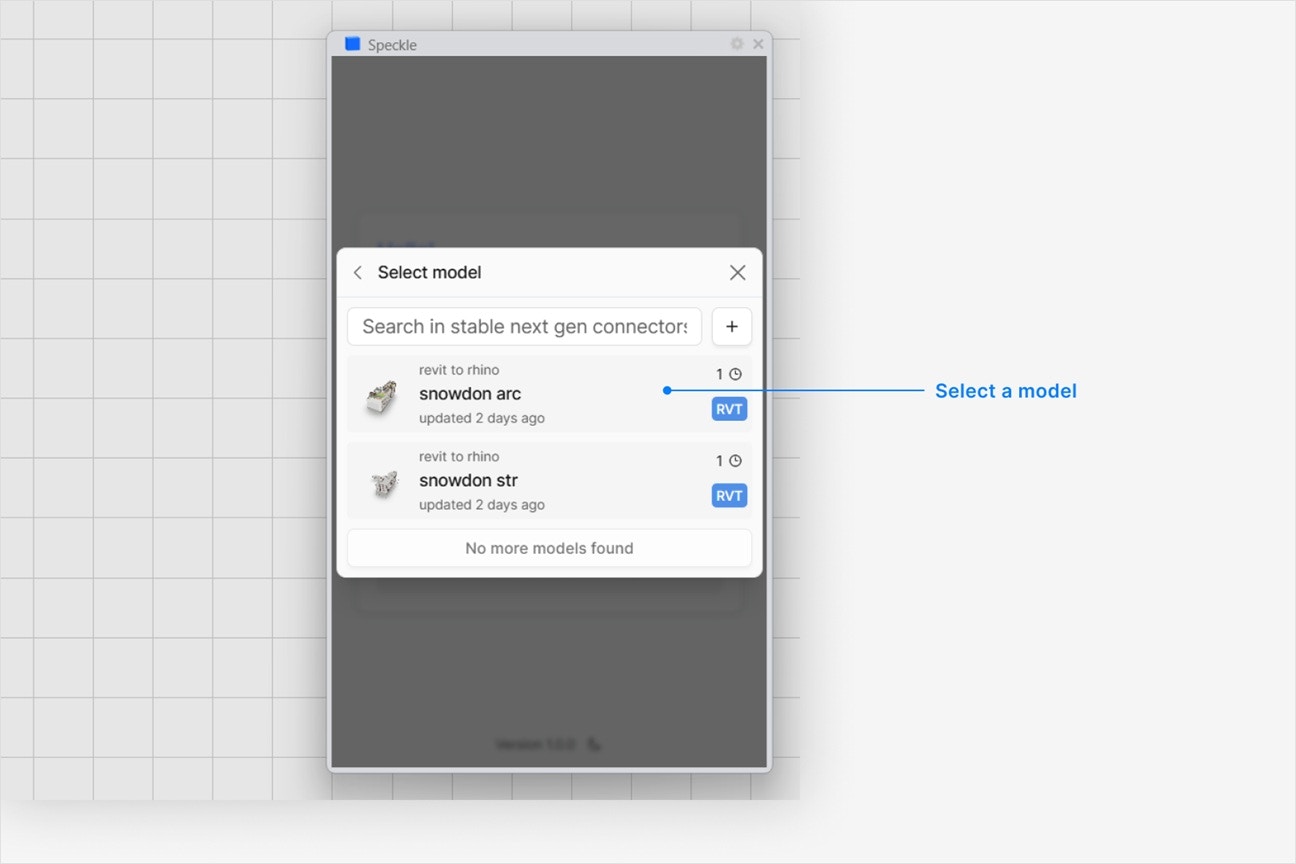
Choose a model
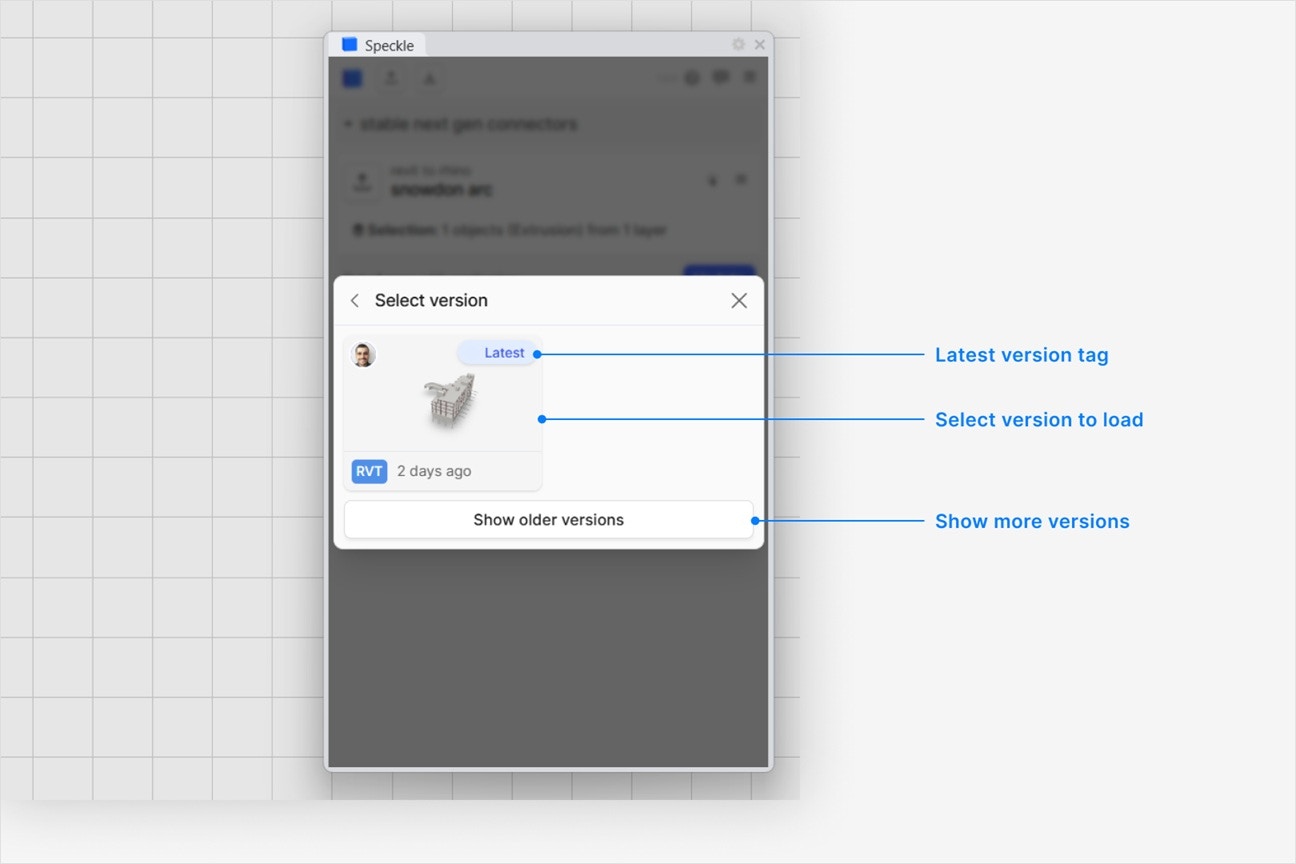
Choose a version to load
- Latest version is always first.
- To load a specific version, select it from the UI.
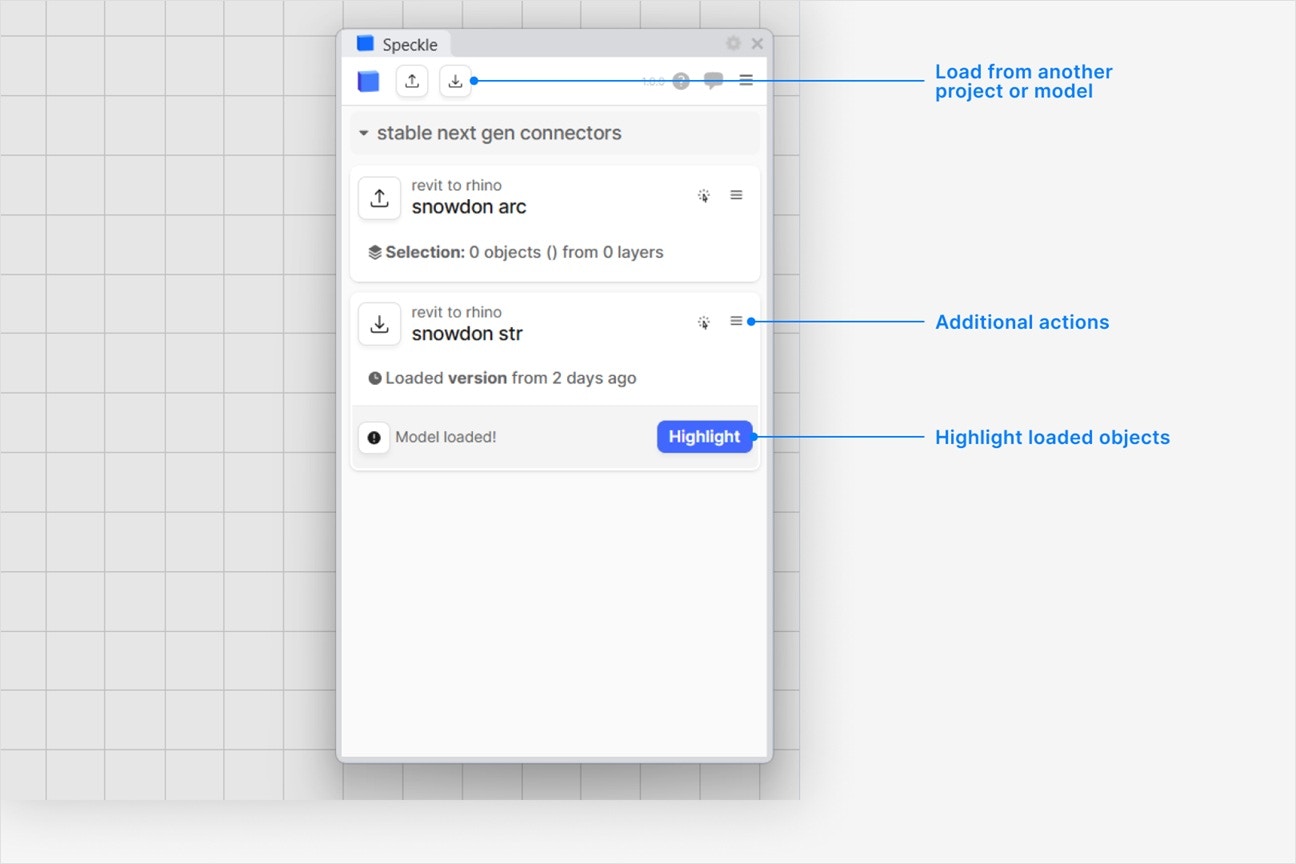
How are Speckle models loaded in Archicad?
How are Speckle models loaded in Archicad?
- Render material (if any)
- Mesh geometry
How are the loaded GDL objects displayed on floor plan views in Archicad?
How are the loaded GDL objects displayed on floor plan views in Archicad?
Can I load custom properties in Archicad?
Can I load custom properties in Archicad?
Why was my Speckle model was loaded in an incorrect position?
Why was my Speckle model was loaded in an incorrect position?
Why are some objects that I loaded missing from my model?
Why are some objects that I loaded missing from my model?
Why can't I select a project in the UI—it's disabled?
Why can't I select a project in the UI—it's disabled?
Can I load a model via URL?
Can I load a model via URL?