Setup
Install the connector
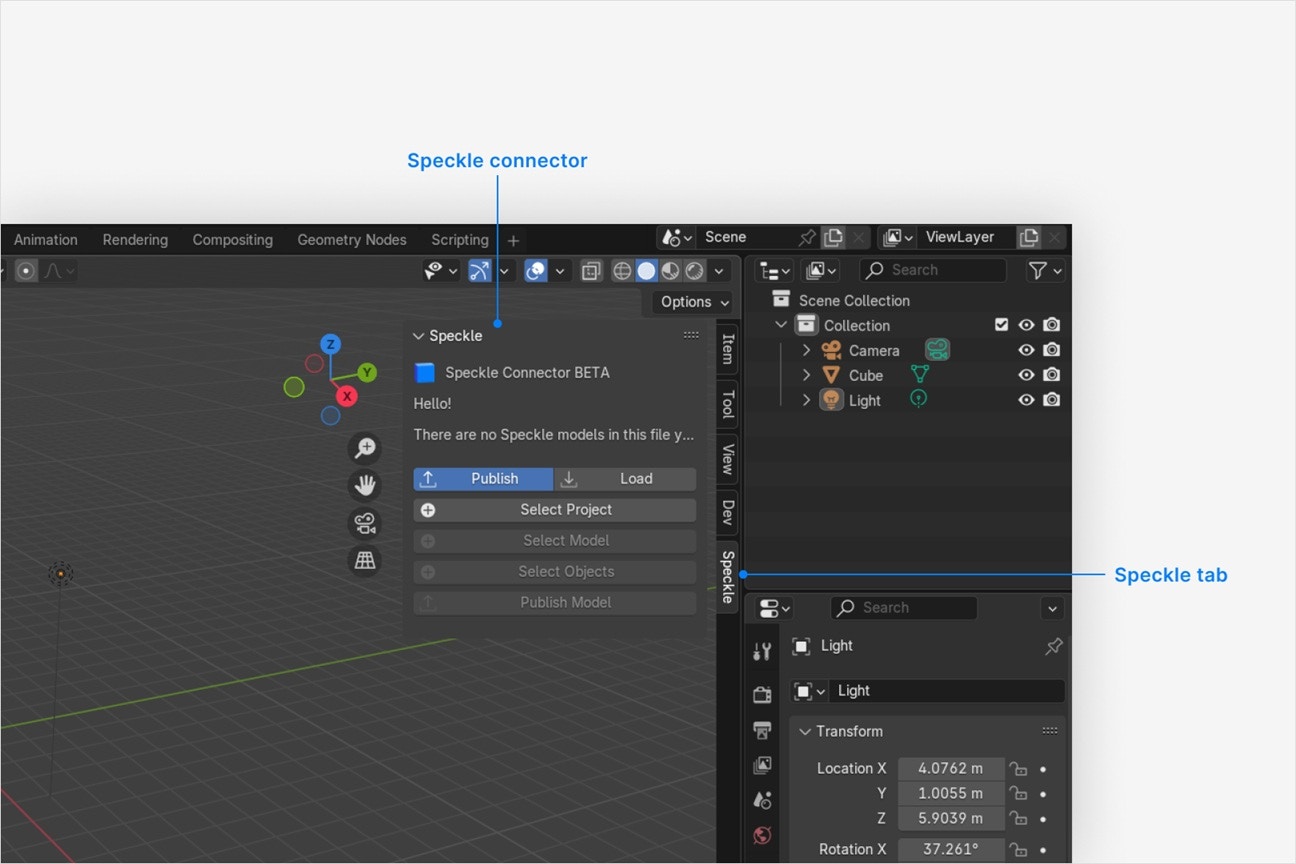
Open the Blender connector
- Press N from your keyboard to open the side toolbar.

- Select Speckle to open the Blender connector.
Why don't I see Speckle in the side toolbar?
Why don't I see Speckle in the side toolbar?
- Go to Edit > Preferences > Add-ons
- Search for Speckle
- Select Install
Why is the Speckle plugin not showing up after I installed the connector?
Why is the Speckle plugin not showing up after I installed the connector?
- Make sure your version of is one of the supported versions.
- Uninstall and reinstall your connector.
.exe or right-clicking and then selecting Open to run the installer.
Installation issues can also be caused by conflicting plugins.If you’re still experiencing problems, please report it in our Community Forum and include the following information:- Your application version
- Your Speckle connector version
What should I do if the plugin UI is empty or unresponsive, or if my application crashes?
What should I do if the plugin UI is empty or unresponsive, or if my application crashes?
log file in your directory at AppData\Roaming\Speckle\Logs.
Please report your problem in our Community Forum and include the following information:- Your application version
- Your Speckle connector version
- A copy of the log
Why can't I add a new account?
Why can't I add a new account?
How do I uninstall my connector?
How do I uninstall my connector?
Applications. For a full uninstall, you should also remove Speckle Desktop Services as well as your Speckle connector.How do I update my connector to the latest version?
How do I update my connector to the latest version?
Publishing a Model
Select Publish
Choose a project
- Select an existing project
- or click the
+button and select Create Project to create a new project
Choose a model
- Select an existing model
- or click the
+button and select Create Model to create a new model
Select objects to publish
- In your application viewport, select the elements you want to publish.
- Select Publish.
- Your model is now published to Speckle and is available to the rest of your team.
What types of objects are published?
What types of objects are published?
Mesh, Bezier, Circle, NURBS Curve and NURBS Circle are supported.How do I publish my objects with modifiers?
How do I publish my objects with modifiers?
- Open the Publish to Speckle window
- Make sure that Apply Modifiers is checked
- Click OK to publish with all object modifiers.
Why don't materials look correct in the viewer?
Why don't materials look correct in the viewer?
- Principled
- Diffuse
- Emission
- Glass
Where are object textures?
Where are object textures?
Loading a Model
Select Load
Choose a project
Choose a model
Choose a version to load
- Latest version is loaded by default.
- To load a specific version, select it from the UI. Your selected model is now loaded in Blender.
After I load a model, can I make changes to loaded elements and will they be preserved when I load a new version?
After I load a model, can I make changes to loaded elements and will they be preserved when I load a new version?
Where are my properties?
Where are my properties?
How do I load blocks as linked duplicates?
How do I load blocks as linked duplicates?
- Open the Load model window
- Set the Instance Loading option to Linked Duplicates
- Click OK to load models with blocks as linked dupicates Loading blocks as linked duplicates is more efficient for blocks with many instances.
Why are some objects that I loaded missing from my model?
Why are some objects that I loaded missing from my model?
Why can't I select a project in the UI—it's disabled?
Why can't I select a project in the UI—it's disabled?
Can I load a model via URL?
Can I load a model via URL?