- An authenticated Speckle account.
- A link to the specific Speckle model.
Signing in to your Speckle account
If you don’t already have an authenticated Speckle account on your computer, use the Sign-In node and follow the steps in your browser to add your Speckle account.
- By default, this node will sign in to
app.speckle.systems. Add a Server URL input only if you want to sign in to a custom server. - Click the Sign In button to start the sign in process in your web browser. Follow the prompts in your web browser to complete sign in.
- The Accounts output contains a list of all accounts you are signed into on your local computer.
If I am signed in to other Speckle connectors, do I need to sign in again?
If I am signed in to other Speckle connectors, do I need to sign in again?
You only need to sign in to your account once to use the Grasshopper connector. This authentication will also work with other Speckle connectors on your computer.
How does Speckle account management work?
How does Speckle account management work?
All Speckle account management is handled by our
DesktopServices.exe program, which is installed automatically with every connector.If you uninstall and re-install DesktopServices, you will need to sign in to your Speckle account again.Linking to a Speckle model
All Speckle model management, including creating or deleting workspaces, projects, and models, should be done in your web browser when using the Speckle Grasshopper connector.
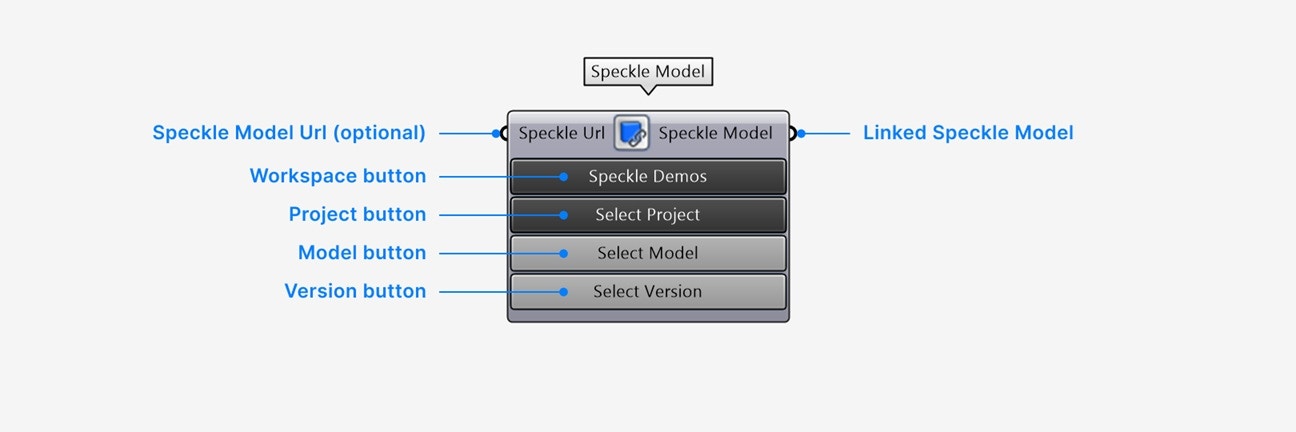
If you are getting errors retrieving your model, make sure you have the correct Speckle account selected in your Speckle Model node.
To check or change your account,
right-click > select Account on the node.- By default, the first button will display your first available Workspace. To change your Workspace, left-click the first button and select the correct one.
- Left-click the second button to select your Speckle Project in the Workspace.
- Left-click the third button to select your Speckle Model in the Project.
- By default, the last button will display the latest version of your selected Model. There is no need to change this, unless you would like to load a specific earlier version of your Model.
- Navigate to your Speckle Model in your web browser.
- Copy the URL of your model. The URL should have the following format: https://app.speckle.systems/projects/[project id]/models/[model id].
- Paste your URL to a Panel in your Grasshopper document and add it to the URL input of the Model Link node. You should now see all node buttons correctly set.
Loading Models
Use the Load node to load a Speckle Model into your Grasshopper document.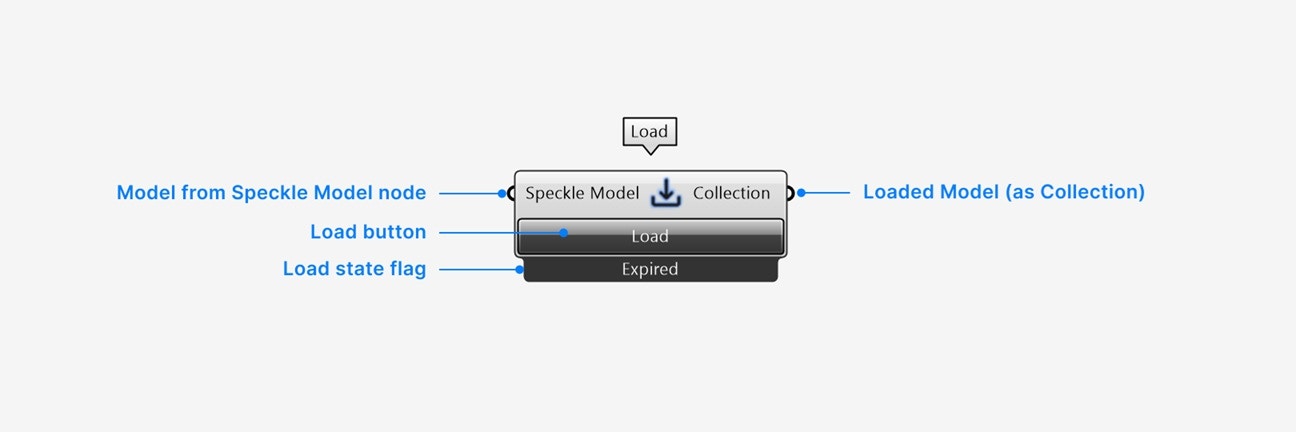
- Add a Speckle Model input of the Speckle Model you want to load.
- Click the Load button to load your model.
- The Collection output contains your loaded model.
Right-click the node for additional settings:
- Set your node to load automatically whenever there is a new version of your Speckle model. Make sure your input Speckle Model node does not have a specific version set in order to activate this setting.
- View your model online in your web browser.
Publishing Models
Use the Publish node to publish your Grasshopper model to Speckle.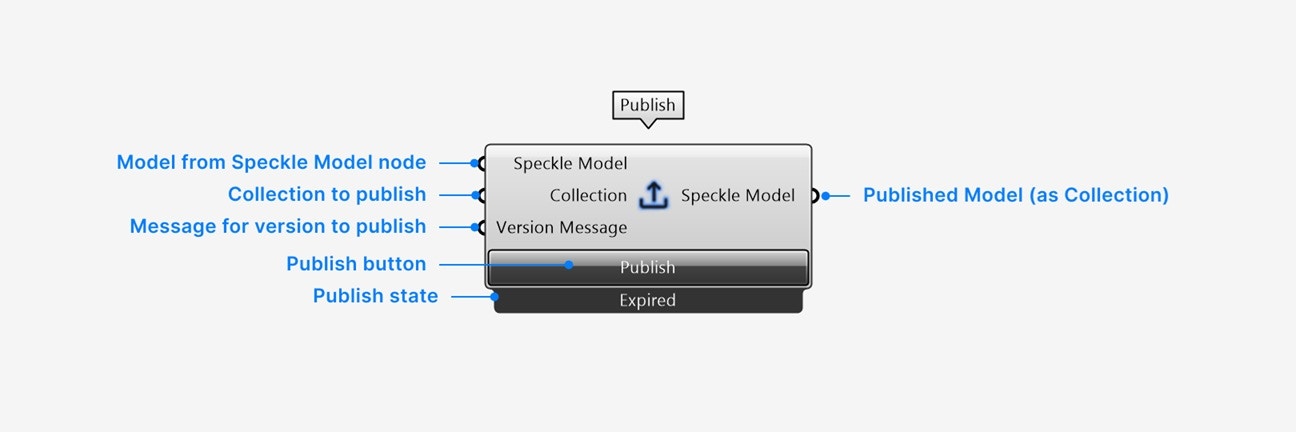
- Add a Speckle Model input of the Speckle Model you want to publish a new version to.
- Add a Collection input containing the Collection of objects you want to publish.
- Add an optional Version Message input to describe the version of the model you are about to publish.
- Click the Publish button to publish your model.
- The Speckle Model output contains the Model you just published.
Right-click the node for additional settings:
- Set your node to publish automatically whenever there is a new solve of the Collection you are publishing.
- View your model online in your web browser.